Go Back   EcoModder Forum > EcoModding > Aerodynamics
Register Now
 Register Now
 

Reply  Post New Thread
 
Submit Tools LinkBack Thread Tools
Old 03-24-2013, 08:06 AM   #221 (permalink)
EcoModding Apprentice
 
turbothrush's Avatar
 
Join Date: Nov 2008
Location: Canada
Posts: 133

2 x wrecked vx - '92 Honda Civic Vx
Team Honda
90 day: 62 mpg (US)
Thanks: 119
Thanked 54 Times in 30 Posts
That's great !

  Reply With Quote
Alt Today
Popular topics

Other popular topics in this forum...

   
Old 03-28-2013, 01:38 AM   #222 (permalink)
B.O. Zen
 
Join Date: Feb 2009
Location: Folsom, CA
Posts: 208

Pickup - '99 Toyota Tacoma 2wd, Regular Cab, Short Bed
90 day: 34.62 mpg (US)
Thanks: 130
Thanked 140 Times in 59 Posts
Alright, new progress again, finally!

I went in a couple days ago and figured out how big I was going to make the comparment for the pop-out awning. See divider here:


I had to abduct some of my supporting structure to put the divider in there, which showed me some about the shape the shell is going to take when I remove all of the support in the middle. The top goes from a nice spherical shape to a cylindrical shape. I'm going to make a couple of shallow cross-supports to go from side to side and set the width of the top of the shell to help it keep it's shape as and after I glass everything up.

Here are roughed out the corners up by the cab:


And finally started laying some fiberglass. I started with both ends of the shell. I followed someone's advice on here and, after sanding the foam surface, scored it to give some ridges for the epoxy to flow into. Then painted on resin, laid the glass over, and wet it out with the paint brush:


I've been really nervous about actually starting the fiberglass, so I'm sort of building confidence at this point. It's going easy enough that I'm going to go ahead and start the exterior surface in the next couple of days... or maybe next week... I'm abandoning my weeknight routines to start making headway again, since I don't expect to have a weekend home any time soon.

I want to be able to do the whole shell without using much body filler. I picked up a small container of microspheres today to blend with resin to make fairing compound to use in place of filler for smoothing out any rough stuff after I lay all the glass. I figure I'll do that and then do a thin layer of polyester glazing putty before I primer and paint. I don't want to do loads of body filler, like I did with the bed extension, though.

Now that I think about it, what I might do is glass up the shell, do all the internals, like the lift hardware and all mounting points, first and let the overall shell and fiberglass settle a bit before I employ the fairing compound and whatnot to finish it. When I did the bed extensions, they started out mirror smooth, and then settled into a lumpy rippled surface (great 6-footer pieces), that I'd like to avoid w/ the shell... hmm...

Oh, also got my lexan all cut up nice for the front window on the shell. Pictures of that when it's time. :P
__________________
  Reply With Quote
The Following 5 Users Say Thank You to a8ksh4 For This Useful Post:
aerohead (03-30-2013), KamperBob (04-02-2013), NeilBlanchard (03-29-2013), slowmover (03-28-2013), turbothrush (03-28-2013)
Old 03-28-2013, 03:16 AM   #223 (permalink)
NightKnight
 
NachtRitter's Avatar
 
Join Date: Dec 2008
Location: Placerville, CA
Posts: 1,594

RippinRoo - '05 Subaru Legacy Wagon 2.5 GT
Subaru
90 day: 21.16 mpg (US)

Helga - '00 Volkswagen Jetta TDI
TEAM VW AUDI Group
Diesel
90 day: 53.91 mpg (US)

Olga - '03 Volkswagen Jetta Wagon
90 day: 46.24 mpg (US)
Thanks: 303
Thanked 311 Times in 186 Posts
Quote:
Originally Posted by a8ksh4 View Post
Anyhow, I applied a few weeks back to show the shell at the Maker Faire in SF in May and got accepted... I have to get a bunch of work done in the next few weeks and have some more progress to show there! If I can get coverage at work, this could be really fun!
I'll look for you there!
  Reply With Quote
Old 03-28-2013, 11:55 AM   #224 (permalink)
EcoModding Apprentice
 
turbothrush's Avatar
 
Join Date: Nov 2008
Location: Canada
Posts: 133

2 x wrecked vx - '92 Honda Civic Vx
Team Honda
90 day: 62 mpg (US)
Thanks: 119
Thanked 54 Times in 30 Posts
Rear spoiler / kamm looks great !
Thought I would mention what to expect for springback after glassing if there is some tension in the foam . Short answer is not much if you glass 1 side and let it cure . Next to none if you could glass both sides and let it cure before releasing the supports.

My roof was 2" thick ( no kerfs and pretty stiff ) and I was looking for about a 1" crown/camber over 8 feet. So I just guessed and forced in in 1 1/4 " crown with clamps and glassed 1 side . Springback was 1/4 " . Then I turned it over and forced it back to 1 1/4" and glassed the second side. Springback was 1/8 "
  Reply With Quote
The Following User Says Thank You to turbothrush For This Useful Post:
a8ksh4 (03-28-2013)
Old 03-29-2013, 03:51 AM   #225 (permalink)
B.O. Zen
 
Join Date: Feb 2009
Location: Folsom, CA
Posts: 208

Pickup - '99 Toyota Tacoma 2wd, Regular Cab, Short Bed
90 day: 34.62 mpg (US)
Thanks: 130
Thanked 140 Times in 59 Posts
Ohah! More progress! Today, we cut a front window opening!
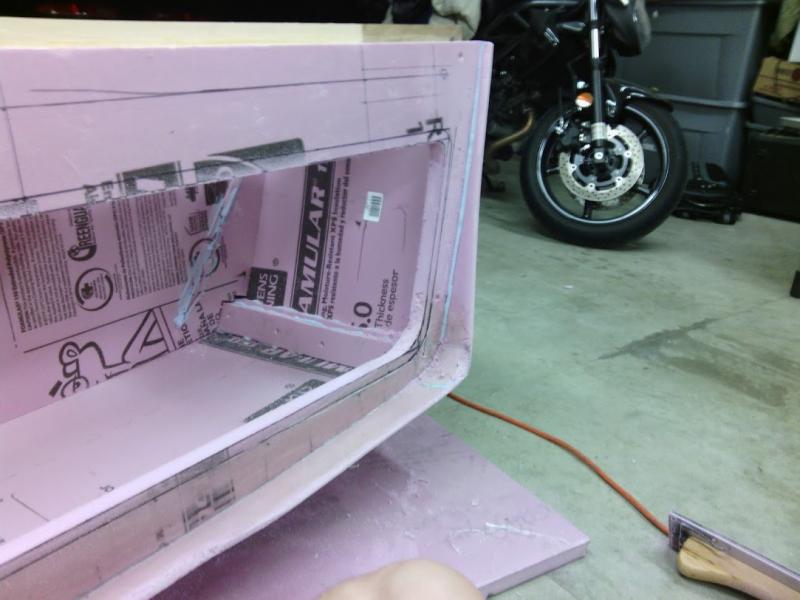

And made a jig for cutting the opening that the front shell window will fit into:
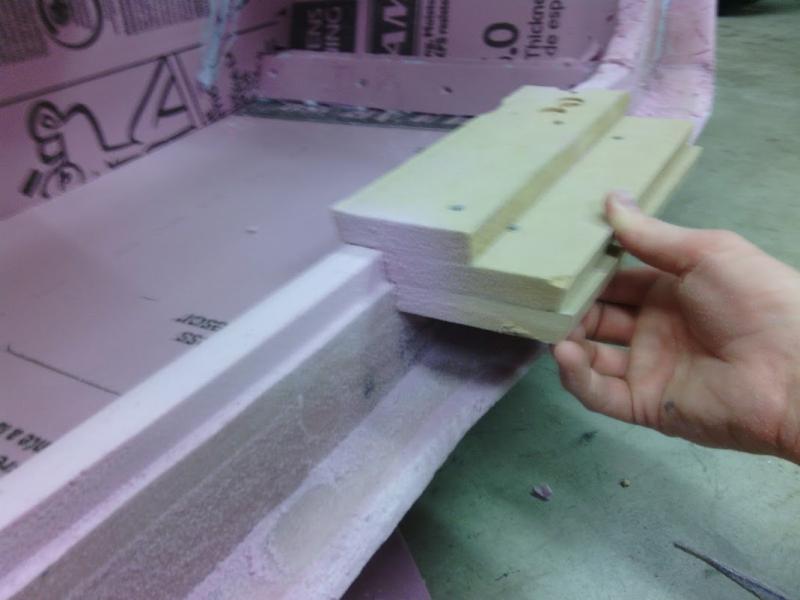

And with a little trimming, we're all ready...
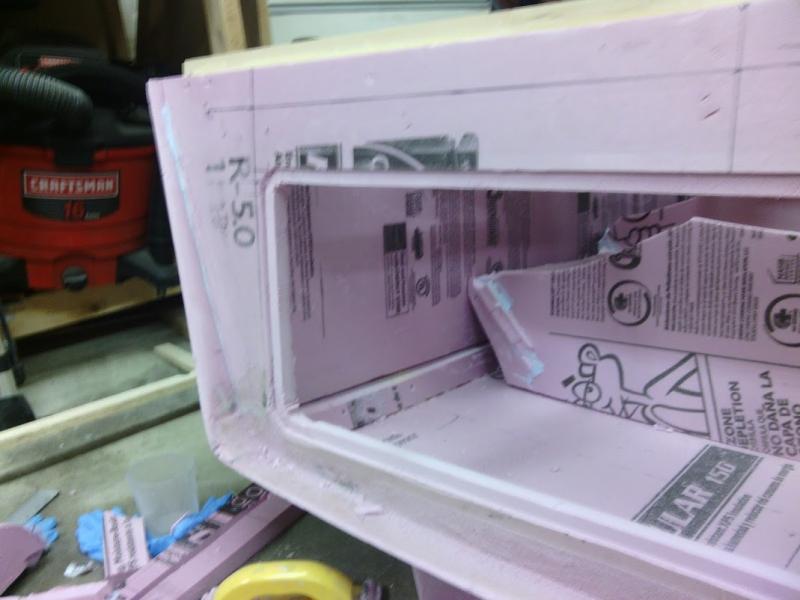

Some day, this piece of lexan will be a window...


Totally off-topic, here is my favorite recipe for Mead. Behold, here are two gallons of the nectar of the gods, cough, cough, I mean a gallon and a half of the nectar of the gods...
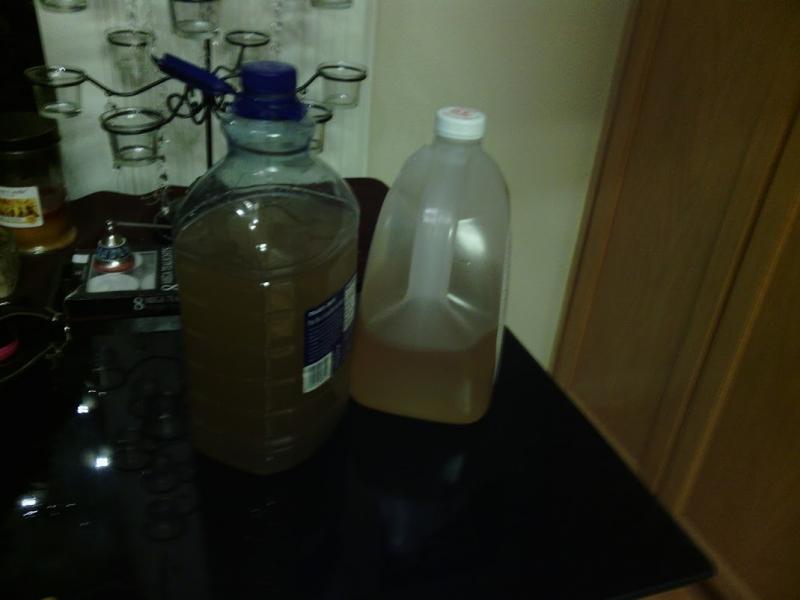

""
Joe's Ancient Orange Cinnamon Clove Mead - J.M.

Ingredients - At a glance
Makes 1 gallon batch (Dan doubles, approximately, for large batches, for more fun!)
3 1/2 lbs Clover or your choice honey or blend (will finish sweet) (Dan uses mesquite honey because it's cheap and available nearby)
1 Large orange (later cut in eights or smaller rind and all)
1 small handful of raisins (25 if you count but more or less ok)
1 stick of cinnamon
1 whole clove (or 2 if you like - these are potent critters)
optional (a pinch of nutmeg and allspice)(very small)
1 teaspoon of Fleismanns bread yeast (now don't get holy on me--- after all this
is an ancient mead and that's all we had back then)
Balance water to one gallon
Methods/steps
This is one I have shared before but it may have got lost in the rebuild. It is so simple to make and you can make it without much equipment and. a multitude of variations. This could be a first Mead for the novice as it is almost fool proof. It is a bit unorthodox but it has never failed me or the friends I have shared it with.

Process:

Use a clean 1 gallon carboy

Dissolve honey in some warm water and put in carboy

Wash orange well to remove any pesticides and slice in eights --add orange (you can push em through opening big boy -- rinds included -- its ok for this mead -- take my word for it -- ignore the experts)

Put in raisins, clove, cinnamon stick, any optional ingredients and fill to 3 inches from the top with cold water (need room for some foam -- you can top off with more water after the first few day frenzy)

Shake the heck out of the jug with top on, of course. This is your sophisticated aeration process.

When at room temperature in your kitchen. Put in 1 teaspoon of bread yeast. (No you don't have to rehydrate it first-- the ancients didn't even have that word in their vocabulary-- just put it in and give it a gentle swirl or not)(The yeast can fight for their own territory)

Install water airlock. Put in dark place. It will start working immediately or in an hour. (Don't use grandma's bread yeast she bought years before she passed away in the 90's)(Wait 3 hours before you panic or call me) After major foaming stops in a few days add some water and then keep your hands off of it. (Don't shake it! Don't mess with them yeastees! Let them alone except its okay to open your cabinet to smell every once in a while.

Racking --- Don't you dare
additional feeding --- NO NO
More stirring or shaking -- Your not listening, don't touch

After 2 months and maybe a few days it will slow down to a stop and clear all by itself. (How about that) (You are not so important after all) Then you can put a hose in with a small cloth filter on the end into the clear part and siphon off the golden nectar. If you wait long enough even the oranges will sink to the bottom but I never waited that long. If it is clear it is ready. You don't need a cold basement. It does better in a kitchen in the dark. (like in a cabinet) likes a little heat (70-80).
If it didn't work out... you screwed up and didn't read my instructions (or used grandma's bread yeast she bought years before she passed away). If it didn't work out then take up another hobby. Mead is not for you. It is too complicated.
If you were successful, which I am 99% certain you will be, then enjoy your mead. When you get ready to make a different mead you will probably have to unlearn some of these practices I have taught you, but hey--- This recipe and procedure works with these ingredients so don't knock it. It was your first mead. It was my tenth. Sometimes, even the experts can forget all they know and make a good ancient mead.

Enjoy, Joe
-- submitted by Joe Mattioli
""
__________________
  Reply With Quote
The Following 3 Users Say Thank You to a8ksh4 For This Useful Post:
aerohead (03-30-2013), KamperBob (04-02-2013), NeilBlanchard (03-29-2013)
Old 04-02-2013, 03:32 PM   #226 (permalink)
Recreation Engineer
 
KamperBob's Avatar
 
Join Date: Dec 2009
Location: Somewhere USA
Posts: 525

Black Stallion - '02 Toyota Tundra 4WD xCab

Half Pint - '06 Yamaha XT225
Thanks: 333
Thanked 138 Times in 103 Posts
Looking great! I'm curious about two things. Why is the window asymmetric? What additional windows do you plan? Meanwhile, rock on!!
__________________
Recreation Engineer
  Reply With Quote
Old 04-02-2013, 03:46 PM   #227 (permalink)
B.O. Zen
 
Join Date: Feb 2009
Location: Folsom, CA
Posts: 208

Pickup - '99 Toyota Tacoma 2wd, Regular Cab, Short Bed
90 day: 34.62 mpg (US)
Thanks: 130
Thanked 140 Times in 59 Posts
The window is asymmetric to accommodate a compartment that opens (hinged door) to the driver's side of the shell where I'll keep an awning. There's going to be an opening to the side of the window where the awning bag slides into the rail along the back of the compartment.

I was out of town all weekend and way tired after work yesterday, but today or tomorrow I'll be getting some of the major external fiberglass covering done. If I lay the fiberglass cloth across the shell from side to side, rather than along it's length or diagonally, I can just cover it and overlap the ends with three widths of the fabric I'm using. This is the route I'll go. If I do end up using a second layer on the outside, I might switch to a diagonal orientation.
__________________
  Reply With Quote
The Following 2 Users Say Thank You to a8ksh4 For This Useful Post:
aerohead (04-06-2013), KamperBob (04-03-2013)
Old 04-04-2013, 01:21 AM   #228 (permalink)
B.O. Zen
 
Join Date: Feb 2009
Location: Folsom, CA
Posts: 208

Pickup - '99 Toyota Tacoma 2wd, Regular Cab, Short Bed
90 day: 34.62 mpg (US)
Thanks: 130
Thanked 140 Times in 59 Posts
I got a little work done tonight...

Measured and cut the opening for the side-hatch:


Having the gaping hole in the side caused the bottom part to flex down and the side to flex outward, so I screwed a board across the bottom to brace it until I get it glassed up and glued a board along the inside of the top opening. The top one will give me something to fasten hinges to in addition to adding strength. I'm totally sure yet, but I might pull it back off and cut into the foam a bit so I can move it closer to the outside lip of the opening... need to go by home depot and look at different hinges and decide if it needs doing.
__________________
  Reply With Quote
The Following 3 Users Say Thank You to a8ksh4 For This Useful Post:
aerohead (04-06-2013), BamZipPow (04-04-2013), KamperBob (04-05-2013)
Old 04-04-2013, 09:17 AM   #229 (permalink)
Do more with less
 
Join Date: Jul 2010
Location: North Eastern Missouri
Posts: 930

OD - '05 Ford Econoline
90 day: 18.64 mpg (US)

Joetta - '86 Volkswagen Jetta Turbo Oil Burner
TEAM VW AUDI Group
90 day: 49.71 mpg (US)

Benzilla - '85 Mercedes Benz 300D
90 day: 28.08 mpg (US)
Thanks: 66
Thanked 177 Times in 112 Posts
Before you cut a hole in the other side, wet out a layer or two of composite on it
__________________
“The further a society drifts from the truth, the more it will hate those that speak it.” George Orwell

“Before a standing army can rule, the people must be disarmed; as they are in almost every kingdom in Europe.

The supreme power in America cannot enforce unjust laws by the sword; because the whole body of the people are armed.”

Noah Webster, 1787
  Reply With Quote
Old 04-04-2013, 09:24 AM   #230 (permalink)
Do more with less
 
Join Date: Jul 2010
Location: North Eastern Missouri
Posts: 930

OD - '05 Ford Econoline
90 day: 18.64 mpg (US)

Joetta - '86 Volkswagen Jetta Turbo Oil Burner
TEAM VW AUDI Group
90 day: 49.71 mpg (US)

Benzilla - '85 Mercedes Benz 300D
90 day: 28.08 mpg (US)
Thanks: 66
Thanked 177 Times in 112 Posts
I would lay up the composite on the bias. It will go over the corners a lot better. Use some super 77 spray to glue it down then use a paint brush for the epoxy. Cover any areas with seams with a strip of polyester cloth as a peel ply to keep it flat and to make it easy to do a secondary layer. You will want the edges to probably have more cloth (fiberglass) on them than the middle of the panels.

__________________
“The further a society drifts from the truth, the more it will hate those that speak it.” George Orwell

“Before a standing army can rule, the people must be disarmed; as they are in almost every kingdom in Europe.

The supreme power in America cannot enforce unjust laws by the sword; because the whole body of the people are armed.”

Noah Webster, 1787
  Reply With Quote
Reply  Post New Thread


Powered by vBulletin® Version 3.8.11
Copyright ©2000 - 2024, vBulletin Solutions Inc.
Content Relevant URLs by vBSEO 3.5.2
All content copyright EcoModder.com