 09-27-2016, 12:45 PM
|
#111 (permalink)
|
|
Master EcoModder
Join Date: May 2008
Location: Maynard, MA Eaarth
Posts: 7,908
Thanks: 3,475
Thanked 2,953 Times in 1,846 Posts
|
Quote:
Originally Posted by Macskyver

Thanks. I got the wood from Lowes. It was 2x6 rough cut cedar (1.75x5.75 actual). I then cut that into strips with a table saw and did the beads and coves on a custom router table. Page 2 of this thread has all the details.
|
Thanks - the only thing I am not totally clear on is the bead and cove. You made the 1/4" edges curved so they fit tightly around the curved ribs? You then had to sand the surface, I assume?
I am really liking this construction technique. I have my CNC machine that could cut the ribs - and you used jigsaw joints to join them together, like I did on CarBEN. Nice job!
|
|
|

|
 Today Today
|
|
|
|
 Other popular topics in this forum...
|
|
|
|
 09-27-2016, 04:18 PM
|
#112 (permalink)
|
|
EcoModding Lurker
Join Date: Aug 2016
Location: Texas
Posts: 86
Thanks: 0
Thanked 225 Times in 56 Posts
|
Quote:
Originally Posted by NeilBlanchard

Thanks - the only thing I am not totally clear on is the bead and cove. You made the 1/4" edges curved so they fit tightly around the curved ribs? You then had to sand the surface, I assume?
I am really liking this construction technique. I have my CNC machine that could cut the ribs - and you used jigsaw joints to join them together, like I did on CarBEN. Nice job!
|
Thanks. The beads and coves are on the edges of the strips so they fit together tightly with a lot of edge-to-edge surface area contact when laying the flat strips over curves. They also are good at preventing gaps. There's a little leeway before daylight starts shining through. After they are laid down, the curved surfaces are definitely faceted, and require quite a bit of sanding to make smooth. |
|
|

|
|
The Following User Says Thank You to Macskyver For This Useful Post:
|
|
 09-27-2016, 09:22 PM
|
#113 (permalink)
|
|
Master EcoModder
Join Date: Aug 2012
Location: northwest of normal
Posts: 29,414
Thanks: 8,367
Thanked 9,125 Times in 7,534 Posts
|
I'd expect we're talking about convex (bead) and concave (cove) edges rather than tongue and groove.
|
|
|

|
 09-28-2016, 12:27 AM
|
#114 (permalink)
|
|
Master EcoModder
Join Date: Apr 2011
Location: Tacoma WA
Posts: 1,401
Thanks: 743
Thanked 530 Times in 346 Posts
|
The epoxy will yellow over time with exposure to the sun. I used WR-LPU from system three as a protective clear coat.
https://www.systemthree.com/products...ethane-topcoat
__________________

2007 Dodge Ram 3500 SRW 4x4 with 6MT
2003 TDI Beetle
2002 TDI Beetle
currently parked - 1996 Dodge 2500 Cummins Turbodiesel
Custom cab, auto, 3.55 gears
|
|
|

|
|
The Following 2 Users Say Thank You to skyking For This Useful Post:
|
|
 09-28-2016, 09:02 AM
|
#115 (permalink)
|
|
Master EcoModder
Join Date: Jul 2011
Location: Ann Arbor, Michigan
Posts: 4,214
Thanks: 145
Thanked 2,827 Times in 1,983 Posts
|
I've always loved the amber hue and glow wood gets over time from the varnishes yellowing over time.
However, there are times when yellowing isn't wanted, so I've bookmarked that link.
If you ever need anything opaque, try adding West Systems 423 Graphite Powder to a 2-part epoxy resin. It makes a shiny and slippery black coating. I've used it on my hovercraft and S10 pickup truck.
__________________
George
Architect, Artist and Designer of Objects
2012 Infiniti G37X Coupe
1977 Porsche 911s Targa
1998 Chevy S-10 Pick-Up truck
1989 Scat II HP Hovercraft
You cannot sell aerodynamics in a can............
|
|
|

|
|
The Following User Says Thank You to kach22i For This Useful Post:
|
|
 09-28-2016, 10:31 AM
|
#116 (permalink)
|
|
EcoModding Lurker
Join Date: Aug 2016
Location: Texas
Posts: 86
Thanks: 0
Thanked 225 Times in 56 Posts
|
Quote:
Originally Posted by freebeard

I'd expect we're talking about convex (bead) and concave (cove) edges rather than tongue and groove.
|
Exactly. Post #40 on this thread has a good graphic showing it.
Quote:
Originally Posted by skyking

|
Yep. I got a different product, but also from system three to prevent the yellowing due to UV radiation. This is what I have:
https://www.systemthree.com/collecti...e-spar-varnish |
|
|

|
|
The Following 3 Users Say Thank You to Macskyver For This Useful Post:
|
|
 09-28-2016, 12:15 PM
|
#117 (permalink)
|
|
Master EcoModder
Join Date: May 2008
Location: Maynard, MA Eaarth
Posts: 7,908
Thanks: 3,475
Thanked 2,953 Times in 1,846 Posts
|
By the way, all the images in Post #30 (??) are not showing up. I will look back at post #40, but you confirmed what I was thinking about how you constructed this, is correct.
|
|
|

|
 09-28-2016, 12:43 PM
|
#118 (permalink)
|
|
EcoModding Lurker
Join Date: Aug 2016
Location: Texas
Posts: 86
Thanks: 0
Thanked 225 Times in 56 Posts
|
Quote:
Originally Posted by NeilBlanchard

By the way, all the images in Post #30 (??) are not showing up. I will look back at post #40, but you confirmed what I was thinking about how you constructed this, is correct.
|
Yeah, that's kinda weird.. I have a lot of my friends tell me certain pictures don't show up for them at certain times.. I post all of them the same way, so I know it can work. All my images are hosted on a shared google drive folder. I don't know if this is jacking with things. Maybe someone in the know can chime in. |
|
|

|
 09-28-2016, 03:11 PM
|
#119 (permalink)
|
|
Master EcoModder
Join Date: Aug 2012
Location: northwest of normal
Posts: 29,414
Thanks: 8,367
Thanked 9,125 Times in 7,534 Posts
|
You have 'local' (to here) storage available here on you Profile Page.
It's fairly brain-dead, you can't sort after the fact or query whether you've use one in a post.
|
|
|

|
 10-04-2016, 10:54 AM
|
#120 (permalink)
|
|
EcoModding Lurker
Join Date: Aug 2016
Location: Texas
Posts: 86
Thanks: 0
Thanked 225 Times in 56 Posts
|
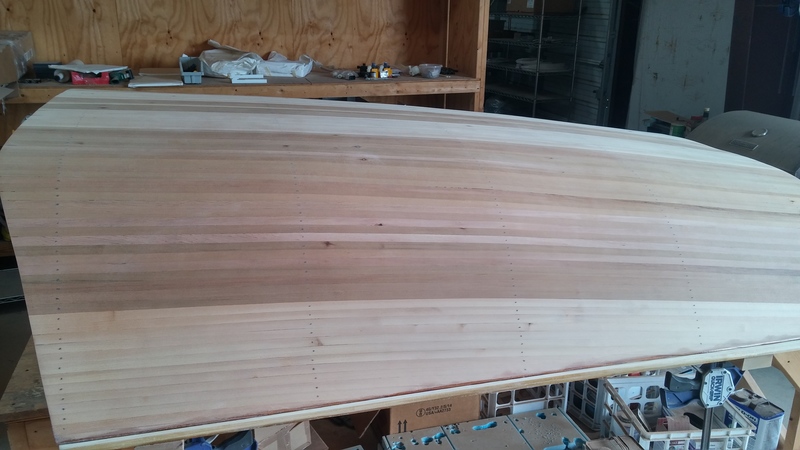
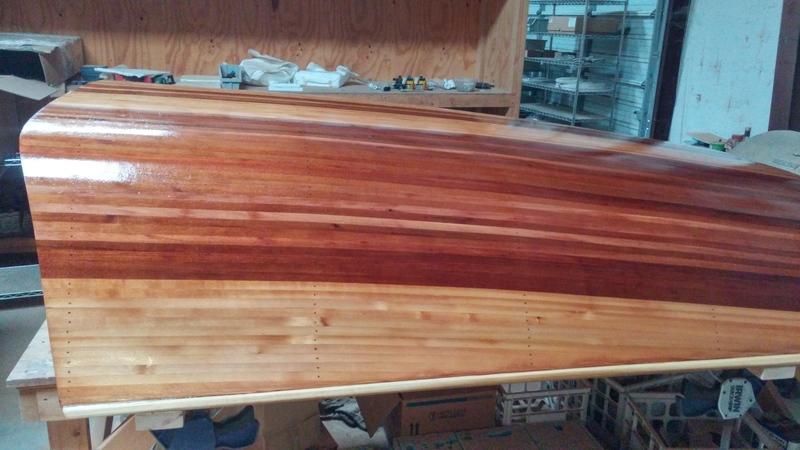
I got a bunch done since last post. I was unhappy with the splotchy finish with the epoxy so I decided to just bite the bullet and completely resand it. It basically set me back a full day, but I think it was worth it.
After sanding:
After epoxy:
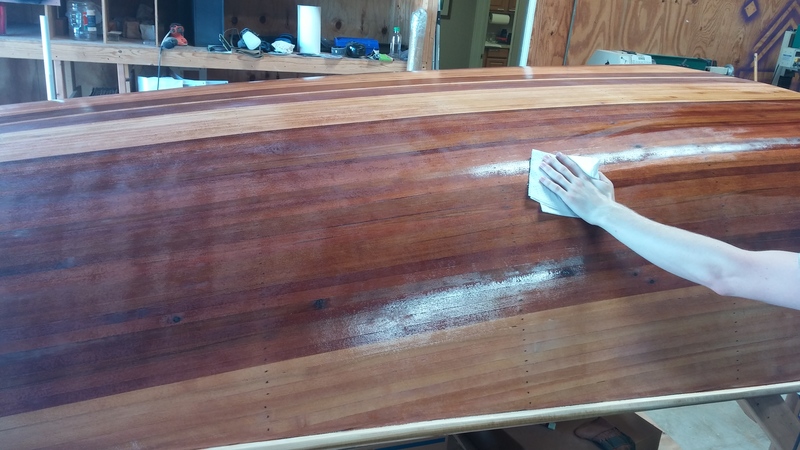
Then I did a light sand with 220 grit and clean with alcohol to knock down the little nubs and bubbles that I didn't get popped:
Then laid out the fabric:
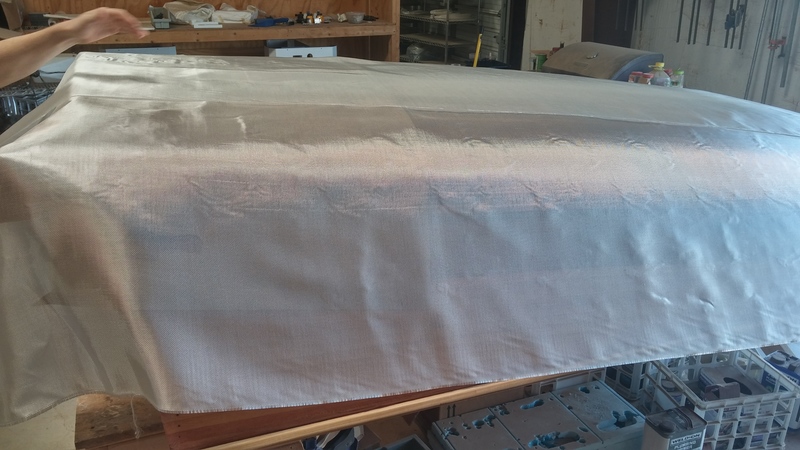
Then did the first round of epoxy:
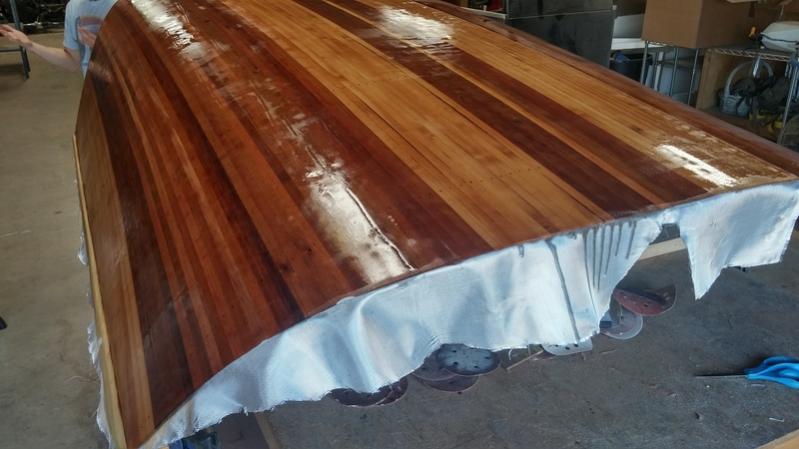
Next up I will lay out the fabric on the other side of the shell. The fabric wasn't wide enough to span the whole width so I decided to do it in 2 sections overlapping on the outside edge of the upper accent strips. I don't have it in any of the pictures, but I did fold over the cloth underneath the eaves and bed rail caps. In those areas there are a lot of bubbles and areas where the springiness of the cloth was too much for the wet epoxy to hold. I'll have to do something to clean up those areas, but I think they will turn out fine.
|
|
|

|
|
The Following 9 Users Say Thank You to Macskyver For This Useful Post:
|
|
|