09-14-2012, 11:48 PM
|
#11 (permalink)
|
|
Master EcoModder
Join Date: Mar 2008
Location: USA
Posts: 568
Thanks: 1
Thanked 74 Times in 59 Posts
|
Question on Coro coverings of moving suspension members, such as front control arms:
Anybody rigged Coro such that it is attached to the moving control are and flexes up and down with it? Flexible fairing, keeps wind from dragging on the control arm. Would this work and how to attach?
|
|
|

|
 Today Today
|
|
|
|
 Other popular topics in this forum...
|
|
|
|
|
09-15-2012, 01:01 AM
|
#12 (permalink)
|
|
Learning Aeromodding
Join Date: Feb 2011
Location: Spokane, WA.
Posts: 199
Metro - '93 Geo Metro 4 door hatchback 90 day: 35.26 mpg (US)
Thanks: 59
Thanked 45 Times in 32 Posts
|
Hey Otto, I was actually thinking the same thing yesterday! But in regards to the rear suspension.
A little brain storming:
I was thinking I would either zip tie the coro to the lower bar, or use a bracket and attach it with U bolts like Mcrews did.  You might be able to find a place to bolt a bracket onto the lower control arm.
Don't know what you drive, but the RAV has a couple of access holes in the lower control arm. Something like those might make good attaching points? Might be able to get something inside the arm that can be screw into via the access?
Other issue, which might prove to be way bigger, is the actual movement of the coro. Not only will it pull on screws or whatever securing method you're using. But I would think there's a good chance it would/could move more then a whole sheet of coro will allow? I have a couple of ideas for allowed movement, but it would be hard for me to describe it. Some kind of layer design. |
|
|
|
|
09-15-2012, 09:38 AM
|
#13 (permalink)
|
|
Master EcoModder
Join Date: Oct 2008
Location: Mid-Atlantic
Posts: 491
Thanks: 170
Thanked 69 Times in 44 Posts
|
I allow mine to just touch under extreme extension, as when the side of car is jacked up. There is also another factor worth considering. If you study the suspension, particular lower A arms, you will see that the inner part of the A arms move very little on suspension extension, so you can get that part fairly tight. Of course, I'm working with an Insight Gen1. Other cars will have different considerations.  |
|
|
|
|
09-15-2012, 09:51 AM
|
#14 (permalink)
|
|
Master EcoModder
Join Date: Oct 2008
Location: Mid-Atlantic
Posts: 491
Thanks: 170
Thanked 69 Times in 44 Posts
|
Quote:
Originally Posted by Otto

Question on Coro coverings of moving suspension members, such as front control arms:
Anybody rigged Coro such that it is attached to the moving control are and flexes up and down with it? Flexible fairing, keeps wind from dragging on the control arm. Would this work and how to attach?
|
I think aluminum might be a better material to use if you are going to attach it directly to the suspension parts. You can do simple one dimensional bends and then bolt it in place. I haven't done this myself but am seriously considering doing it on some parts of shock brackets on rear of my Insight Gen1.
If you have convenient holes, you could use T anchors, those spring loaded thingies that are pushed through holes in drywall to provide shelf anchors, etc. I've done this on my car in places where I only had a large hole to work with. You can also find "edge" brackets in the automotive hardware section. These push over an edge and have a screw thread internally. (You have to drill a hole to get the bolt in.) I don't much like the edge brackets which only allow a screw to be used because screws can come out and puncture someone's tire. Zip ties are good. If you have a flat surface and are willing to drill a hole, the plastic 2 piece "pop" fastners work well and don't rust. Lots of options |
|
|
|
|
09-15-2012, 09:52 AM
|
#15 (permalink)
|
|
Master EcoModder
Join Date: Aug 2011
Location: Warren, MI
Posts: 2,456
Thanks: 782
Thanked 669 Times in 411 Posts
|
Quote:
Originally Posted by myrefugeisintheLord
Sven7, What would you suggest putting between any metal and aluminum in contact with each other? I'm thinking there isn't going to be any place that the two metals are actually touching, because the previous owners had a thick protective undercoating added. I don't like thinking of how much extra weight we're carrying around because of it, but at least future rust will be prevented or at least slowed.
I'm unsure as to what primer you may be referring to. I've heard it mentioned in a couple other places, but honestly, the only primer I know of is paint primer. And that doesn't make sense to me.
And lastly,  I honestly can't interpret your diagram... I wish I could!!
So basically, the end of the belly pan is best when it's level with the ground? That would be easier then trying to figure out this 10 degree angle thing.
Probably the further out the back, the better?
|
Since aluminum and steel hate each other you have to put a non-reactive metal in between them. I use zinc coated bolts, but galvanized should work as well. With an undercoating you should be fine, but just be careful.
Just Rustoleum or whatever. Get some that is meant for bare metal, spray the drill hole and screw before putting it together, and it should coat most surfaces. Not perfect, but better than nothing.
The diagram shows drag numbers for diffuser angles on several body styles. You have the wagon type, "c", so follow the C line on the graph. It says that any angle more than 0 degrees is going to increase your drag, so keep your diffuser at 0. (ΔCx means the change in drag for X. You want to be below 0)
If you're going to do a boat tail it wouldn't be as important because you'd be managing the flow all the way back, but here you need to be mindful of what the air might be doing after it leaves your car.
As for the angle, I found it helpful when building the boat tail to cut a 10* wedge out of plywood. As long as the bottom of the wedge is level with the ground you've got a concrete 10* angle to build from. You can just cut out a rectangle!

__________________
He gave me a dollar. A blood-soaked dollar.
I cannot get the spot out but it's okay; It still works in the store
|
|
|
|
|
The Following User Says Thank You to Sven7 For This Useful Post:
|
|
|
09-17-2012, 09:35 PM
|
#16 (permalink)
|
|
Learning Aeromodding
Join Date: Feb 2011
Location: Spokane, WA.
Posts: 199
Metro - '93 Geo Metro 4 door hatchback 90 day: 35.26 mpg (US)
Thanks: 59
Thanked 45 Times in 32 Posts
|
I worked on the Belly Pan some more today. I took off the aluminum wrapped around the muffler, checked everything really carefully, and added a piece of coro in the LR wheel well to seal it up some.
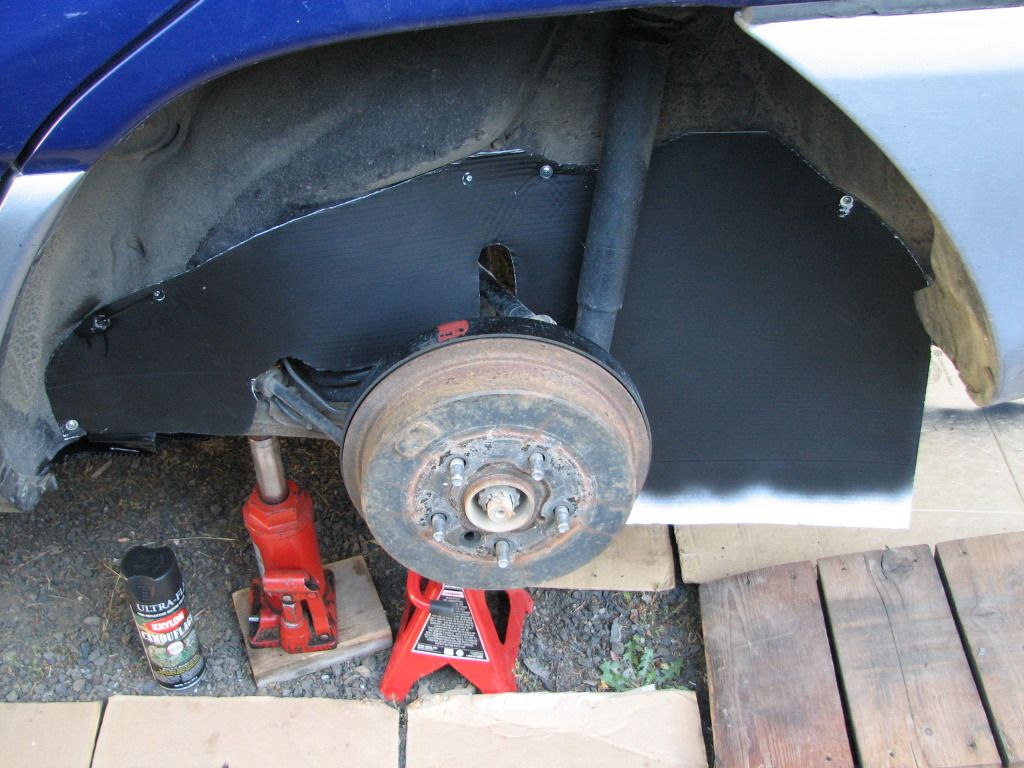
All of the aluminum framing was fine. Even where it was nearly touching the tail pipe. No hint of melting. However, the coroplast along the tail pipe, more towards the middle of the RAV, was singing a different tune. It's warped and slightly melted on the upper side. I'll have to replace the whole right side. And I will be using quite a bit of wire mesh.
Last edited by myrefugeisintheLord; 12-17-2012 at 12:07 AM..
|
|
|
|
|
09-18-2012, 03:32 PM
|
#17 (permalink)
|
|
Learning Aeromodding
Join Date: Feb 2011
Location: Spokane, WA.
Posts: 199
Metro - '93 Geo Metro 4 door hatchback 90 day: 35.26 mpg (US)
Thanks: 59
Thanked 45 Times in 32 Posts
|
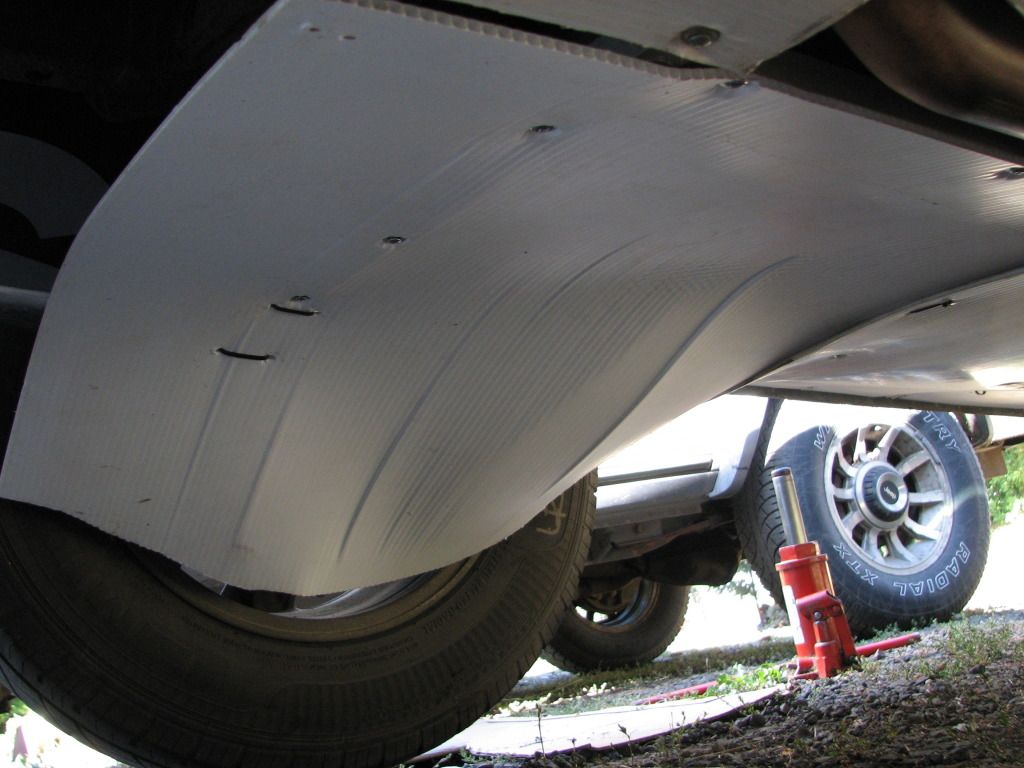
Another update.
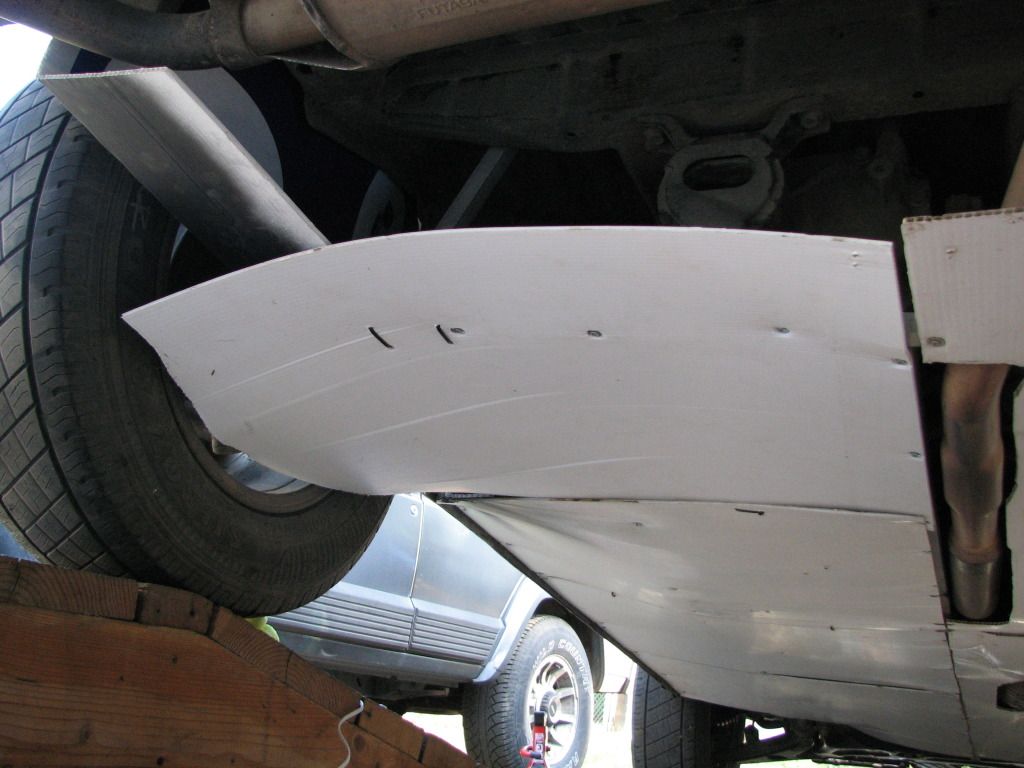
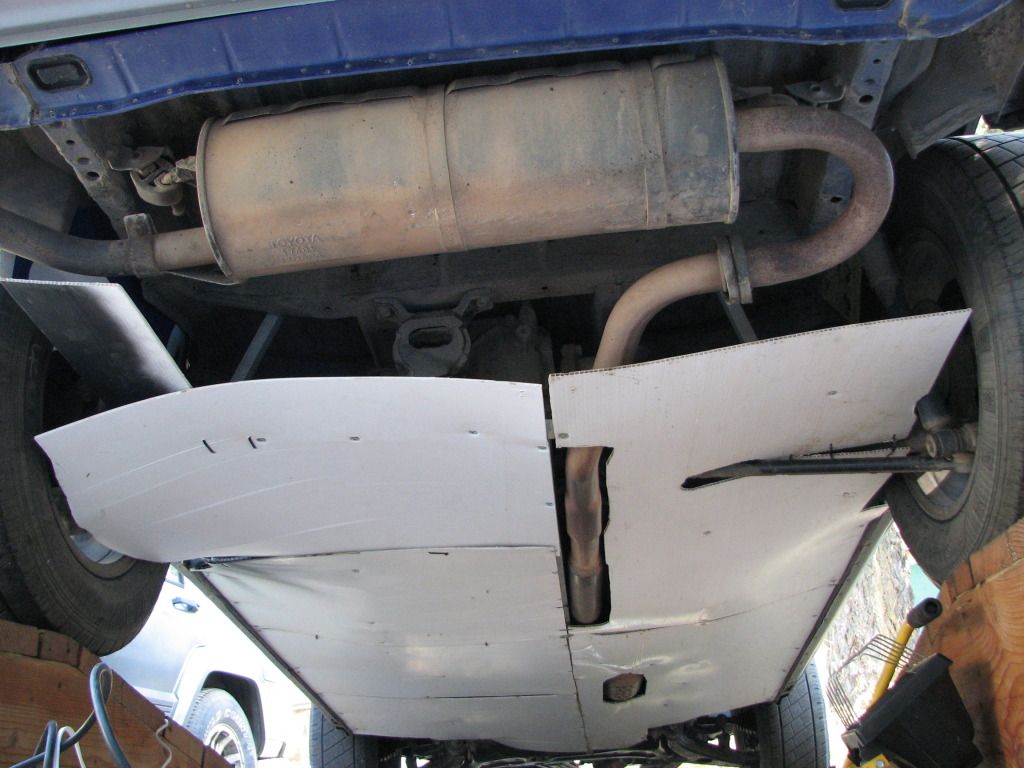
The drooping corner will be brought up with the last piece added. But I need to address the whole right side before I can finish.

Looking backwards, I cut out the jack point. Leaving the coro there and trying to jack up the back end would result in serious problems! I did cut too much off the piece in front of this one however, so the whole gap is way bigger then I wanted. Hopefully the other side will turn out better!
Also, I'm hoping the coro will be able to move as needed. I only tucked the front part in, about 2" worth. I'm hoping the movement will be taken from that point. I will test it a bit later with the use of jack stands and a jack.
Tomorrow I will be cleaning a house near our house on the mountain. Which we are selling. (Anybody looking for a scenic, mountain retreat in the inland NW? Our home for sale)
I'm hoping there is a window screen somewhere in the building stuff that's still there. Plus I'll be able to pick up some other things I will need to get this finished, brackets, etc. Either way, I'm getting a wire mesh tomorrow for near the tail pipe.
Last edited by myrefugeisintheLord; 12-17-2012 at 12:09 AM..
Reason: reloaded pictures
|
|
|
|
|
09-18-2012, 04:38 PM
|
#18 (permalink)
|
|
Learning Aeromodding
Join Date: Feb 2011
Location: Spokane, WA.
Posts: 199
Metro - '93 Geo Metro 4 door hatchback 90 day: 35.26 mpg (US)
Thanks: 59
Thanked 45 Times in 32 Posts
|
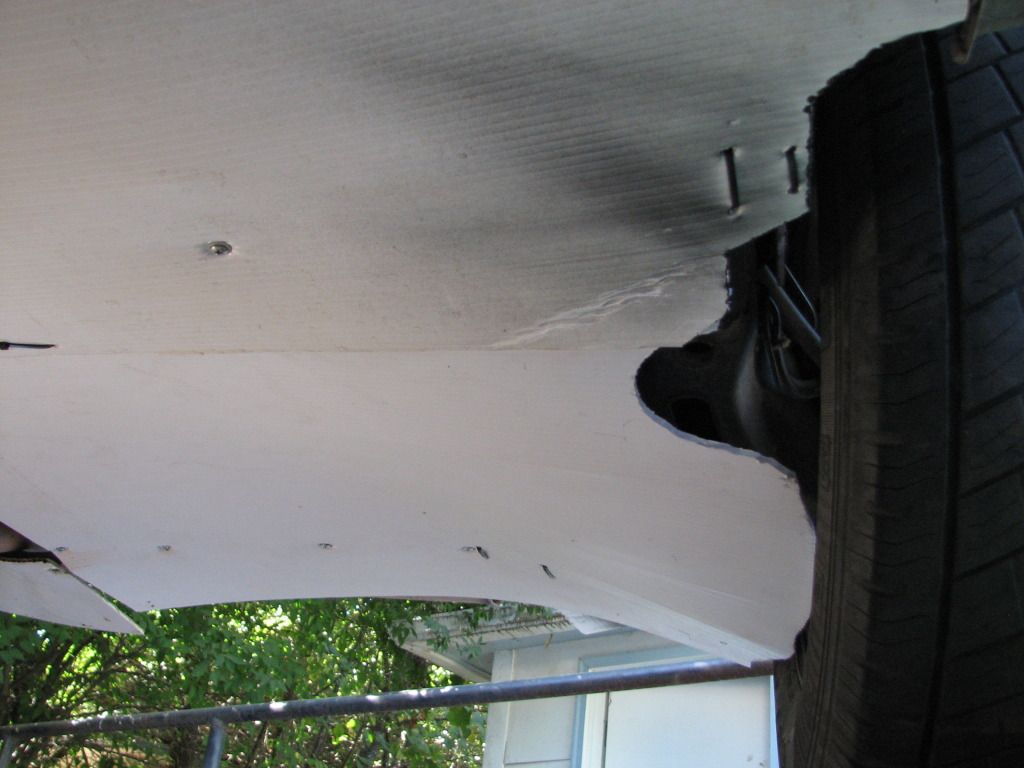
Okay, here's my findings:
Looks like it will work! Sure enough the coro drew from the detached side to allow the suspension to extend as far down as it can go. Everything looked really good. Well, by my standards, and limited experience.
I'm tempted to cut a hole out for the lower part of the strut. Good idea? No? It would make it not so low, but it would be exposed to the wind.
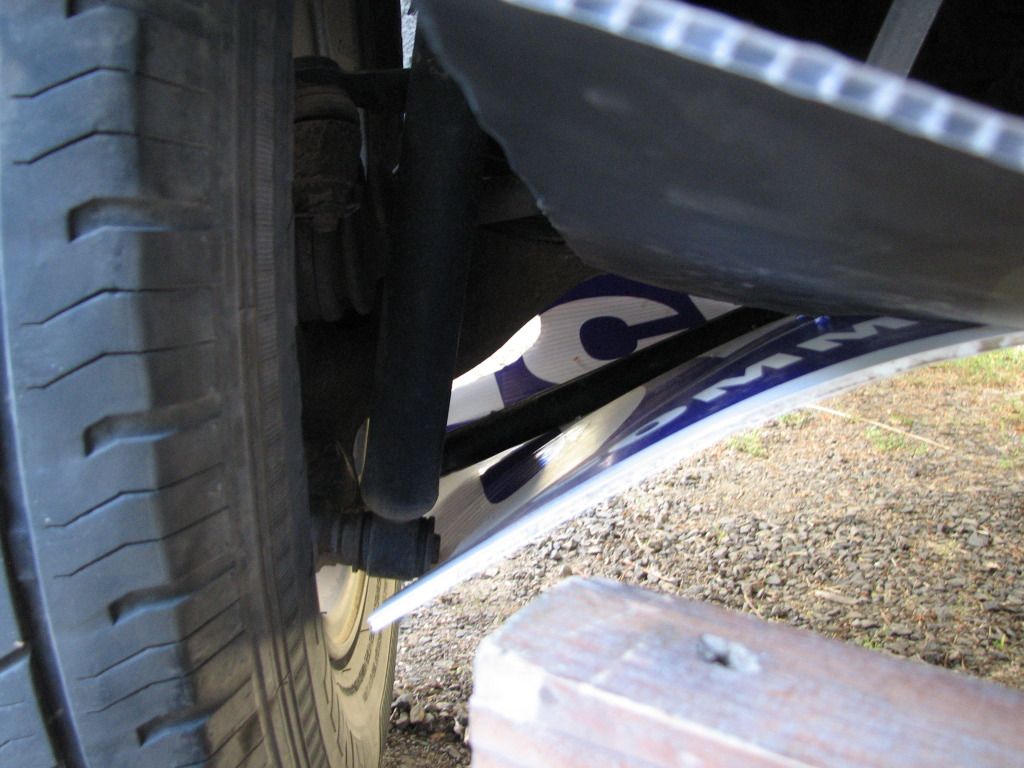
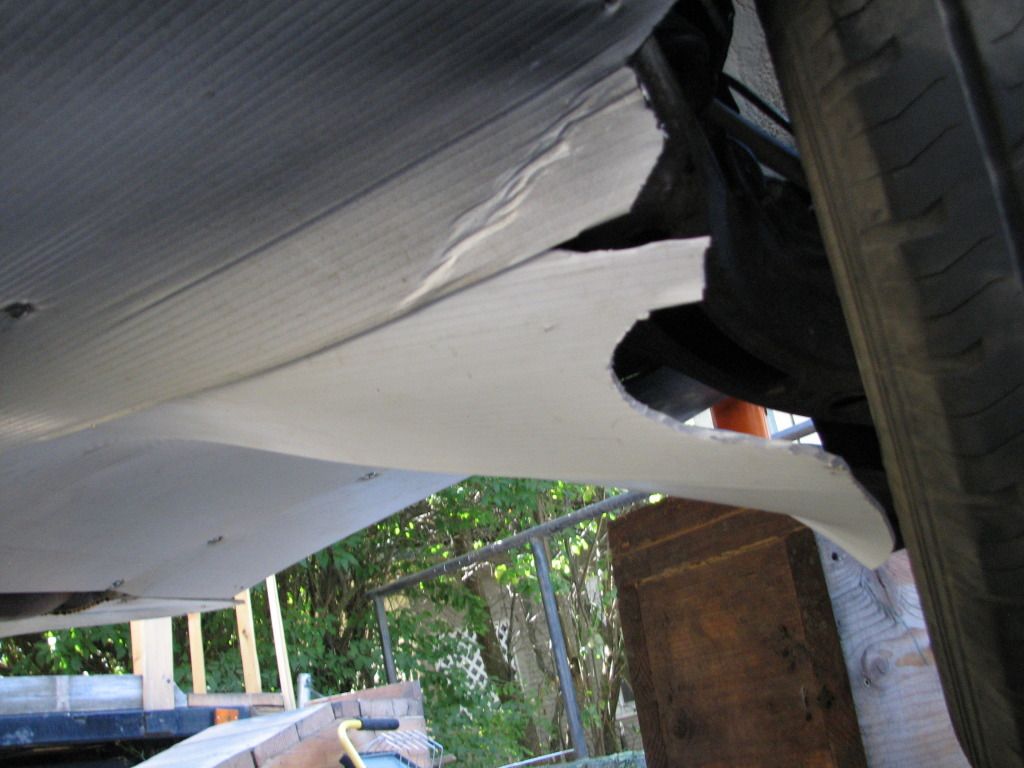
Look okay? Ideas? Suggestions?
I'm going to swing her around and work on the front, so added input can very well be implemented when I get back to work back here.
Last edited by myrefugeisintheLord; 12-17-2012 at 12:09 AM..
Reason: reloaded pictures
|
|
|
|
|
09-18-2012, 05:25 PM
|
#19 (permalink)
|
|
Master EcoModder
Join Date: Oct 2008
Location: Mid-Atlantic
Posts: 491
Thanks: 170
Thanked 69 Times in 44 Posts
|
Quote:
Originally Posted by myrefugeisintheLord
Okay, here's my findings:
Looks like it will work! Sure enough the coro drew from the detached side to allow the suspension to extend as far down as it can go. Everything looked really good. Well, by my standards, and limited experience. .
|
Your pictures are interesting. You are dealing with an area of the suspension which has been a bit of a frustration to me, so it is interesting to see your approach. On my Insight, I just left the basic suspension uncovered with room for the suspension to move. But I have not really been satisfied with that approach. Glad to see you working that area. |
|
|
|
|
09-18-2012, 06:34 PM
|
#20 (permalink)
|
|
Master EcoModder
Join Date: Aug 2011
Location: Warren, MI
Posts: 2,456
Thanks: 782
Thanked 669 Times in 411 Posts
|
Seeing that over the suspension just doesn't look right. I wonder if it's worth the trouble, with the spinning wheels right there and all.
Nice house! Better keep my mom from seeing it. 
__________________
He gave me a dollar. A blood-soaked dollar.
I cannot get the spot out but it's okay; It still works in the store
|
|
|
|
|