 09-28-2012, 09:14 PM
|
#51 (permalink)
|
|
Batman Junior
Join Date: Nov 2007
Location: 1000 Islands, Ontario, Canada
Posts: 22,541
Thanks: 4,085
Thanked 6,989 Times in 3,619 Posts
|
Quote:
Originally Posted by myrefugeisintheLord

Darin, I was going with the 0 degree angle because of what Sven said on the first page. I'm really confused about that whole thing!
|
Aha! Well, you can probably ignore me - I missed that one.
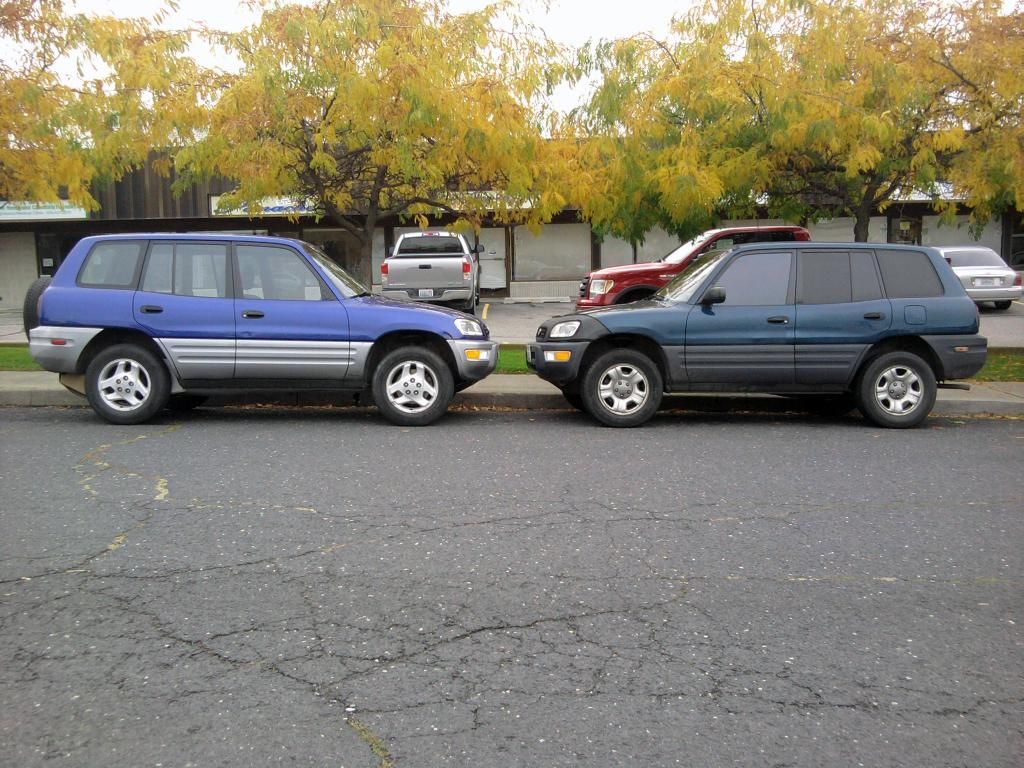
The RAV certainly looks like Vehicle C in the diagram.
|
|
|

|
 Today Today
|
|
|
|
 Other popular topics in this forum...
|
|
|
|
 09-29-2012, 02:31 AM
|
#52 (permalink)
|
|
Learning Aeromodding
Join Date: Feb 2011
Location: Spokane, WA.
Posts: 199
Metro - '93 Geo Metro 4 door hatchback 90 day: 35.26 mpg (US)
Thanks: 59
Thanked 45 Times in 32 Posts
|
After all that I've read on EM today, several hours literally, I'm convinced that I'm on the wrong track with the back.
I've never done any tuft testing on RAVadoodle, and I want to do some before I change anything. It should prove helpful to myself, as well as future readers. Rigging up an arm to hold the camera should prove challenging.  But I'll have a few days before the appropriate size SD card comes in the mail.
I'll be testing the back areas for sure. Getting footage from all 4 corners if at all possible. Would there be any other areas that would be good to test??? |
|
|

|
 09-29-2012, 07:59 AM
|
#53 (permalink)
|
|
Wiki Mod
Join Date: Nov 2009
Location: Midland MI, USA
Posts: 2,042
Thanks: 228
Thanked 304 Times in 210 Posts
|
your thinking of a boat tail.... my car must be rubbing off on you 
just think of all the extra space you would have.
if you put a big logo on the tail then its a "work loner car" most of the body shops around here have loner cars that are covered in decals. yours would you be a show off of what you can do to cars.
to make a camera rig, get a big magnet (from an old CB radio antenna) and bolt it to a 1x2 and the it can stick back far enough to work.
you will want to see the sides, top and bottom as the approach the the back end.
for the belly pan, after looking at all the pics and diagrams I think you want it to taper up to match the bottom of the back bumper.
go ahead and make your pan, or wheel well covers out of paper mache, then once that is dry it will make a nice mold for fiberglass. I can walk you though how to do fiberglass. you should have no issues. I did my whole tail and had up to that point only ever used fiberglass to patch a small hole in a canoe.
__________________

|
|
|

|
 09-29-2012, 01:01 PM
|
#54 (permalink)
|
|
Master EcoModder
Join Date: Mar 2008
Location: USA
Posts: 568
Thanks: 1
Thanked 74 Times in 59 Posts
|
For the rear undertray, why not just tuck a piece of Coro under the lip of the rear bumper cover, then bend the Coro to mate with the belly pan that it mates with to its front? Heat the Coro as needed to bend. Avoids that whole box thing in back. Add fins of Coro if desired as diffusers and to stiffen the bent sheet.
|
|
|

|
 09-29-2012, 01:27 PM
|
#55 (permalink)
|
|
Learning Aeromodding
Join Date: Feb 2011
Location: Spokane, WA.
Posts: 199
Metro - '93 Geo Metro 4 door hatchback 90 day: 35.26 mpg (US)
Thanks: 59
Thanked 45 Times in 32 Posts
|
Ben, Lol... Ya, a boat tail would be fun. And in a way, it would be the easiest route because there's more control as a whole. But that is way out of my skill level at this point. I do plan on adding one to my future car though!  Even if I have to drive all the way over there to have you help me build it. 
And a boat tail would be something I could add to RAVadoodle at any point. Speaking of attaching points, I spent some time looking at the top of the back door area last night, and there's no where to attach anything up there except on the door itself. The kammback might be a difficult project. But I'm getting off track!
A big magnet, and 1x2s is a good idea. I'll go that route if my other idea doesn't work. 
I'm sure tempted to go the fiberglass route, and maybe for only parts of it. Would it be very expensive to get the supplies to do that?
Otto, if you're thinking of the "rear bumper cover" that is on the sides of the door, then that might be a possibility. Difficult, but where there's a will, there's a way. If your thinking of the grey area where the door is, then there's a bigger problem with that. Because that cover IS the door. In theory it would be a great idea, but I'm not going to loose access through the back. 
The location that I attached the coro to, is inset from the edge of the RAV's floor, about 1.5". It's out of sight and a good thickness for screwing into. I'll open the back door and take some pictures so you guys can see what I have to work with. I'll also take off one of the side bumper covers to show that. |
|
|

|
 09-29-2012, 04:22 PM
|
#56 (permalink)
|
|
Wiki Mod
Join Date: Nov 2009
Location: Midland MI, USA
Posts: 2,042
Thanks: 228
Thanked 304 Times in 210 Posts
|
Well if you want to build a boat tail and feel like coming out here I'll be happy to take a few days off and help you build it 
Fiberglas is not have to be very expensive when you're at the hardware store you should find a 1 gallon container of the resin with hardener for about 35 bucks. 8 sf of cloth is about 6$. If you need a lot of fiberglass cloth you can order it online or look for boat supply storehouse. they often carry it in a 36 inch wide roll and you can buy it by the yard. That's what I should've done with my boat tail. But I did not know about it as I was just getting started.
__________________

|
|
|

|
 09-29-2012, 04:23 PM
|
#57 (permalink)
|
|
Wiki Mod
Join Date: Nov 2009
Location: Midland MI, USA
Posts: 2,042
Thanks: 228
Thanked 304 Times in 210 Posts
|
For mounting location did you look to see how your hatch mounting is at the very top? that is where I took my hatch off and use those mounting points for my boat tail.
__________________

|
|
|

|
 11-12-2012, 07:49 PM
|
#58 (permalink)
|
|
Learning Aeromodding
Join Date: Feb 2011
Location: Spokane, WA.
Posts: 199
Metro - '93 Geo Metro 4 door hatchback 90 day: 35.26 mpg (US)
Thanks: 59
Thanked 45 Times in 32 Posts
|
I'm past due for an update.
So, about a month ago, I changed the diffuser angle. And I used a piece of cardboard instead of coro, next to the right rear tire because that's all I had. (I never took pictures specifically of the changes, so sorry for the distant shots.)


With everything else that has been going on lately, it's hard for me to tell if it made any difference, but I would say it seemed like coast down time was slightly increased.
However, it doesn't look like that anymore...  It's been snowing today, and while out testing my "new to me", all-season tires, slush was packing on top of the belly pan. And ya, part of it came down. That's what I get for going from one project to the next before the first one is finished.
"Take the time it takes, so it takes less time." 
So, this afternoon, I took everything down from the middle of the RAV back. I think the rest can stay. The front looks great, despite having large shelves next to the front tires. The slush can fall off towards the back easy enough.  This project will have to wait until Spring before I can work on it anymore.
I'll be working on the wheel covers and rear skirts here and there this Winter. 
Last edited by myrefugeisintheLord; 12-17-2012 at 12:16 AM..
|
|
|

|
 11-13-2012, 08:51 AM
|
#59 (permalink)
|
|
Batman Junior
Join Date: Nov 2007
Location: 1000 Islands, Ontario, Canada
Posts: 22,541
Thanks: 4,085
Thanked 6,989 Times in 3,619 Posts
|
Bummer about the de-belly-panning.
I once had a similar thing happen ... except it was cardboard & duct tape, in the middle of a comparison test (which needless to say, didn't get completed).
|
|
|

|
 05-11-2013, 05:27 PM
|
#60 (permalink)
|
|
EcoModding Lurker
Join Date: May 2013
Location: Parma - Italy
Posts: 29
Thanks: 5
Thanked 6 Times in 3 Posts
|
Quote:
Originally Posted by myrefugeisintheLord

|
Rav4... Great car... 
Hi myrefuge!
__________________
Wolf_Tm250 [Silat-Kali] - Parma (Italy)
Suzuki Gsx-R 600 naked
Toyota Rav4.1 Torsen: 240hp 3SGTE swap in progress
Toyota Celica Gt-Four ST205 Snowy White [2.34kg/hp - 600Nm@4950rpm]
EFI University Advanced Tuner
|
|
|

|
|