Go Back   EcoModder Forum > EcoModding > EcoModding Central
Register Now
 Register Now
 

Reply  Post New Thread
 
Submit Tools LinkBack Thread Tools
Old 06-30-2008, 03:03 AM   #1 (permalink)
Modified Driver
 
Twerp's Avatar
 
Join Date: Apr 2008
Location: South Western middle of nowhereish New Hampshire
Posts: 104

Frozen Tundra - '03 Toyota Tundra 4WD SR5 Access Cab
90 day: 26.51 mpg (US)

Red Skateboard - '91 Honda Civic DX
90 day: 45.49 mpg (US)
Thanks: 0
Thanked 6 Times in 5 Posts
Conservation and the Frozen Tundra

So this is the saga of my build project for my truck. It will prolly be pretty drawn out because I don't have a lot of free time and once my Civic gets out of the shop, I will start working on that instead.

So far, I've added a Scan Gauge and I've been working on my driving technique and so far, the results have been astounding. I used to average 18-20 mpg. Since I modded my driving along my work commute, I've increased that to 24, 25 and close to 26 mpg. The Scan Gauge is helping the current tank quite a bit. If my estimates are right, I should hit close to 28mpg. Not bad, but I want more. So here are the plans:

First, an aero cap! Then possibly some underside solutions and a partial grill block and maybe some kind of wheel skirts. Suggestions are welcome.

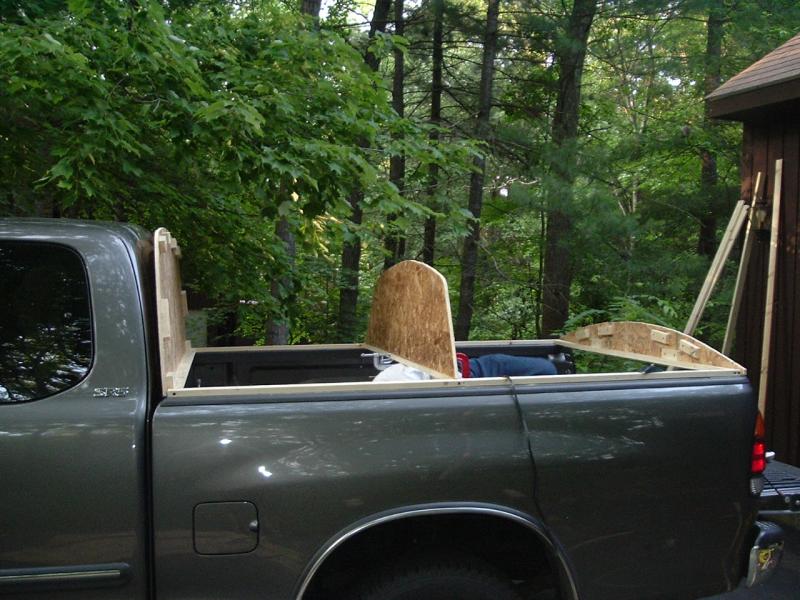
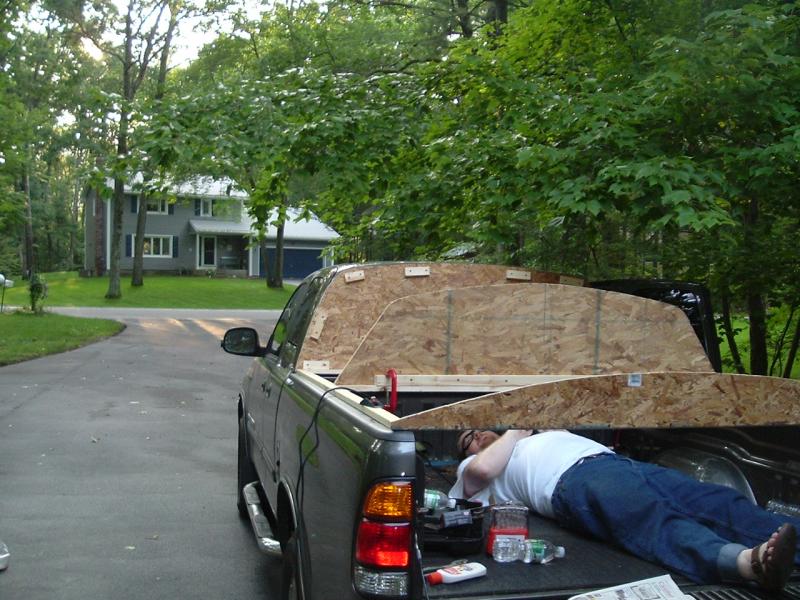
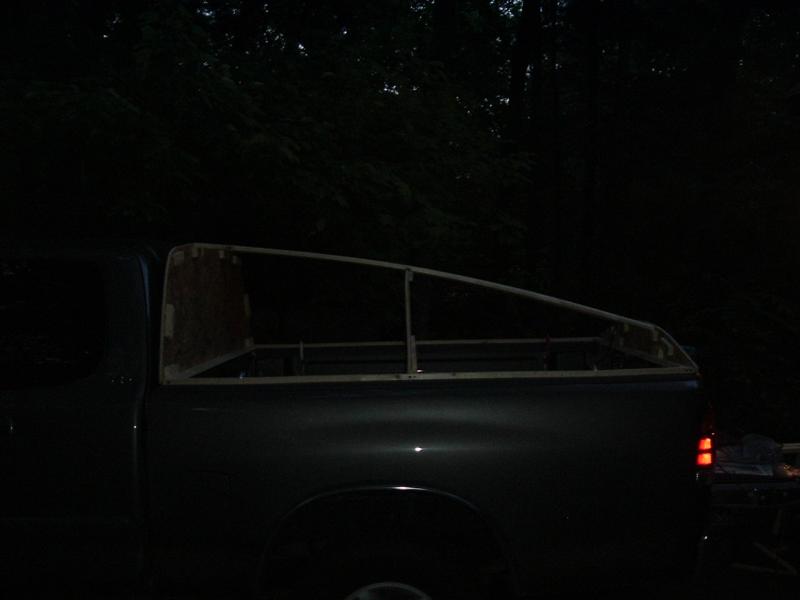
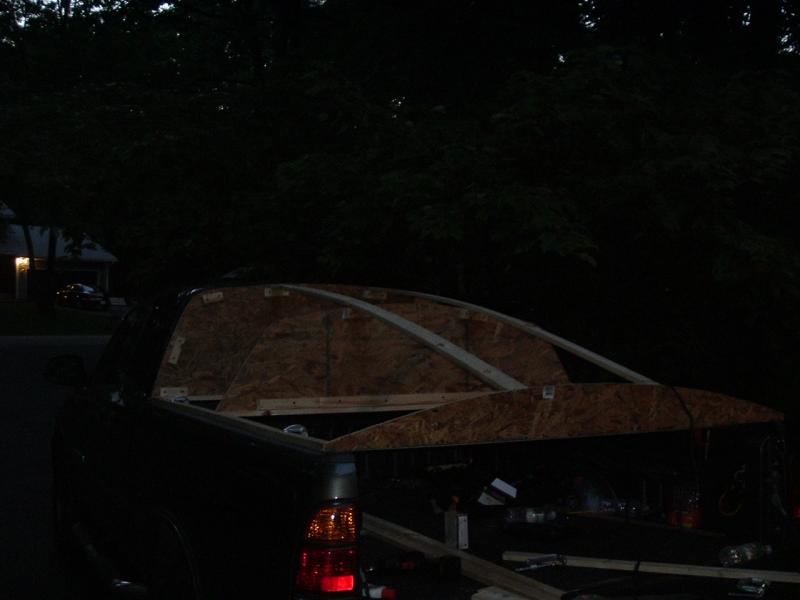
I've already got a lot of the materials for my aero cap, and I've started construction on the frame. If I can successfully attach a picture, I'll show you what I have so far...


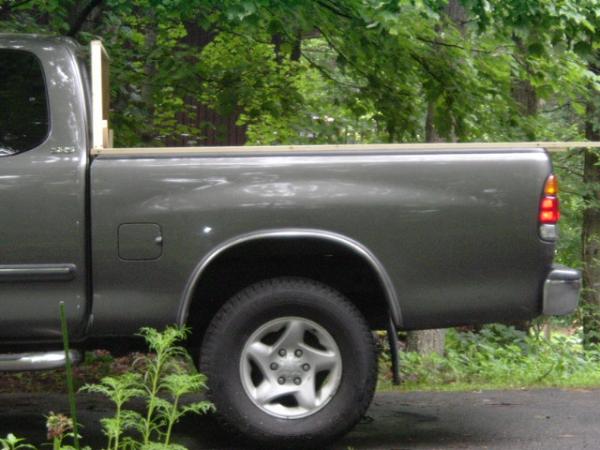
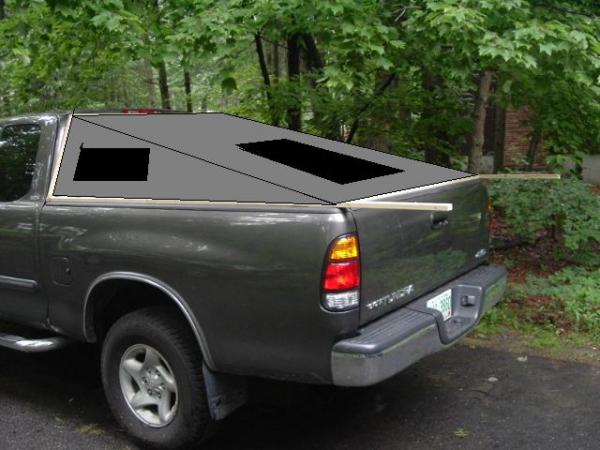
The tabs sticking out of the back will eventually be trimmed off. With the base assembled, I want to start working on the top, but I'm torn between two possible designs. The predictable option is just to go in a straight line from the cab to the tailgate. What I want to do is go back at a flatter angle and then angle toward the tailgate from there. This has two major advantages. One, it allows more cargo room. Two, it angles the rear window a little so that better visibility can be attained without using too much transparent material. Here's what I'm talking about:


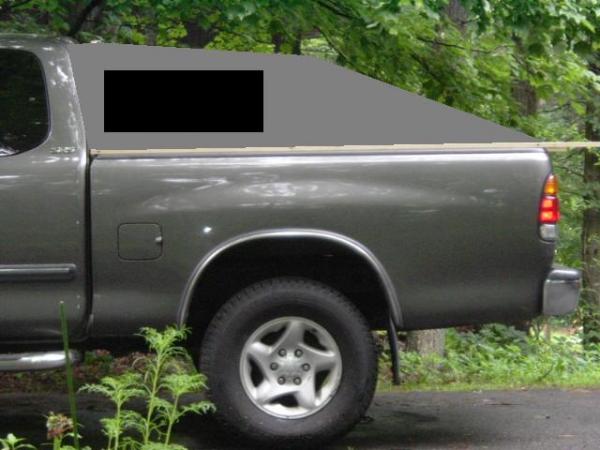
My apologies for the cheesy MS Paint edit and the poor perspective drawing...

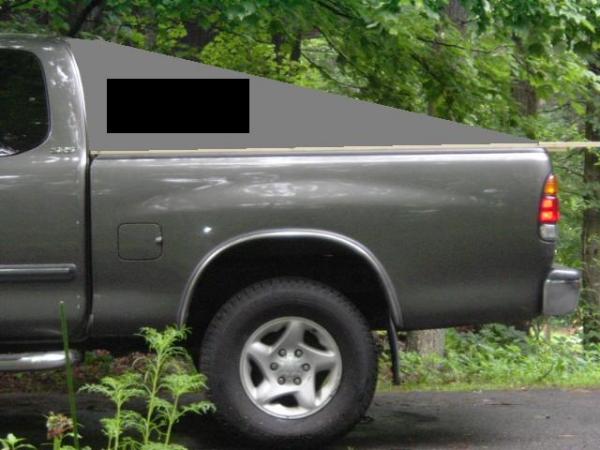
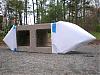
The other design would look more like this:


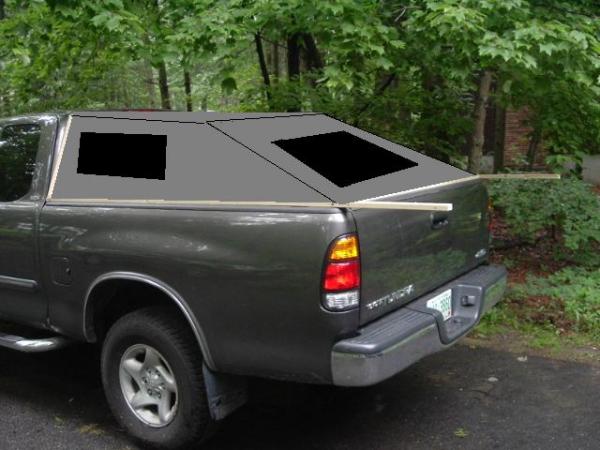
And this just amuses me:


So my question is, which cap design should I go with? I like the multi angle design, but aerodynamics is really what it's all about. So what do you think? Any suggestions?

__________________
  Reply With Quote
Alt Today
Popular topics

Other popular topics in this forum...

   
Old 06-30-2008, 09:44 AM   #2 (permalink)
JJW
EcoModding Lurker
 
Join Date: Apr 2008
Location: Nashua, New Hampshire
Posts: 53

The Crimson Jellybean - '08 Toyota Yaris
90 day: 41.8 mpg (US)

White's Elephant (in Black) - '02 Jeep Wrangler Sahara
Thanks: 0
Thanked 3 Times in 2 Posts
If it were mine, I'd be trying to emulate the following shape (excuse the rapidly made craptacular 'shop):


I hacked on the back half of a prius, rescaled to the same length as your roof peak to tail end. I grabbed the point where the rooflines both become level. I also put on a bloody great air dam, because its the ecomodder version of putting on a flame job in photoshop

It might be acceptable to simply slope from the rear of the roof to the tailgate top, though. It appears that's how Phil Knox did it, and I don't pretend to know nearly as much about aero:


But I wonder if there is a problem with maintaining attachment over the transition from roof to slant back. IF there is, some VGs might help just forward of the transition, or perhaps the more gentle slope of the curved prius-style kamback would be better.

Anyone with more aero knowledge care to do a mock up? Here is an excellent Tundra side shot:

__________________
  Reply With Quote
Old 06-30-2008, 10:11 AM   #3 (permalink)
Veggiedynamics
 
Join Date: May 2008
Location: Alexandria, MN
Posts: 684

Volt12 - '12 Chevy Volt base
Thanks: 0
Thanked 12 Times in 10 Posts
the prius graft is about what you want.. a gradual curve, less angle at the cab and more near the tailgate.. up to 15 degrees. From cab to tail gate may be too steep raise the rear at the tail gate a bit to lessen the angle of the slope, also slope in the sides a bit so there more horizontal in back than near the cab.. this is what is more ideal.. however even a straight slope would help, but if your going to go through the efforts.. might as well do it best you can.
__________________

  Reply With Quote
Old 06-30-2008, 10:55 AM   #4 (permalink)
JJW
EcoModding Lurker
 
Join Date: Apr 2008
Location: Nashua, New Hampshire
Posts: 53

The Crimson Jellybean - '08 Toyota Yaris
90 day: 41.8 mpg (US)

White's Elephant (in Black) - '02 Jeep Wrangler Sahara
Thanks: 0
Thanked 3 Times in 2 Posts
"Artist's" Concept #2:

__________________
  Reply With Quote
Old 06-30-2008, 12:52 PM   #5 (permalink)
EcoModding Lurker
 
Join Date: May 2008
Location: Motor City
Posts: 89
Thanks: 0
Thanked 1 Time in 1 Post
Quote:
Originally Posted by JJW View Post
"Artist's" Concept #2:

Might want to terminate the arse end as more of a Kamm-back.
  Reply With Quote
Old 07-07-2008, 01:58 AM   #6 (permalink)
Modified Driver
 
Twerp's Avatar
 
Join Date: Apr 2008
Location: South Western middle of nowhereish New Hampshire
Posts: 104

Frozen Tundra - '03 Toyota Tundra 4WD SR5 Access Cab
90 day: 26.51 mpg (US)

Red Skateboard - '91 Honda Civic DX
90 day: 45.49 mpg (US)
Thanks: 0
Thanked 6 Times in 5 Posts
Progress was made!

It wasn't much, but JJW and I worked the frame a little more. We're going for the curved look which he suggested earlier. We purchased some cheap supplies and after half a Saturday's work, we are most of the way done with the frame. I'm crediting him with most of the design and cutting as well as the photography. Hey, 2 out of 3 talents isn't bad.

So here are the bulkheads...


Here's another angle which includes me, between adding support screws


Here is a shot with two of the stringers installed. It's actually not as dark as it looks.


And another angle


Hopefully next weekend, I will be able to install the other four stringers. After that, I think upholstering it is going to be the next step... Then there will prolly be something involving fiberglass resin and then maybe some mold making and fiberglassing and surfacing and painting and so on... It's going to be a long project, but hopefully it will look decent when it's finally finished.
__________________
  Reply With Quote
Old 07-07-2008, 02:26 AM   #7 (permalink)
Veggiedynamics
 
Join Date: May 2008
Location: Alexandria, MN
Posts: 684

Volt12 - '12 Chevy Volt base
Thanks: 0
Thanked 12 Times in 10 Posts
looking great!! my next project is for my 2005 colorado.. to make a area topper almost like what your doing. Ill probably also consider the same for my 8foot box on my 93 dually 1ton chevy diesel (after the veggie converson) Keep up the great work.
__________________

  Reply With Quote
Old 07-07-2008, 01:12 PM   #8 (permalink)
JJW
EcoModding Lurker
 
Join Date: Apr 2008
Location: Nashua, New Hampshire
Posts: 53

The Crimson Jellybean - '08 Toyota Yaris
90 day: 41.8 mpg (US)

White's Elephant (in Black) - '02 Jeep Wrangler Sahara
Thanks: 0
Thanked 3 Times in 2 Posts
It's worth pointing out that those bulkheads are going to be trimmed to allow for rear visibility, but we left them solid for now until everything is more structural. The two stringers shown will have acrylic window material between them, hence the wide spacing. We were both fairly impressed with the quality of the shape we were able to produce using this method, I think it was better than either of us had anticipated. It looks like a small row boat off the truck.
__________________
  Reply With Quote
Old 07-13-2008, 11:15 PM   #9 (permalink)
Modified Driver
 
Twerp's Avatar
 
Join Date: Apr 2008
Location: South Western middle of nowhereish New Hampshire
Posts: 104

Frozen Tundra - '03 Toyota Tundra 4WD SR5 Access Cab
90 day: 26.51 mpg (US)

Red Skateboard - '91 Honda Civic DX
90 day: 45.49 mpg (US)
Thanks: 0
Thanked 6 Times in 5 Posts
Well, we made more progress on the cover. I have photos, but they aren't uploaded yet and I'm at work, so give me some time on that one, k?

We finished building the frame and upholstered it with cloth. It has really taken shape now. It looks like the back end of a really aerodynamic race car. Hopefully, after I get paid this week, I'll be able to pick up some fiberglass resin and give it a good coating on Friday. At that point, I will have a functional unit, I think.

Now, we didn't put any windows in it. We prolly could have, but I got lazy. The plan is to mount it and test it. If I can get some confirmation of its functionality, I will consider making a mold of it and creating a copy out of straight fiberglass. I will be able to cut windows into that pretty easily. For now though, I'll be very happy to just put it onto my truck and go riding around with it.
__________________
  Reply With Quote
Old 07-29-2008, 05:47 AM   #10 (permalink)
Modified Driver
 
Twerp's Avatar
 
Join Date: Apr 2008
Location: South Western middle of nowhereish New Hampshire
Posts: 104

Frozen Tundra - '03 Toyota Tundra 4WD SR5 Access Cab
90 day: 26.51 mpg (US)

Red Skateboard - '91 Honda Civic DX
90 day: 45.49 mpg (US)
Thanks: 0
Thanked 6 Times in 5 Posts
There was more progress on the cap since my last post... Unfortunately, not as much progress on getting pictures posted. They are currently being held for ransom on somebody else's camera.

We applied some fiberglass resin to the cloth upholstery in hopes of stiffening it. The upholstery is two sided. It is a lined burlap with one side being, you guessed it, burlap and the other being a canvas like material. Well, we had the canvas side up and the resin didn't really stiffen the canvas that much. We did discover that where it soaked into the burlap around the edges was really strong. So we flipped the thing over and applied the rest of the resin to the burlap. We didn't have enough resin left to cover all the burlap but the areas that we did get are all nice and rigid.

So the next step has been to wait for my fume filled lungs to recover and my damaged brain cells to grow back. So far the lungs are good, but I've been waiting on the brain cells for an awfully long time. After that, I'm going to coat the rest of the underside and hit a few spots on the surface for waterproofing purposes. Then it's sand and paint time. I'm considering acquiring a rear view camera system (saw it at Walmart for less than $100) instead of trying to apply windows to this thing.

__________________
  Reply With Quote
Reply  Post New Thread


Powered by vBulletin® Version 3.8.11
Copyright ©2000 - 2024, vBulletin Solutions Inc.
Content Relevant URLs by vBSEO 3.5.2
All content copyright EcoModder.com