01-28-2013, 10:59 PM
|
#21 (permalink)
|
|
EcoModding Lurker
Join Date: Jun 2011
Location: Austin, TX
Posts: 74
Thanks: 10
Thanked 27 Times in 15 Posts
|
Quote:
Originally Posted by MetroMPG

Plans to A-B-A test the cap when it's finished?
|
Absolutely. I also plan to video the ABA tests and have anyone local along to observe/report. And tuft test.
If you get sick of that cold weather up there, feel free to come down and help 
__________________

|
|
|

|
 Today Today
|
|
|
|
 Other popular topics in this forum...
|
|
|
|
|
01-28-2013, 11:02 PM
|
#22 (permalink)
|
|
Batman Junior
Join Date: Nov 2007
Location: 1000 Islands, Ontario, Canada
Posts: 22,534
Thanks: 4,082
Thanked 6,979 Times in 3,614 Posts
|
Ha! Well, I've been hiding from the cold weather on the Wet Coast this year. But if you're still working on it next winter ...  |
|
|
|
|
01-28-2013, 11:02 PM
|
#23 (permalink)
|
|
EcoModding Lurker
Join Date: Jun 2011
Location: Austin, TX
Posts: 74
Thanks: 10
Thanked 27 Times in 15 Posts
|
I bought the hardware, and a cheap, sacrificial tarp from Harbor Freight yesterday. I'll put the frame together with the hardware, then cut up the cheap tarp (which has a convenient small amount of stretch) and use them as a temporary cover for the panels. That way I can do some preliminary tuft testing and ABA testing before committing to the curve and design.
Let's see if we can make some big progress tomorrow 
__________________
|
|
|
|
|
The Following User Says Thank You to plasticuser For This Useful Post:
|
|
|
01-29-2013, 07:59 PM
|
#24 (permalink)
|
|
EcoModding Lurker
Join Date: Jun 2011
Location: Austin, TX
Posts: 74
Thanks: 10
Thanked 27 Times in 15 Posts
|
Progress...
Today I put the sides in. The design has become a lot more rigid now there are triangles involved. This is good.
Next, I assembled the lid and dry fitted it with the retaining clips. It's a bit more snug than I'd like, but it looks right.
I attached some photos of today's work.
__________________
|
|
|
|
|
The Following 3 Users Say Thank You to plasticuser For This Useful Post:
|
|
|
01-31-2013, 08:05 AM
|
#25 (permalink)
|
|
Banned
Join Date: Oct 2009
Location: Fort Worth, Texas
Posts: 2,442
Thanks: 1,422
Thanked 737 Times in 557 Posts
|
Quote:
Originally Posted by plasticuser
That's a nice Airstream you have there. Single axle at that length, is it a 50's pre-torsion axle one?
|
The one pictured is an '83 Silver Streak an upmarket cousin to Airstream. I've now a '90 model (different in appearance). Leaf sprung suspension . . for now. |
|
|
|
|
01-31-2013, 04:21 PM
|
#26 (permalink)
|
|
EcoModding Lurker
Join Date: Jun 2011
Location: Austin, TX
Posts: 74
Thanks: 10
Thanked 27 Times in 15 Posts
|
Moving swiftly on...
Today things are really taking shape. I'm getting the luan on, getting beautiful curves...
Once that's on, I'll just very lightly bondo the seams and sand to get a professional looking finish, then seal it all in...
One thing I can't find... The mystical auxilliary brake light lead for hooking up the brake lights on camper shells. Where do they stash that?
__________________
|
|
|
|
|
The Following User Says Thank You to plasticuser For This Useful Post:
|
|
|
01-31-2013, 06:37 PM
|
#27 (permalink)
|
|
Master EcoModder
Join Date: Jan 2008
Location: Arkansas
Posts: 279
Thanks: 90
Thanked 241 Times in 90 Posts
|
Quote:
Originally Posted by plasticuser
Today things are really taking shape. I'm getting the luan on, getting beautiful curves...
Once that's on, I'll just very lightly bondo the seams and sand to get a professional looking finish, then seal it all in...
One thing I can't find... The mystical auxilliary brake light lead for hooking up the brake lights on camper shells. Where do they stash that?
|
The wire you are looking for is located under the drivers side door in the wiring harness against the frame. It will be a green wire with a black cap on it. Snip off the black cap and that is your hot lead for the brake light.
You will have to wire up a ground wire to the frame or another good grounding location also.
Best of luck to you on your project, it is looking very good.
Bondo |
|
|
|
|
The Following User Says Thank You to bondo For This Useful Post:
|
|
|
01-31-2013, 09:02 PM
|
#28 (permalink)
|
|
EcoModding Lurker
Join Date: Jun 2011
Location: Austin, TX
Posts: 74
Thanks: 10
Thanked 27 Times in 15 Posts
|
Quote:
Originally Posted by bondo
The wire you are looking for is located under the drivers side door in the wiring harness against the frame. It will be a green wire with a black cap on it. Snip off the black cap and that is your hot lead for the brake light.
You will have to wire up a ground wire to the frame or another good grounding location also.
Best of luck to you on your project, it is looking very good.
Bondo
|
Found it! Wow, they really hid that well. It was tucked behind a wiring harness, behind a plastic cover. Including the 3/4" black cap, I'd say there's about 1" of wire there. I guess I'll carefully remove the cap instead of snipping it off, so I have something to work with
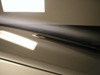
What do you think of my rounded tail, Bondo? I'm trying to keep the airflow attached to 18" behind the truck. I will make a rounded section to fit beneath the tail, so guide and smooth out the airflow coming up from beneath -since we all know turbulent air is a bad thing.
My luan laying went fairly well. On the one side, I applied it in 3" strips and it took the compound curve very well. On the other side I got brave and put it on as one piece. Not so good. I'll take it off tomorrow and make another piece in 3" strips, and start bondoing... Is bondoing a word? I also need to put a couple of guide strips under the top of the tail piece. It has tried to dip down and I suspect it will cause the air to break away right there.
__________________
|
|
|
|
|
02-01-2013, 08:42 AM
|
#29 (permalink)
|
|
Master EcoModder
Join Date: Jan 2008
Location: Arkansas
Posts: 279
Thanks: 90
Thanked 241 Times in 90 Posts
|
It would be best to ask aerohead about the rounded back end. A boat tail extension may be best that mounts on the lowered tailgate. That will get you another 24" back and then you can also haul 4x8 sheets of plywood laid flat in a 6.5 foot truck bed and keep the wood dry too.
Bondo
|
|
|
|
|
The Following 2 Users Say Thank You to bondo For This Useful Post:
|
|
|
02-01-2013, 10:25 AM
|
#30 (permalink)
|
|
EcoModding Lurker
Join Date: Dec 2012
Location: Richmond Texas
Posts: 25
Thanks: 34
Thanked 9 Times in 4 Posts
|
Quote:
Originally Posted by plasticuser
Once that's on, I'll just very lightly bondo the seams and sand to get a professional looking finish, then seal it all in...
|
Make sure you use Bondo Gold, its what I use on cabinets when there going to be lacquer finish. I thinly coat the entire surface and then lightly sand. The finish paint is so smooth you cant tell its wood.
Normal Bondo is to much work
|
|
|
|
|
The Following User Says Thank You to GeekForLife For This Useful Post:
|
|
|