Go Back   EcoModder Forum > EcoModding > Aerodynamics
Register Now
 Register Now
 

Reply  Post New Thread
 
Submit Tools LinkBack Thread Tools
Old 07-06-2012, 05:22 PM   #11 (permalink)
Master EcoModder
 
Sven7's Avatar
 
Join Date: Aug 2011
Location: Warren, MI
Posts: 2,456

Boo Radley - '65 Ford F100
90 day: 13.28 mpg (US)
Thanks: 782
Thanked 668 Times in 410 Posts
Just did a sketch but you seem to be a step ahead!


If you can, continue the curvature of the hood and headlight area.

__________________
He gave me a dollar. A blood-soaked dollar.
I cannot get the spot out but it's okay; It still works in the store
  Reply With Quote
The Following 3 Users Say Thank You to Sven7 For This Useful Post:
Cd (07-06-2012), Pawtuckett (07-11-2012), Weather Spotter (07-06-2012)
Alt Today
Popular topics

Other popular topics in this forum...

   
Old 07-06-2012, 05:42 PM   #12 (permalink)
Master EcoModder
 
aerohead's Avatar
 
Join Date: Jan 2008
Location: Sanger,Texas,U.S.A.
Posts: 15,883
Thanks: 23,957
Thanked 7,219 Times in 4,646 Posts
front

Quote:
Originally Posted by Weather Spotter View Post
so if I understand this right, I need to make the front end a half circle (top view) and a smooth under side, and slope the top to match the hood?

Where would the best spot be for an air intake for the radiator?

Where should I make a hole to let the air out of the engine bay?
*In airships or submarines/torpedos,the streamline body's nose has the lowest drag for sub-transonic flow.
*For bluff-body automotive forms a one-half convex-hemisphere would be ideal as from any angle it has the best 115-degree flow separation line.
*On this nose there would be a single point which is the forward stagnation point.This is where the inlet would be located for maximum ram effect.
*Where the air exits will have a lot to do with what's already under the hood.
*Alberto Morelli probably spent the most time in the wind tunnel to scientifically position the engine bay cooling exits for his 1976-78 CNR 'banana' car.This car would be the
benchmark for low drag cooling exits.Hucho shows a number of possible solutions as did Walter Korff.I would hesitate to position them on top of the hood for safety reasons.You could spend a thousand hours in a wind tunnel trying to dial this in.
*The Matrix/Vibe already has VW's 'optimum' nose' as depicted in Hucho's book.
*Where the nose curves back under would be considered a no-no,but could be addressed with a NASCAR type wrap-around airdam to limit air underneath,kicking it out to the sides instead .It might have to be 'active' or flexible to respect the SAE 'approach' angle clearance.
*An airdam which was higher could also be used in conjunction with a Corvette/Trans Am 'bottom-breather' style inlet which would be just ahead of an underbody wrap-around airdam.
*I'll let basjoos speak to the nose on AeroCivic.
  Reply With Quote
The Following User Says Thank You to aerohead For This Useful Post:
Cd (07-06-2012)
Old 07-06-2012, 06:23 PM   #13 (permalink)
Wiki Mod
 
Weather Spotter's Avatar
 
Join Date: Nov 2009
Location: Midland MI, USA
Posts: 2,042

Max - '14 Ford C-Max SEL
Thanks: 228
Thanked 304 Times in 210 Posts
Sven7, nice sketch

aerohead:
what do you mean that the Matrix has the ideal shape already? it looks like a brick. I get that the best spot for an air intake will be dead center before any upward angle starts.
__________________
  Reply With Quote
Old 07-06-2012, 09:52 PM   #14 (permalink)
Wiki Mod
 
Weather Spotter's Avatar
 
Join Date: Nov 2009
Location: Midland MI, USA
Posts: 2,042

Max - '14 Ford C-Max SEL
Thanks: 228
Thanked 304 Times in 210 Posts
Well I started building a beta nose cone

Before:


I started by doing something I had never done before, taking off the front bumper cover.


then I started looking for good mount points. First place to look was the OEM locations (why re engineer if I do not have too). I found one that I can make use of:


then I found a second point that should work well as a bottom mount point:


The bolt is my mounting method (surplus tractor wheel weight bolt, that I just knew would be useful some day ). At first I was going to use a 2x4 chunk and screw it from the back side. this I did and found that it sagged too much

then it was time to see if my board would make a nice round shape:


then I added a bottom support to hold the shape in the back:


Total forward projection 18". the plan is to use alum flashing to go from the round board to the top of the existing grill bock. then slope down to match the bottom of the headlights. there will also be some more fame made to support this flashing because it is so thin.

My thought for hood release access is to make an open able small door right in front of the existing upper grill block, might use a thumb screw or key lock to hold it shut. At this point I do not plan on having the nose cone and hood touch, just gap it a small amount to prevent damage.

Now what I need is a plan for controlling air flow to the radiator. I desire a method that is electricity remotely controlled. My old furnace grate trick might work if I can get some new ones the right size. the radiator is 25" wide so there is no need to be any wider then that though my old one was 32" wide with 78sq in of open area. My thought was to make a hole in the front board that was ~25" by 3 or 4 high.

x out area:


the back side I plan to frame the opening for added strength and then use the same board type to make a duct wall back to the radiator edges (stopping 2-3 in away with the board and using foam for the rest to provide a crush zone). I might also use the boards to make the duct top.

My actuators for the old grill block will move about 1/2 inch.
Ideas?
advice?
__________________
  Reply With Quote
The Following 2 Users Say Thank You to Weather Spotter For This Useful Post:
Pawtuckett (07-11-2012), Sven7 (07-07-2012)
Old 07-07-2012, 01:19 PM   #15 (permalink)
Master EcoModder
 
aerohead's Avatar
 
Join Date: Jan 2008
Location: Sanger,Texas,U.S.A.
Posts: 15,883
Thanks: 23,957
Thanked 7,219 Times in 4,646 Posts
ideal

Quote:
Originally Posted by Weather Spotter View Post
Sven7, nice sketch

aerohead:
what do you mean that the Matrix has the ideal shape already? it looks like a brick. I get that the best spot for an air intake will be dead center before any upward angle starts.
In Hucho's text,he depicts an ;ideal' nose which was tested on the 1st-gen Golf/Rabbit.(there should be a photo of it in the photo-archives).
Hucho was one of the aerodynamicists doing the aero-optimizations of Georgio's design,commissioned by VW.
Hucho found that just by radiusing Georgio's original nose,that they could essentially achieve the same low drag as with the 'ideal' nose.
This nose dates at least to Paul Jaray's wind tunnel 'pumpkin seed' model of 1921,also investigated later by Lay,Fachsenfeld,Kamm,Prandtl,Schlor,Railton,Andrea u,Korff,Hibbs,Schenkel,...................... the list goes on forever.
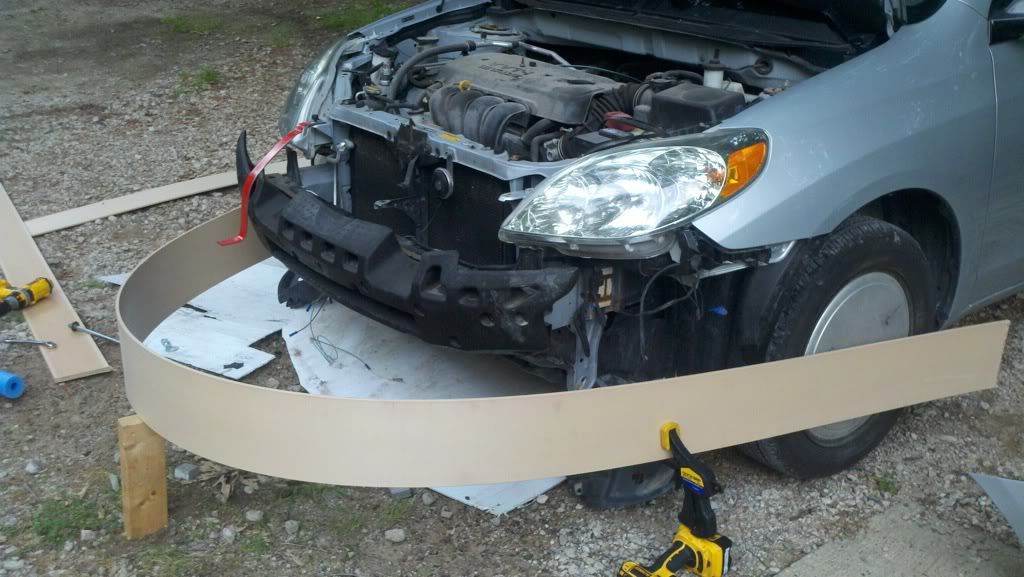
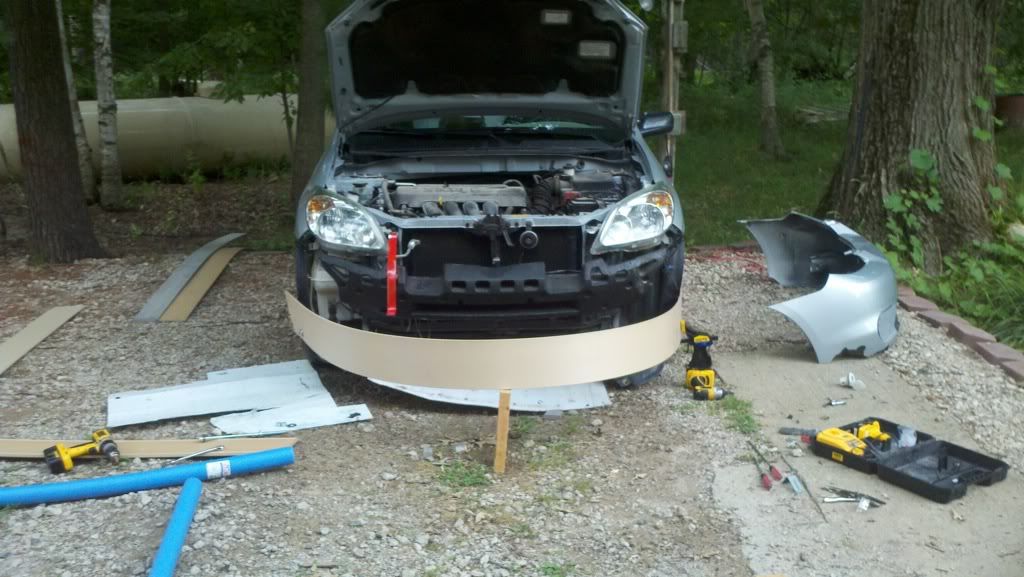
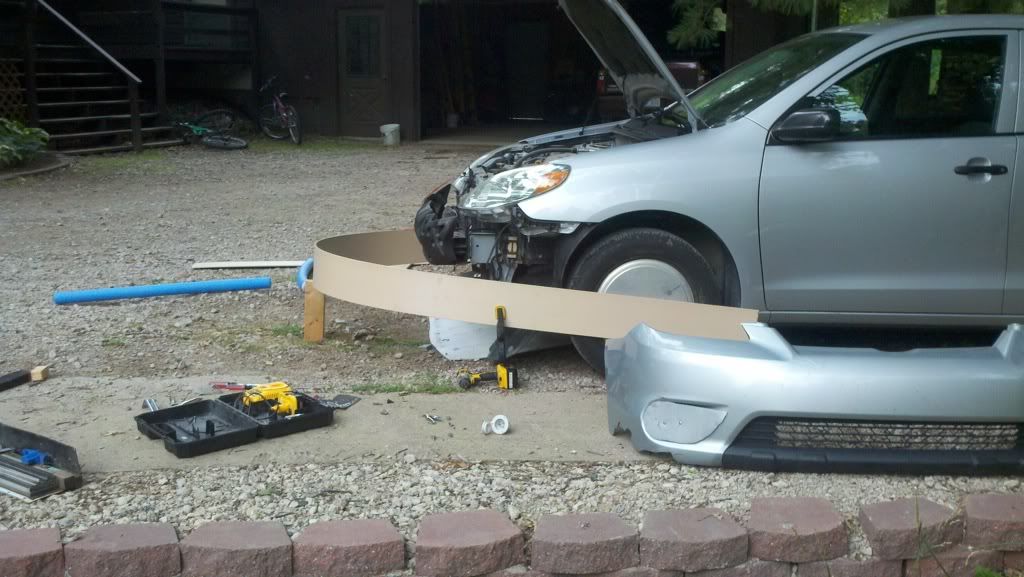
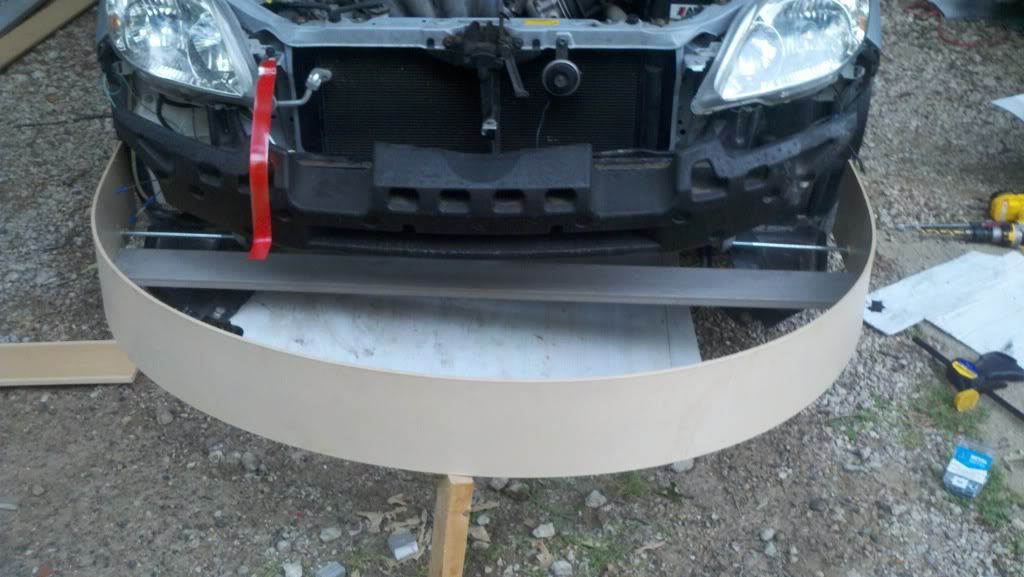
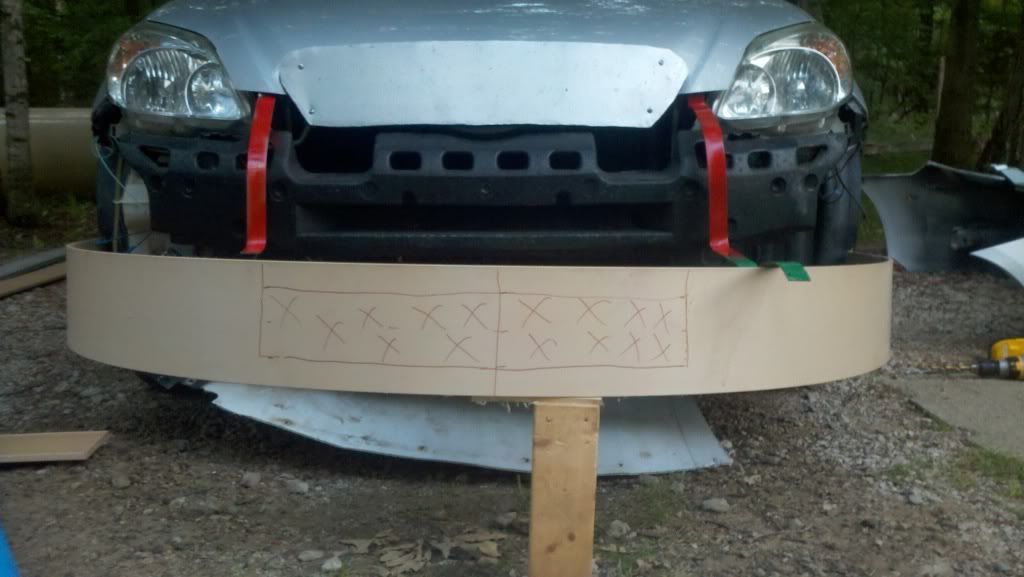
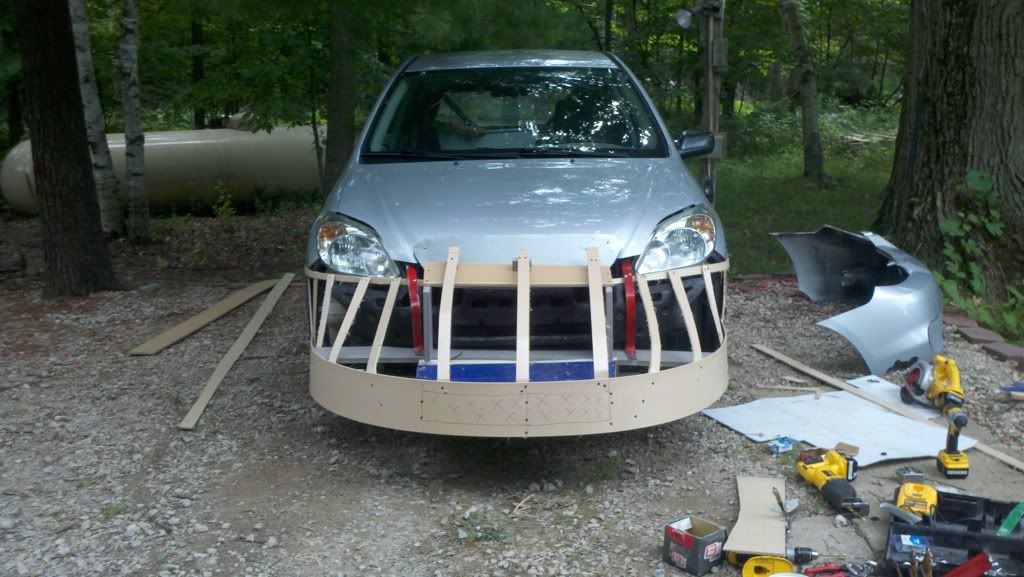
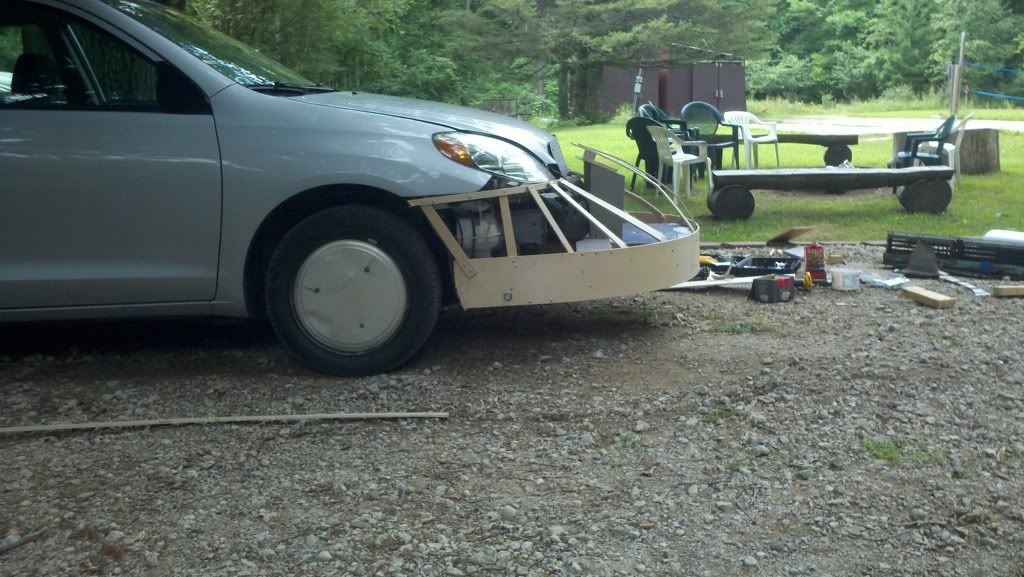
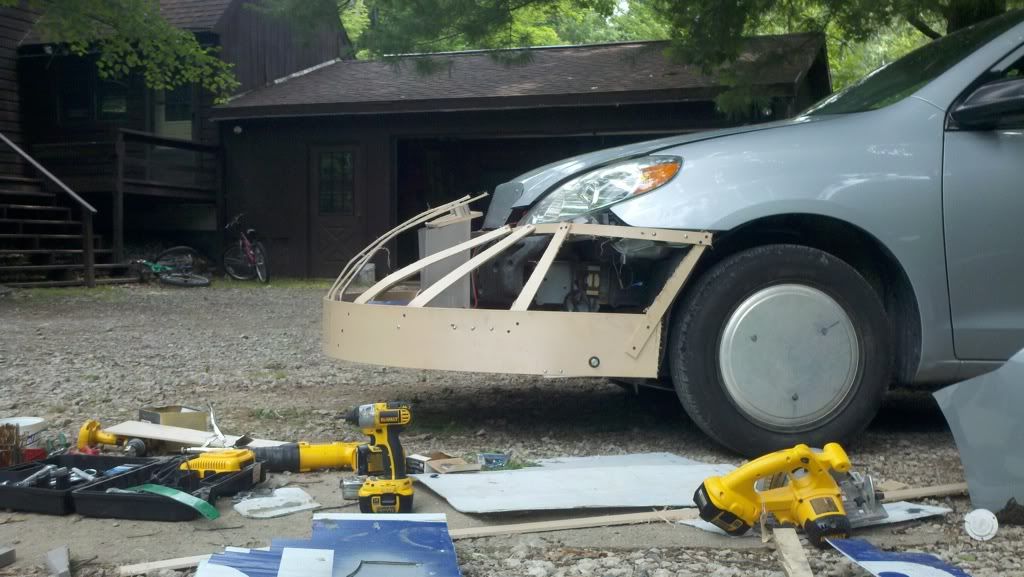
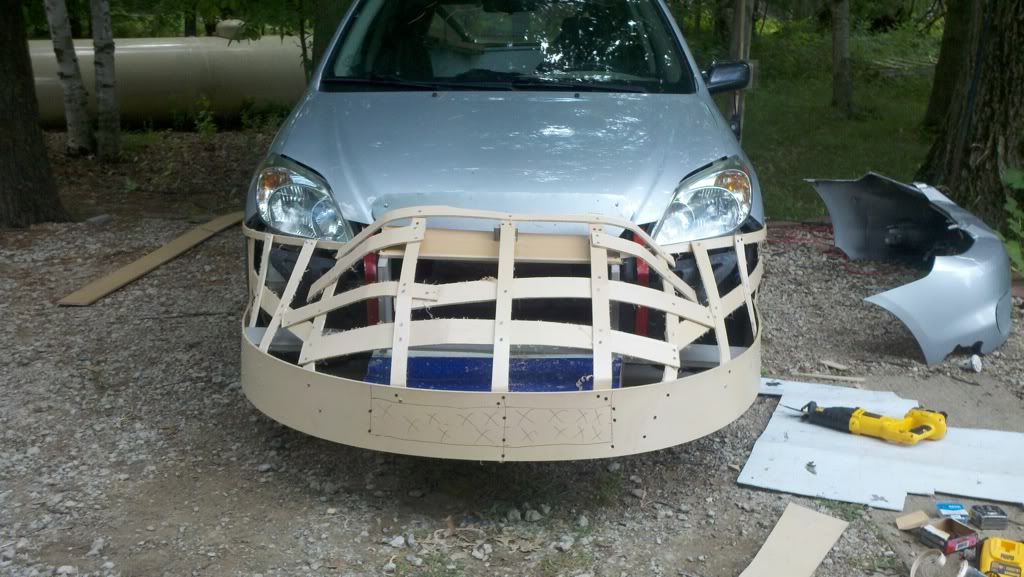
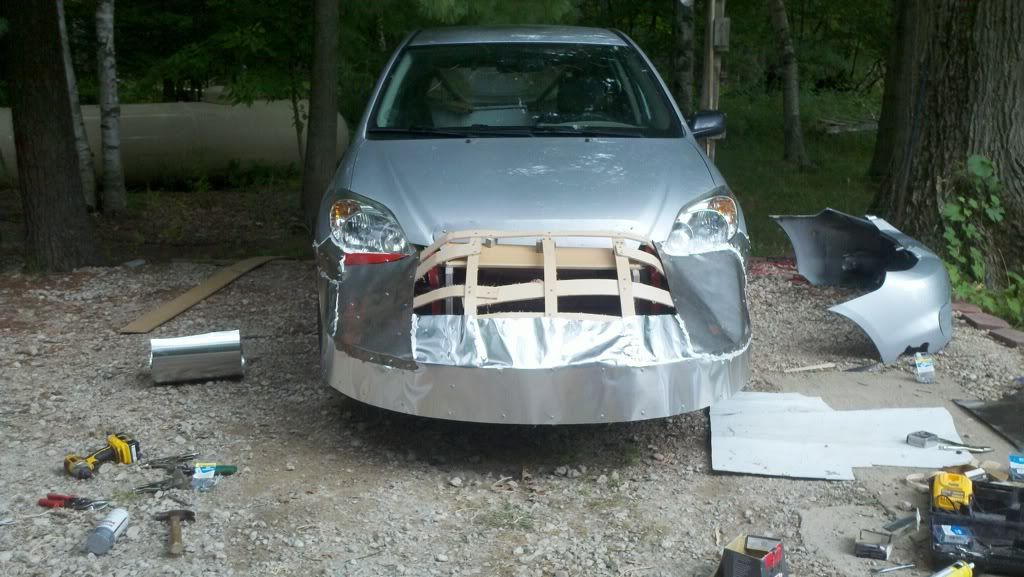
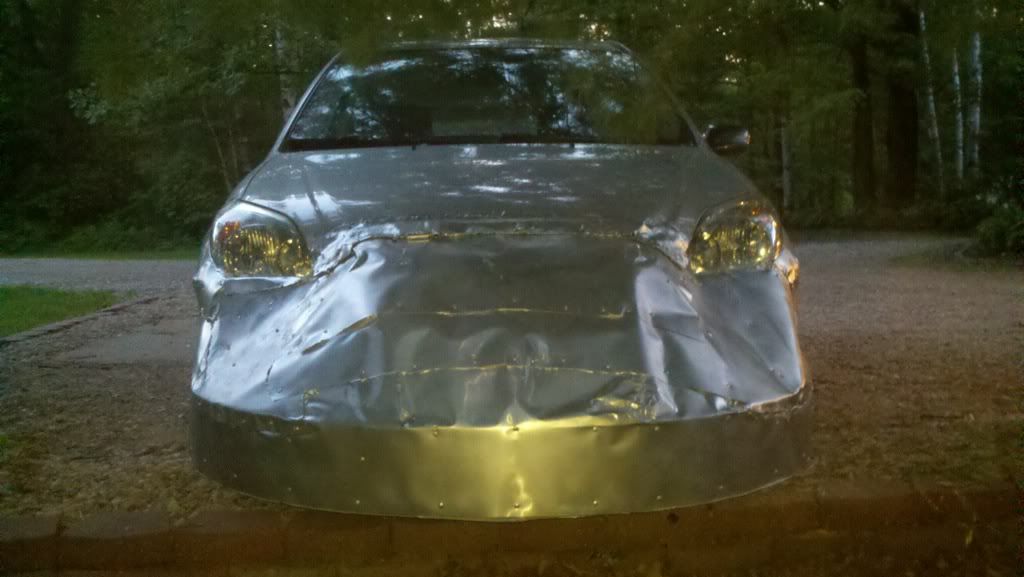
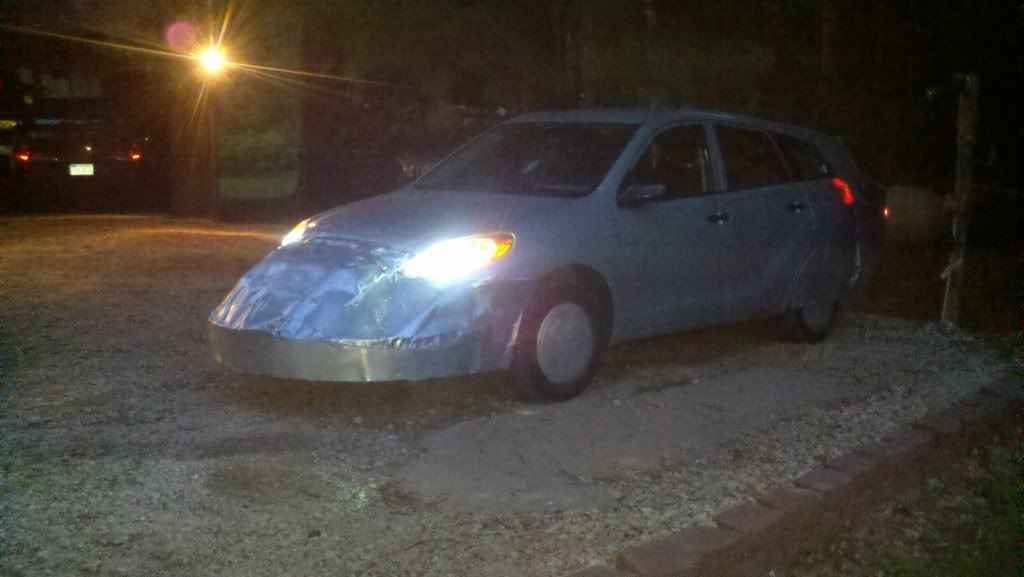
The only thing that would improve what you have,would be to maintain the downward curvature projecting forward,never letting it roll under.(think today's Chevrolet Cruze) or any NASCAR racer.Many ,many others doing it.
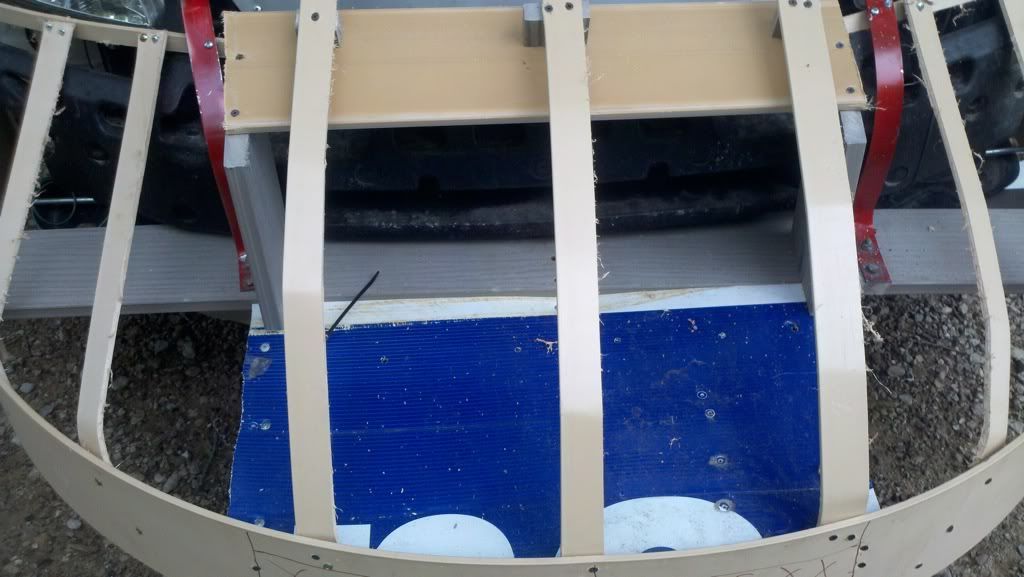
You want the air to go around and over,not under,even if you have a perfect belly pan.Just as depicted in the 'Template' illustration.
Pushing the nose forward would give you room for the Korff inlet and airtight ducting to the radiator,and low forward stagnation point.And all this would be good for high speed stability,as this is where Morelli ended up with CNR.
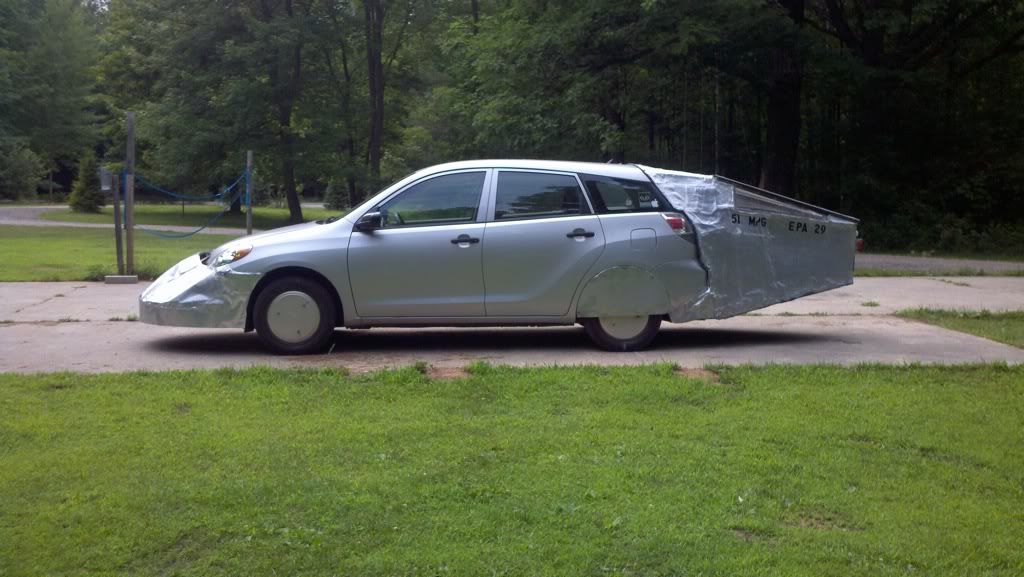
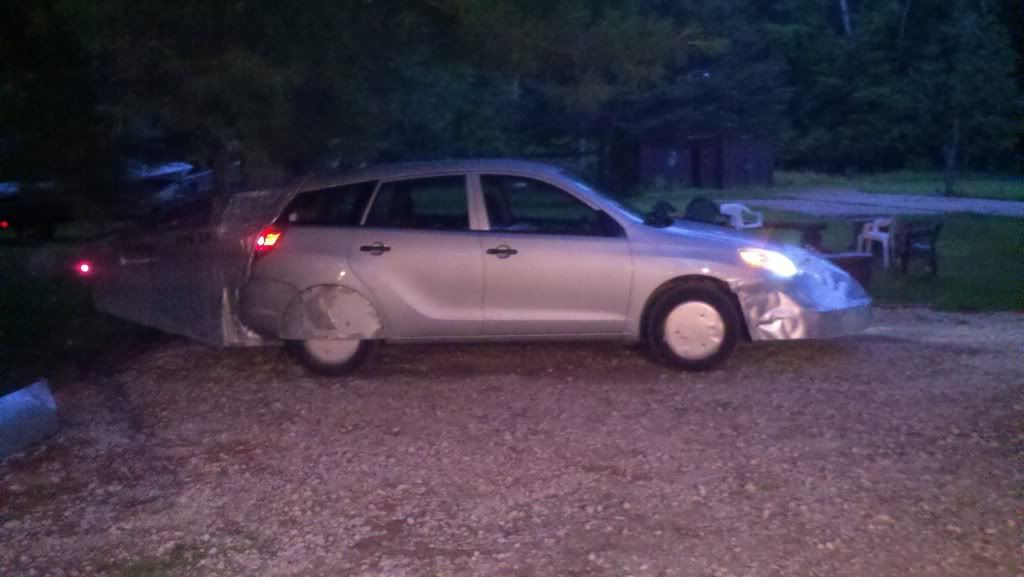
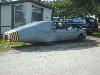
With this nose mod the T-100 is getting 'boat tail' mpg without the boat tail.
I hope to know soon what will happen when the tail goes back on.
GM/Toyota has done a really good job with the Matrix/Vibe.
  Reply With Quote
The Following User Says Thank You to aerohead For This Useful Post:
Cd (07-08-2012)
Old 07-07-2012, 06:13 PM   #16 (permalink)
Wiki Mod
 
Weather Spotter's Avatar
 
Join Date: Nov 2009
Location: Midland MI, USA
Posts: 2,042

Max - '14 Ford C-Max SEL
Thanks: 228
Thanked 304 Times in 210 Posts
Well the car is almost drivable, just need to let some stuff cure up and then attach it and I am ready to roll

I still am not sure how i want to make the new grill block so I left it closed in for now. (its just rebelling and deciding to be in winter mode)

Here is what I got done before I grabbed my camera: (cow catcher look)


I added the top of the air duct (there is a center baffle to allow for 1/2 air flow options)


Can you spot the issue area?
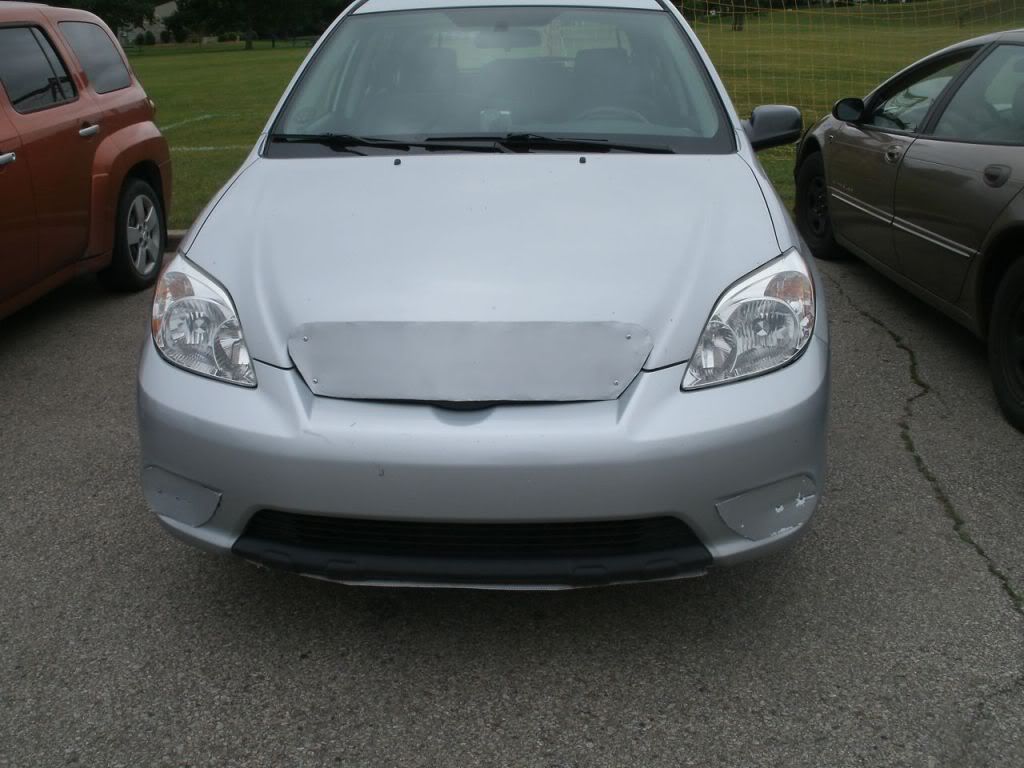
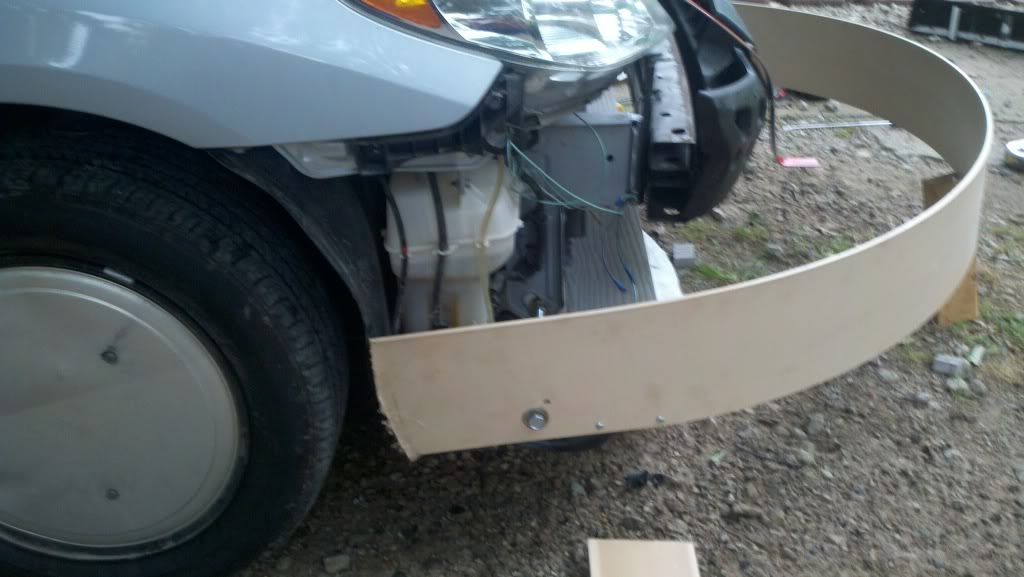
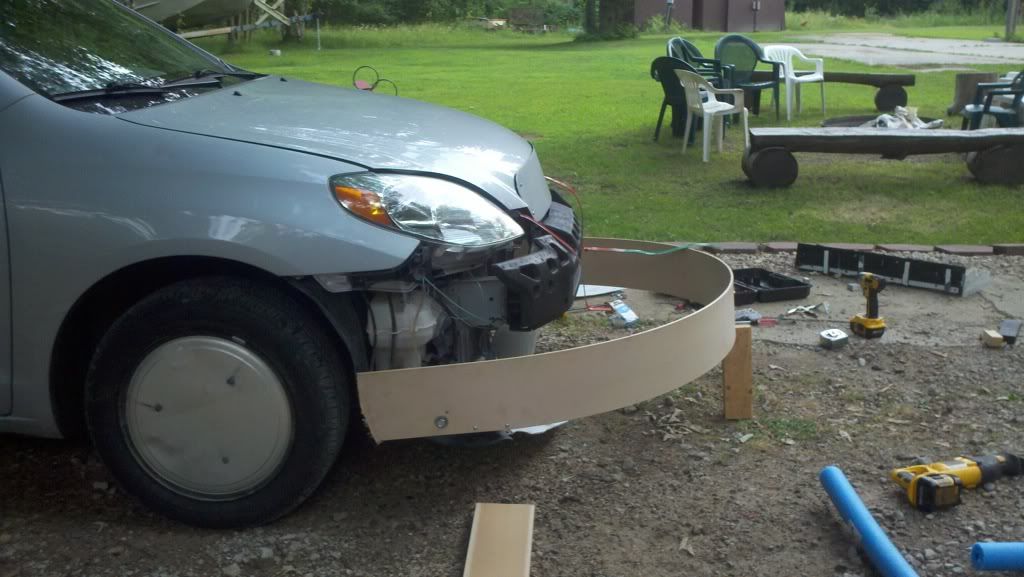
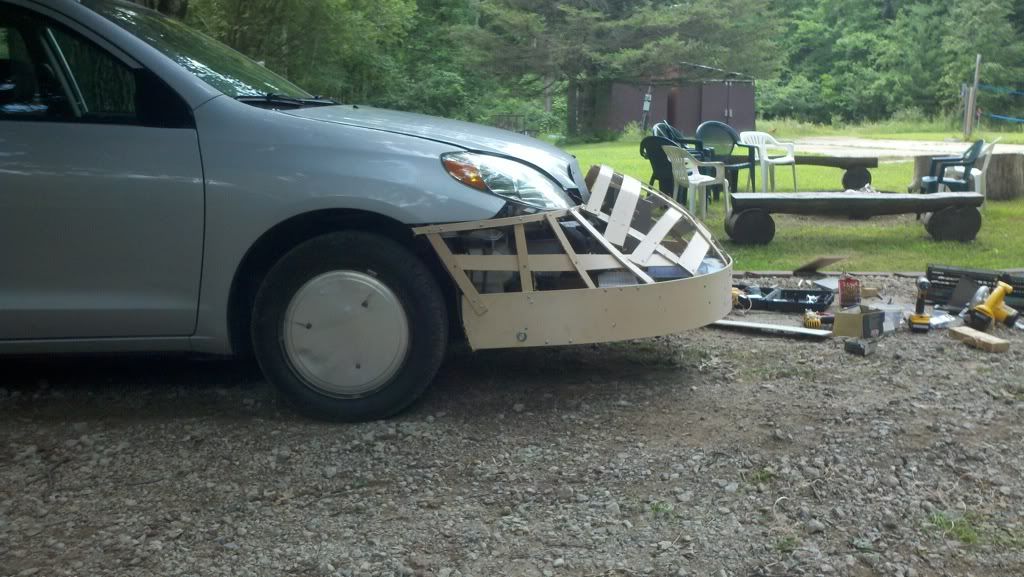
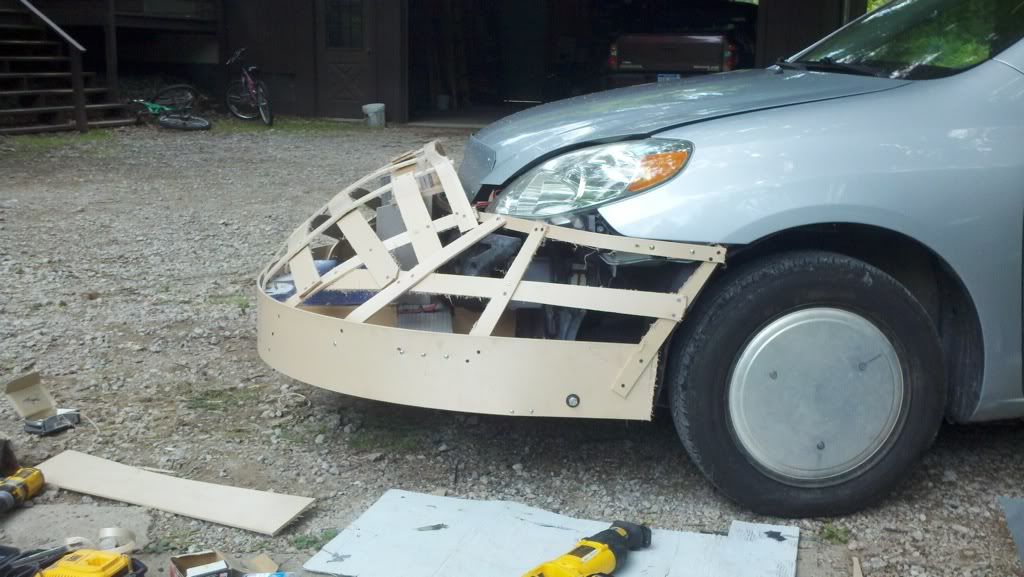
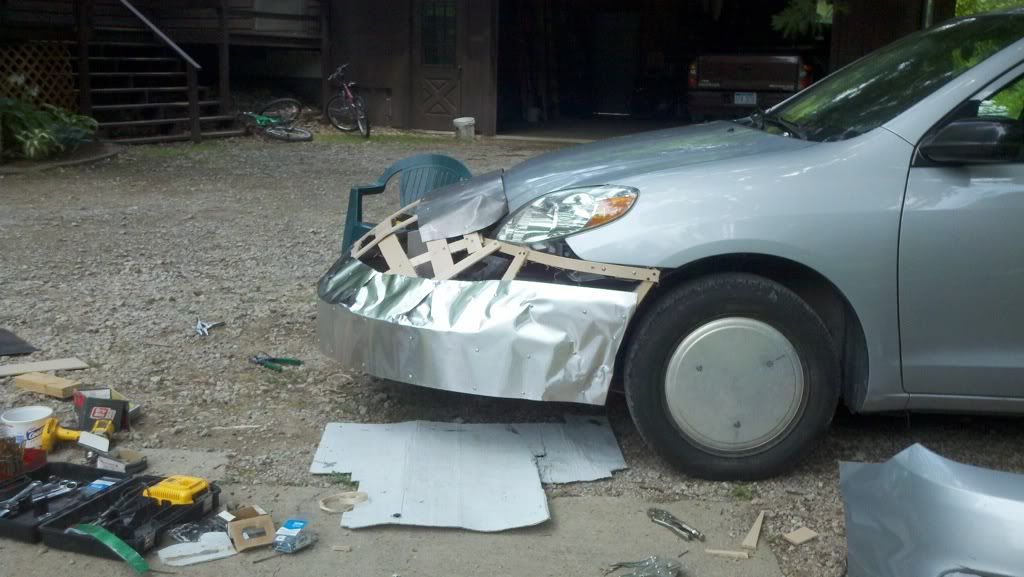
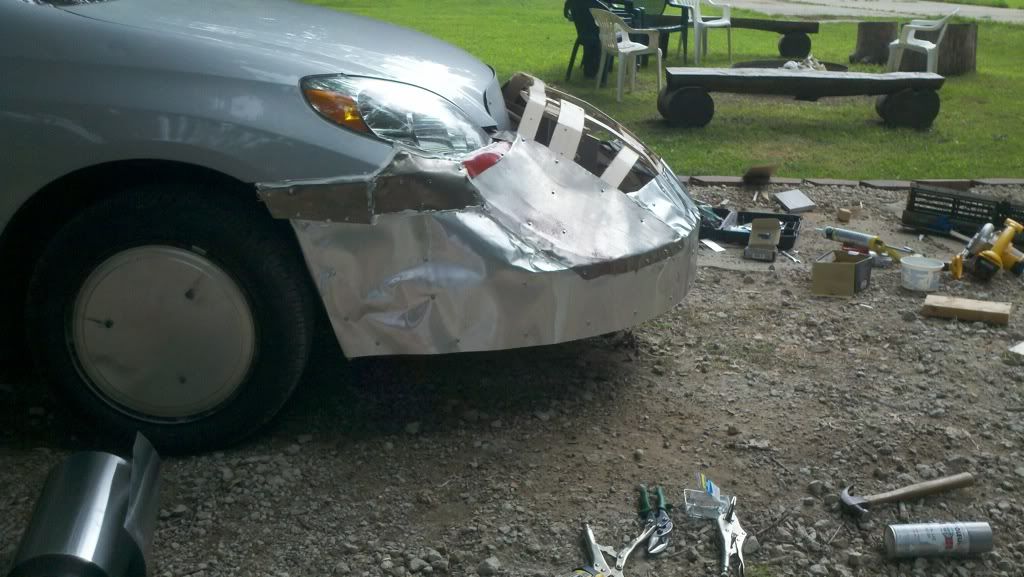
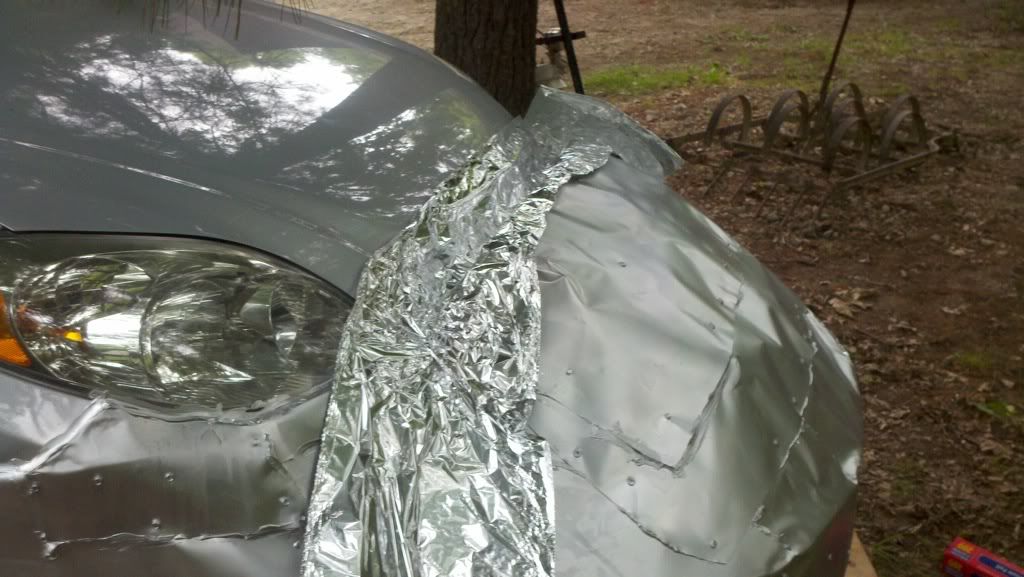
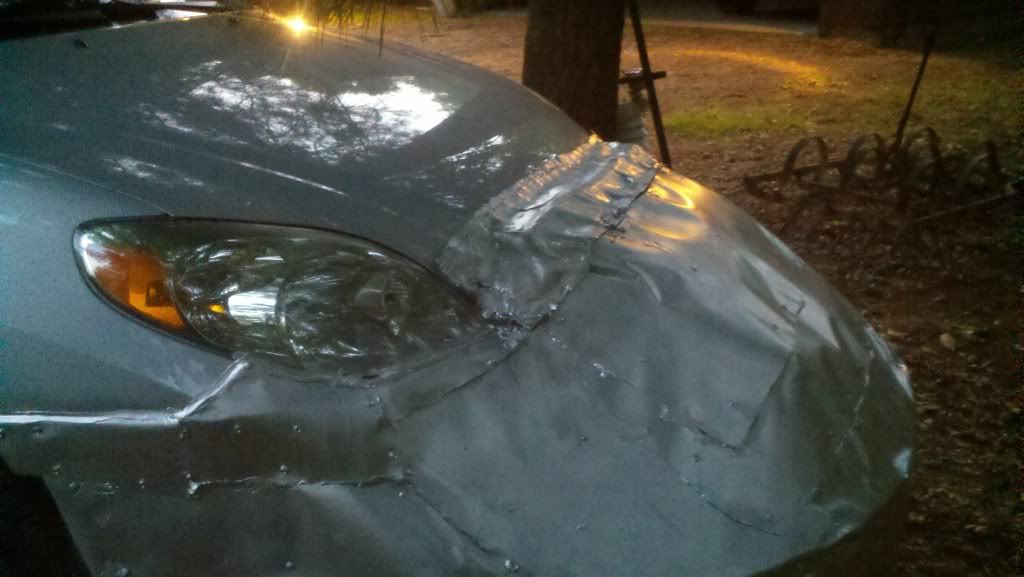
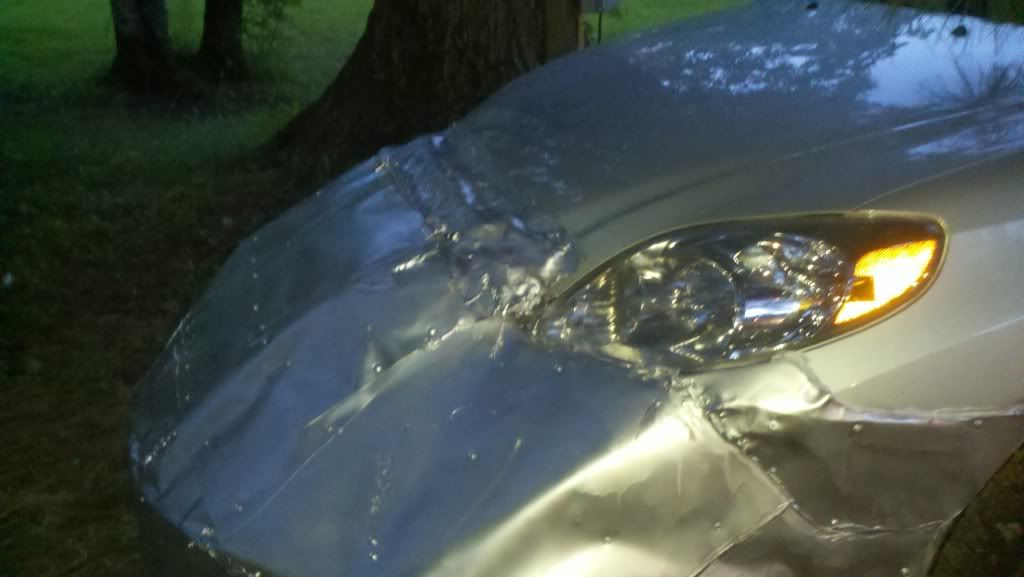
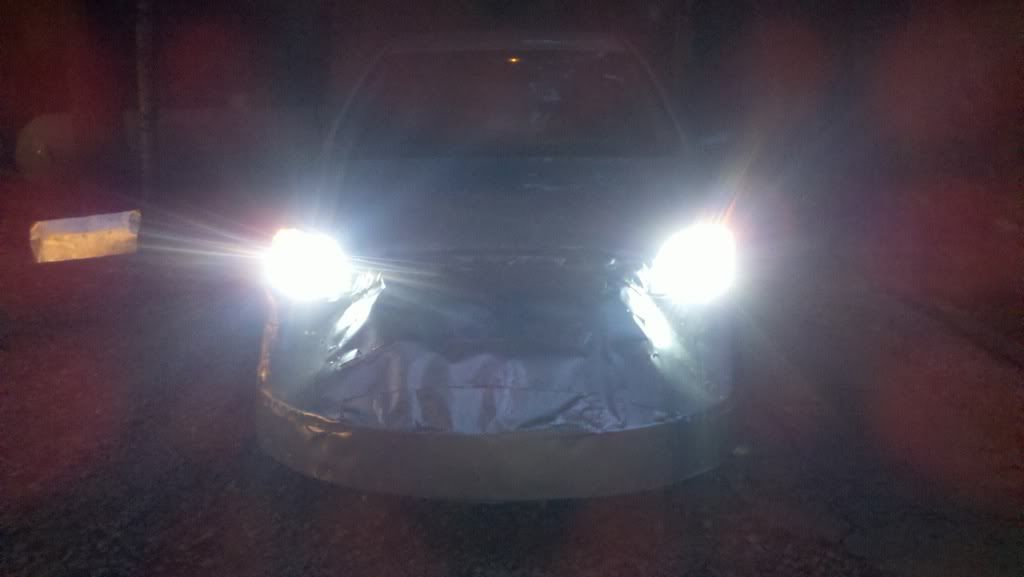
hint it has my first attempt to fix it covering it
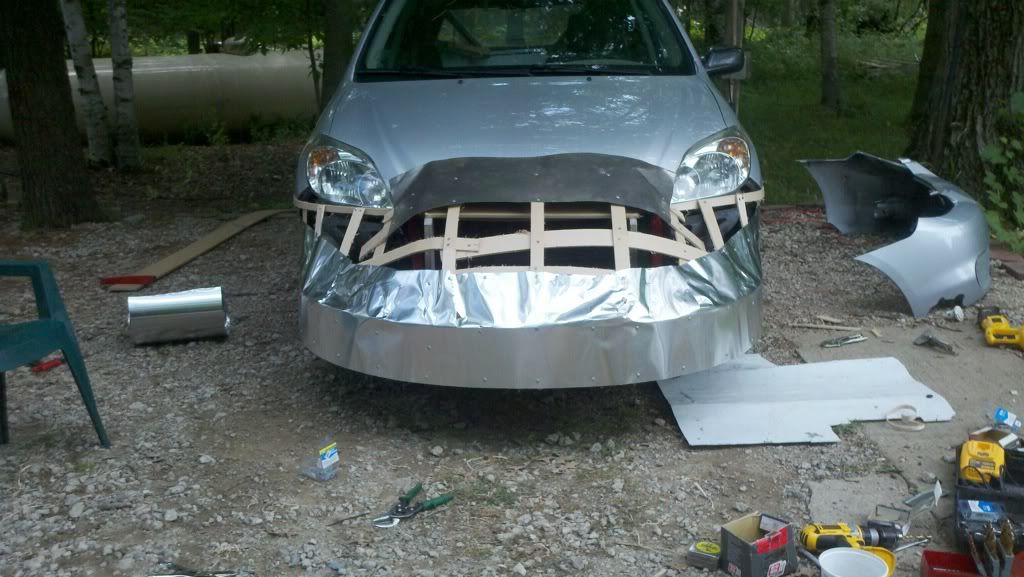
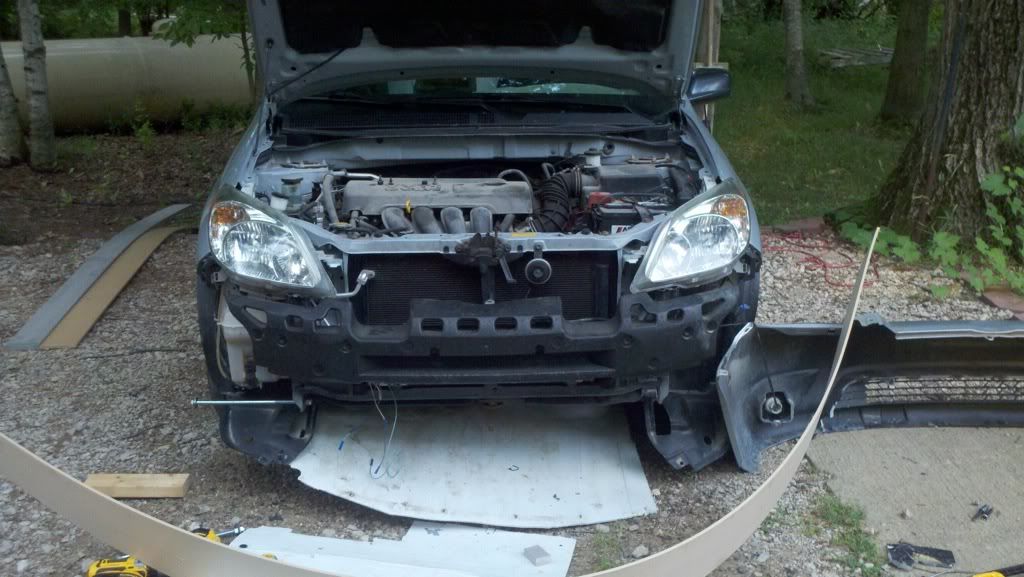
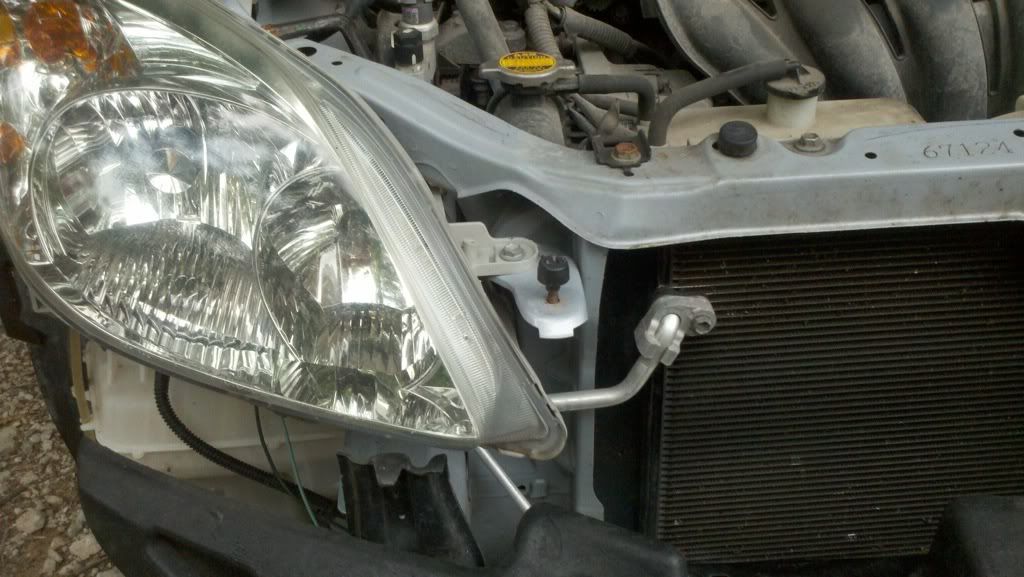
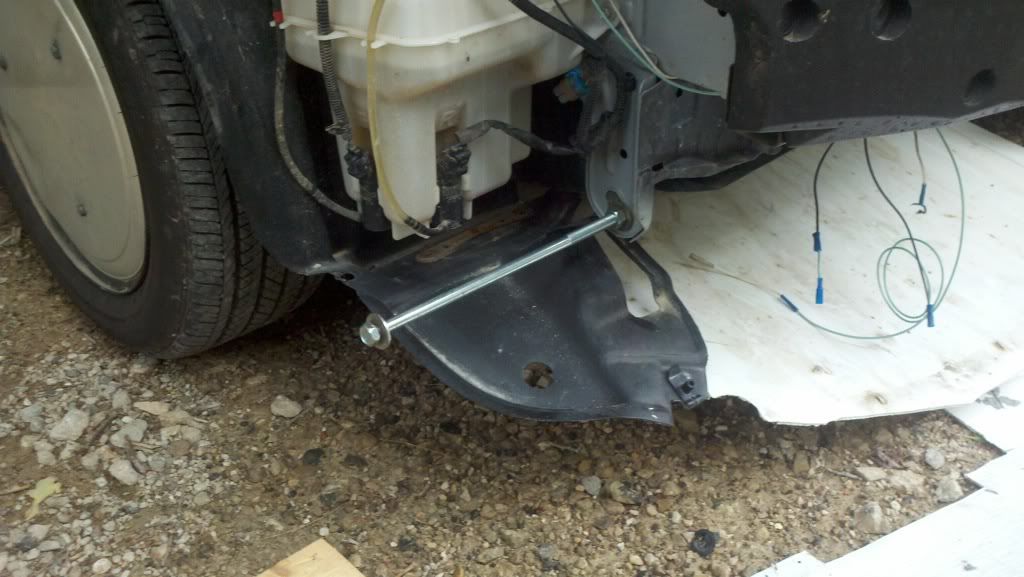
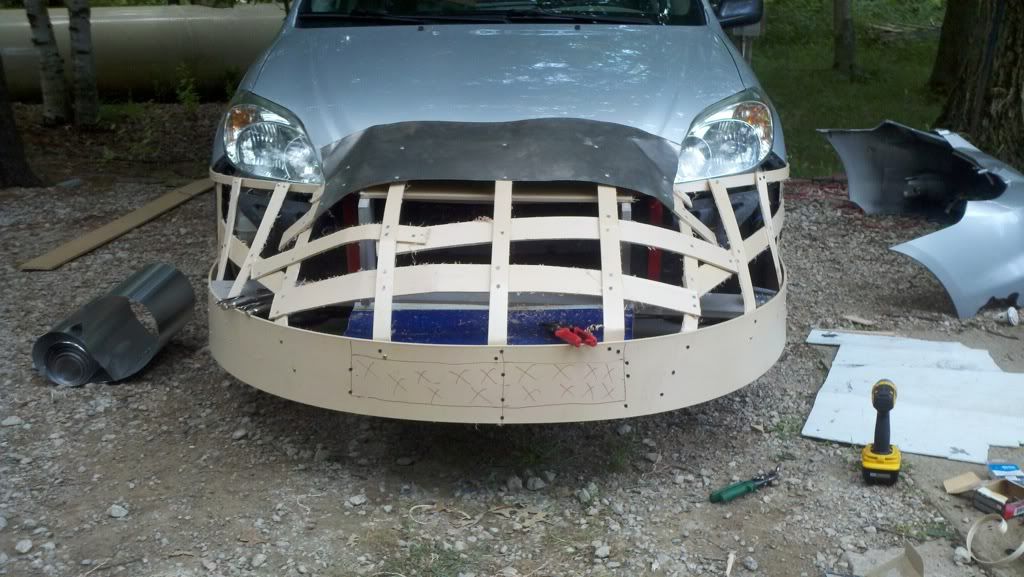
started adding flashing:


Here I used some leftover 24gauge steel for the harder to shape areas as I needed the holding strength. it was left over from the bell pan.


Almost done, just have to make the removable section so I can open the hood. this is turning out to be harder then I was expecting it to be. its a complicated shape and bending sheet metal to fit well is almost imposable. I would have to use 10-12 screws to hold it down and sill it would not be nice ans smooth.


I finally have the car on a almost flat spot and can measure the height off the ground, its about 8.5"


Now to make the removable piece I decided that fiberglass might be the answer. I can form it into place then when its cured it will be thin, removable, strong, and hopefully smooth. I decided to first use alum foil to make a rough mold and then fill it with foam:


this will give the piece some depth to hold it in place and keep the fiberglass in the right shape. The fiberglass is now curing, then I can take it out and remove as much of the foil as I can. then some sanding and it "should pop right in". to hold it in I was thinking of getting a key lock and using that to prevent the piece from coming out unless I want it to. or i might just screw it down.

other ideas?
__________________
  Reply With Quote
The Following User Says Thank You to Weather Spotter For This Useful Post:
Pawtuckett (07-11-2012)
Old 07-07-2012, 09:59 PM   #17 (permalink)
Wiki Mod
 
Weather Spotter's Avatar
 
Join Date: Nov 2009
Location: Midland MI, USA
Posts: 2,042

Max - '14 Ford C-Max SEL
Thanks: 228
Thanked 304 Times in 210 Posts
Well I took it for a dusk spin:


At this point the gap sealer has to be removed to open the hood. I tried some hinges but I cannot get enough of an angle to have the hood clear the door/ gap filler/ removable chunk. It will open almost vertical but the depth and edge curves make it hit the hood. I could try to get it to open father but then I run the risk of having a gap between the nose cone and trap door.

The hinges were kept as they make a nice attachment point to hold the piece onto the car.

Test run showed no issues and a cold engine and drive train cost down test was just a bit longer then my old (no tail, belly pan and regular tires) test I did 2 years ago. This just tells me I did not screw up the areo that bad

Now I can get to church tomorrow without having to bike

I plan on looking for a good grill block after church. Send the ideas in they might trigger a workable plan. I am toying with just making an opening and calling it good but that seems like the cop out method. help me get something to work
__________________
  Reply With Quote
Old 07-07-2012, 11:26 PM   #18 (permalink)
MPG Militia HMV-25E80+A
 
JethroBodine's Avatar
 
Join Date: Mar 2011
Location: Vermont, USA
Posts: 823

FrankenJetta D - '90 Volkswagen Jetta GL
Boat tails and more mods
Diesel
TEAM VW AUDI Group
90 day: 64.35 mpg (US)
Thanks: 191
Thanked 144 Times in 98 Posts
You weren't kidding when you said you were busy today.

I thought the nose was the grill block. Or is the bottom open?

On mine(once it's running again) I'm going to reshape the front bumper so I don't have to leave cut outs for the ends where the blinkers are, remount the lights to the chin, fully enclose the front and duct some NACA openings underneath up to the radiator. Did that make sense?
__________________


Quote:
It is always very amusing how our imagination is put to the test when overcoming reality. Redyaris
Boat tail project
How to gently bump start during EOC
  Reply With Quote
Old 07-07-2012, 11:43 PM   #19 (permalink)
GRU
Master EcoModder
 
GRU's Avatar
 
Join Date: Oct 2011
Location: Windsor ON Canada
Posts: 373

silver bullet - '00 Honda Civic
90 day: 34.41 mpg (US)
Thanks: 21
Thanked 37 Times in 32 Posts
Good job. i love seeing new ideas and projects but (don't take this the wrong way) i would have a hard time driving around town with my car looking like that
__________________

  Reply With Quote
Old 07-08-2012, 01:07 AM   #20 (permalink)
Got soul?
 
Soulster's Avatar
 
Join Date: Aug 2010
Location: Midland, MI, USA
Posts: 35

Soulster - '10 Kia Soul Plus
90 day: 35.36 mpg (US)

100k POS - '01 Dodge Neon
Thanks: 1
Thanked 1 Time in 1 Post
Hard time driving...try riding! I ride in with him to church on Sundays, but my saving grace is that his passenger seat slides back enough for me to duck under the window sill level )

(In case you haven't caught the connection, I'm one of his brothers.)

P.S. If any of you want specific aero help I can give you the email of my aerodynamics professor and/or the aeronautical departments contact info. (I'm on the Aviation Council at Western Michigan University)

  Reply With Quote
The Following User Says Thank You to Soulster For This Useful Post:
Tango Charlie (07-11-2012)
Reply  Post New Thread


Similar Threads
Thread Thread Starter Forum Replies Last Post
DIY Rubber Front Wheel Skirts newtonsfirstlaw DIY / How-to 32 05-19-2011 07:45 AM
front end mod questions puddleglum Aerodynamics 0 10-18-2009 10:34 PM
Front Wheel Skirts on LA Metro Bus cfg83 Aerodynamics 8 09-06-2009 05:59 PM
Aero Front End Possibility? Coyote X Aerodynamics 12 06-07-2008 12:43 AM
Front VS Rear drive on electric bennelson Fossil Fuel Free 18 02-03-2008 03:10 PM


Powered by vBulletin® Version 3.8.11
Copyright ©2000 - 2024, vBulletin Solutions Inc.
Content Relevant URLs by vBSEO 3.5.2
All content copyright EcoModder.com