11-12-2009, 07:08 PM
|
#2571 (permalink)
|
|
PaulH
Join Date: Feb 2008
Location: Maricopa, AZ (sort of. Actually outside of town)
Posts: 3,832
Thanks: 1,362
Thanked 1,202 Times in 765 Posts
|
Hey Alvin! Have you gotten the new chip yet? You will have to turn the pot on the control board clockwise about 1/5 of the range of motion. Then if you have a computer with a serial port, you can change various settings.
By the way, I think it doesn't matter at all if you include something to support the capacitors or not.
|
|
|

|
 Today Today
|
|
|
|
 Other popular topics in this forum...
|
|
|
|
|
11-12-2009, 07:17 PM
|
#2572 (permalink)
|
|
EcoModding Apprentice
Join Date: Aug 2009
Location: Tn
Posts: 126
Thanks: 14
Thanked 19 Times in 16 Posts
|
Hi Paul. No I have not gotten it yet but thanks in advance. I just noticed your other thread this morning. You just don't quit do you? Ha Ha
Thanks again
Alvin
|
|
|
|
|
11-12-2009, 09:45 PM
|
#2573 (permalink)
|
|
EcoModding Lurker
Join Date: Jun 2009
Location: Australia
Posts: 35
Thanks: 0
Thanked 3 Times in 3 Posts
|
Quote:
Originally Posted by sawickm

Hey, are you guy's using the revision "D" controller 
If you are could you post the rev.D firmware in the wiki ??? the schematic and artwork is in there, but no firmware was posted.
The Rev.D controller has pre-charge and extra I/O on-board.
Thanks,
-Mark |
Mark,
The reason there is no firmware for revision D in the wiki is that I haven't written it yet.  I've just got a working hardware prototype, so I will be doing that soon ( a week or two).
Don |
|
|
|
|
11-12-2009, 10:39 PM
|
#2574 (permalink)
|
|
EcoModding Lurker
Join Date: Sep 2009
Location: Western NY
Posts: 27
Thanks: 5
Thanked 1 Time in 1 Post
|
Paul
I'm working on the kit and tweeking the instructions. What is the sequence for J2? I guess I could look up the pin outs on a DB9. Als, am I supposed to have 3 or 4 polypropylene caps? I only got three in my kit.
John
|
|
|
|
|
11-12-2009, 10:51 PM
|
#2575 (permalink)
|
|
PaulH
Join Date: Feb 2008
Location: Maricopa, AZ (sort of. Actually outside of town)
Posts: 3,832
Thanks: 1,362
Thanked 1,202 Times in 765 Posts
|
Hey John! I've made about 6 controllers with 3 polypropylene caps, and then I tried one with 4, and it caused clearance problems, since I didn't have enough room for the 4th one to lay flat. It doesn't seem to affect performance at all, so I should change the directions to reflect that.
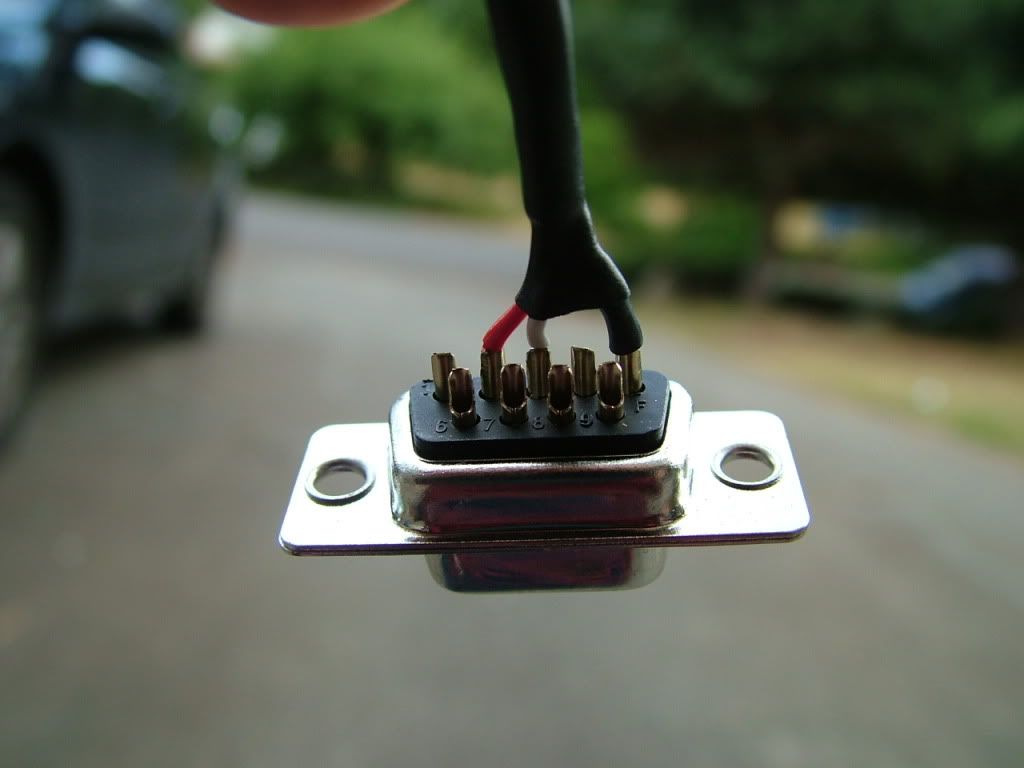
Here are a couple pictures for J2:
This is a picture from the DB9 top (the 5 pins sticking out):

And here's another view:
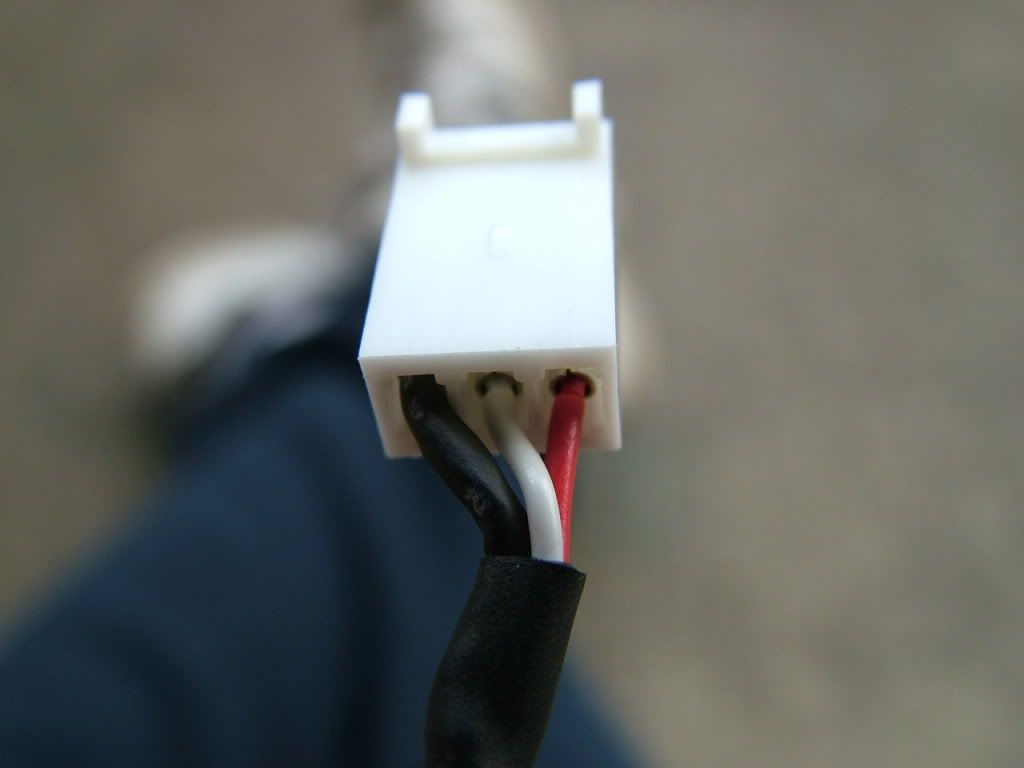
And now for the side that goes into the control board......... You are looking at the top. If I didn't send that part (it's easier just to solder the dang wires right into the holes), then just solder the wires in the same order. (black white red, left to right, or whatever colors they are now. hehe.)
 |
|
|
|
|
11-12-2009, 10:54 PM
|
#2576 (permalink)
|
|
PaulH
Join Date: Feb 2008
Location: Maricopa, AZ (sort of. Actually outside of town)
Posts: 3,832
Thanks: 1,362
Thanked 1,202 Times in 765 Posts
|
And the 3 should lay like this:
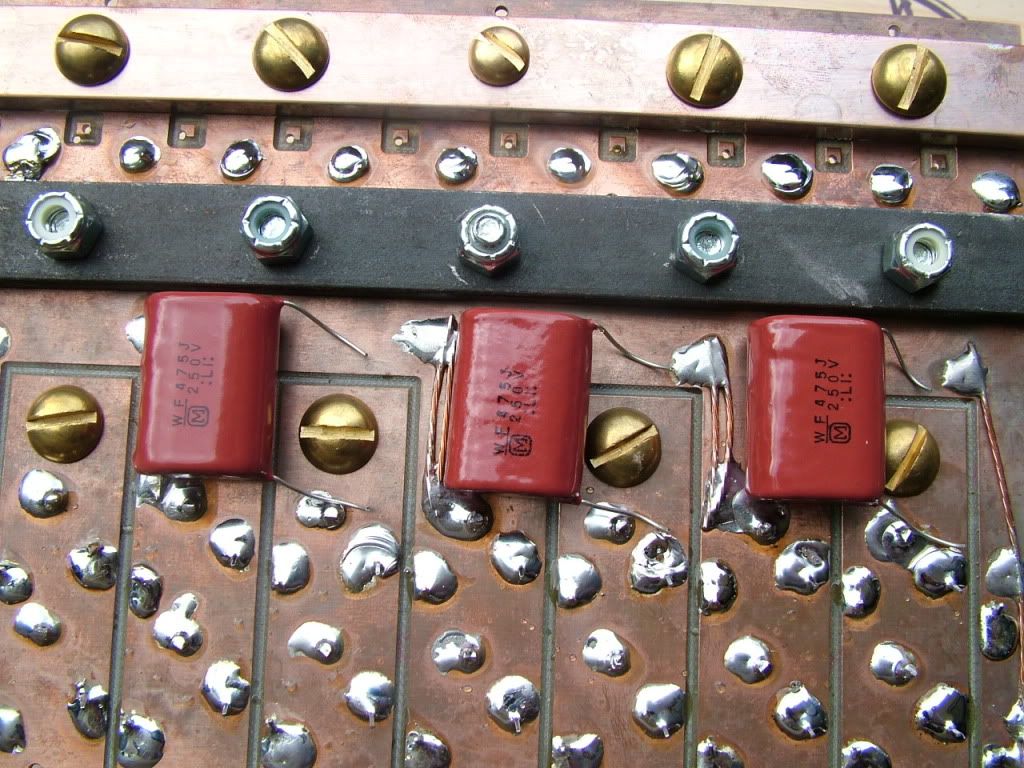
You may have 2.2uF ones, and the ones in that picture were 4.7uF. I was told by people that know a lot more than me that the capacitance wasn't the important thing, just the ESR. |
|
|
|
|
11-13-2009, 02:24 PM
|
#2577 (permalink)
|
|
Joe
Join Date: Feb 2009
Location: phx
Posts: 260
Thanks: 0
Thanked 48 Times in 38 Posts
|
Quote:
Originally Posted by Renny_D
On the heat spreader I assume thicker is better but has any body done a fined one? I thought of just getting a block and a carbide bit for my table saw and doing some machining of fins for better cooling?
PS would love to see more videos and pics of completed units and completed units in cars.
|
Regarding the heat spreader, it's purpose is to move heat to the heat exchanger (whatever you happen to choose as your heat exchanger - i have a finned heatsink under the baseplate) and keep a more uniform temperature across all the mosfets and diodes (particularly the diodes).
If it's too thick and increases the distance between the mosfets and heat exchanger, you'll lose thermal efficiency and the controller will run hotter. Too thin and you'll increase the likelihood of different component temperatures.
Regarding the base plate, a thinner material may help if you have a heat sink attached to the bottom. You want to get the components as close to the heat exchanger as possible. In fact, removing the base plate and having the heat spreader bolt right to the heatsink would be best, though I think the actual difference may be insignificant, like a couple degrees.
If you don't have a heatsink/coldplate/heatpump or something, you better be taking short trips at low amperage and/or low voltage. A large baseplate may have enough thermal mass to 'soak up' the heat after a short drive, but without a real heat exchanger that heat will stay there for a while.
Here's a picture of the Curtis I had before - the Cougar is now in its place. You can barely make out the heatkink fins underneath - there's also 3 muffin fans moving some air through the heatsink fins.
|
|
|
|
|
11-13-2009, 04:23 PM
|
#2578 (permalink)
|
|
Master EcoModder
Join Date: Sep 2009
Location: Ireland
Posts: 734
Thanks: 26
Thanked 304 Times in 171 Posts
|
Paul i think it was mainly the 16 and 18series pics but i'll double check. Bauer household has the flu right now ,obviously a bio weapon so will be a day or so. |
|
|
|
|
11-13-2009, 07:11 PM
|
#2579 (permalink)
|
|
EcoModding Apprentice
Join Date: May 2009
Location: Orrville, Ohio
Posts: 108
Thanks: 9
Thanked 2 Times in 2 Posts
|
Bus bar direction & Heatsink
Hi,jyanof. Good to hear your controller is holding up. Have ordered ,by way of wifes good graces, the control board and parts for my own controller project. Wanted to ask if your bus bars all point the same way, and if I could build it that way without harming anything. Also was thinking of a thin baseplate and heatsink, with 2 12v computer fans. Keep us posted, Watt.
|
|
|
|
|
11-13-2009, 08:23 PM
|
#2580 (permalink)
|
|
Joe
Join Date: Feb 2009
Location: phx
Posts: 260
Thanks: 0
Thanked 48 Times in 38 Posts
|
Quote:
Originally Posted by watt-a-mezz
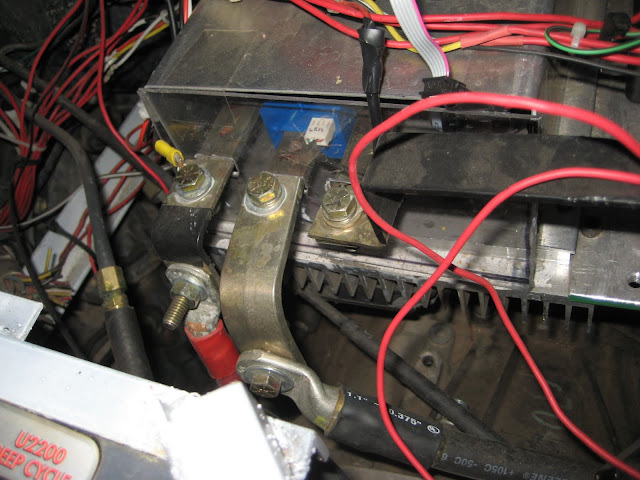
Hi,jyanof. Good to hear your controller is holding up. Have ordered ,by way of wifes good graces, the control board and parts for my own controller project. Wanted to ask if your bus bars all point the same way, and if I could build it that way without harming anything. Also was thinking of a thin baseplate and heatsink, with 2 12v computer fans. Keep us posted, Watt.
|
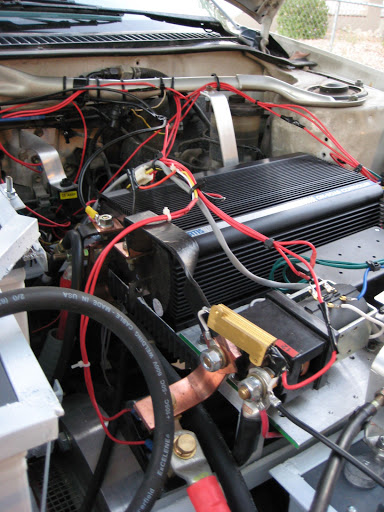
Now that I'm home, I took a picture of the new controller. Yes, all 3 bus bars go out the same direction and I made some bus 'adapter' bars so that the lugs didn't interfere. I did something similar with the Curtis, and no problems so far.
|
|
|
|
|