Go Back   EcoModder Forum > EcoModding > Aerodynamics
Register Now
 Register Now
 

Reply  Post New Thread
 
Submit Tools LinkBack Thread Tools
Old 03-12-2011, 07:37 PM   This thread is in the EcoModder Project Library | #1 (permalink)
OCD Master EcoModder
 
brucepick's Avatar
 
Join Date: Dec 2007
Location: Eastern CT, USA
Posts: 1,933

Outasight - '00 Honda Insight
Team Honda
Gen-1 Insights
90 day: 54.18 mpg (US)
Thanks: 429
Thanked 391 Times in 261 Posts
Belly Pan Build with pics - '97 Civic

I started on it today!
Wifey already knows that's what I'm working on tomorrow (Sunday)!

I really have to thank basjoos (especially!!) and the other folks who've been contributing to the Belly Pan How-To thread. You made it a lot easier to resolve the zillion questions I had.

Basic plan is 4'x4' coroplast from front lip to rear of front wheel cutout. It's split down the middle and will have 24" wide aluminum flashing spliced in (pop rivets, with fender washers on both sides of the join). 2" overlap at each seam gives 68" wide material which is about 4-5" more than the car width. That gives me some room to play while building. Exhaust runs down the middle here so the flashing should be good for that.

So far I've built one seam, the rest of today's work on this project was prep: buying fasteners, jacking car, yada yada.

Second section will be 48"x74" coroplast, also cut with same 24" flashing spliced in under the exhaust. That goes to the front of the rear wheel cutout - basically the rocker panel, which is the 74" dimension. Exhaust takes a jog over to passenger side so it won't be a straight split down the middle.

Rear section is about 44" long. Goes from rear corner of rocker panel to the rear bumper lip. Will be covered by the last piece of 4x4 coroplast, cut/patched with the 24" flashing for the exhaust area and to make up the needed width.

I'm just getting started. Hope to take some pics tomorrow.

Status Update, Mar 19, 2011:

__________________
Coast long and prosper.
Driving '00 Honda Insight, acquired Feb 2016.


Last edited by brucepick; 03-19-2011 at 10:22 PM.. Reason: Added a bunch of pics and text.
  Reply With Quote
Alt Today
Popular topics

Other popular topics in this forum...

   
Old 03-14-2011, 08:39 PM   #2 (permalink)
OCD Master EcoModder
 
brucepick's Avatar
 
Join Date: Dec 2007
Location: Eastern CT, USA
Posts: 1,933

Outasight - '00 Honda Insight
Team Honda
Gen-1 Insights
90 day: 54.18 mpg (US)
Thanks: 429
Thanked 391 Times in 261 Posts
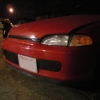
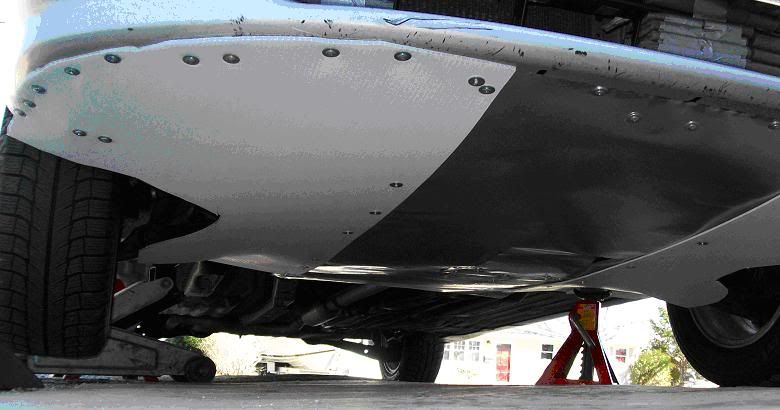
This was a day's work. I got started right after breakfast, took about 3 hours off for lunch and a few other things. It was just about dark when I quit. I got the front section done, though it does need some tweaks still.

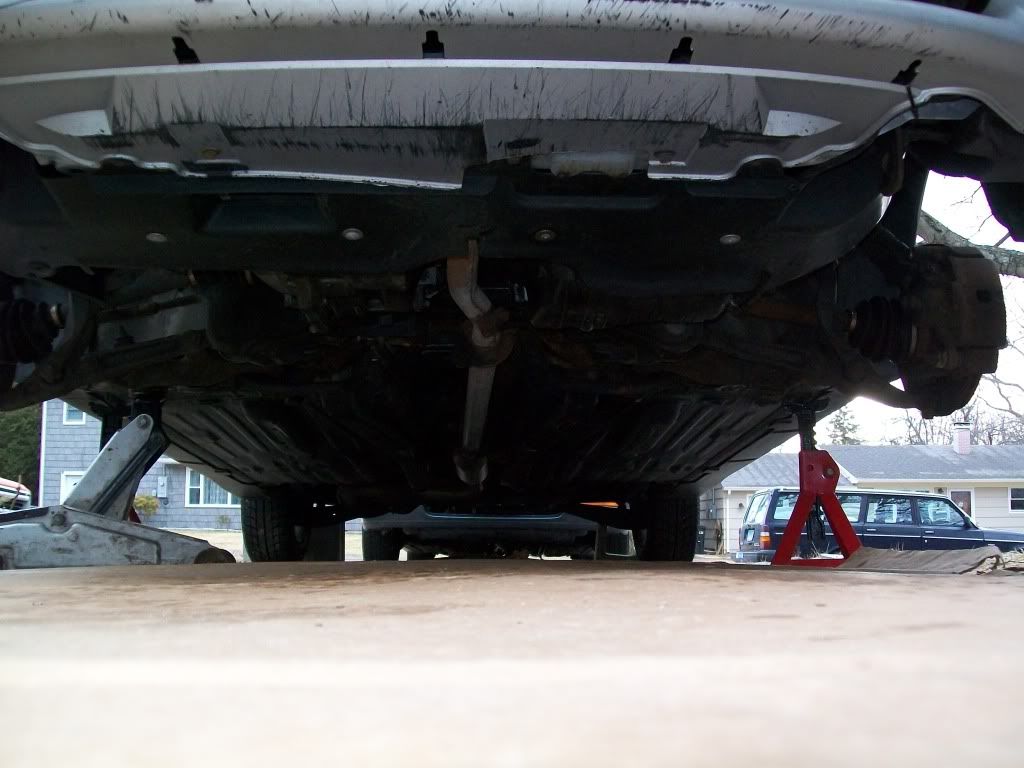
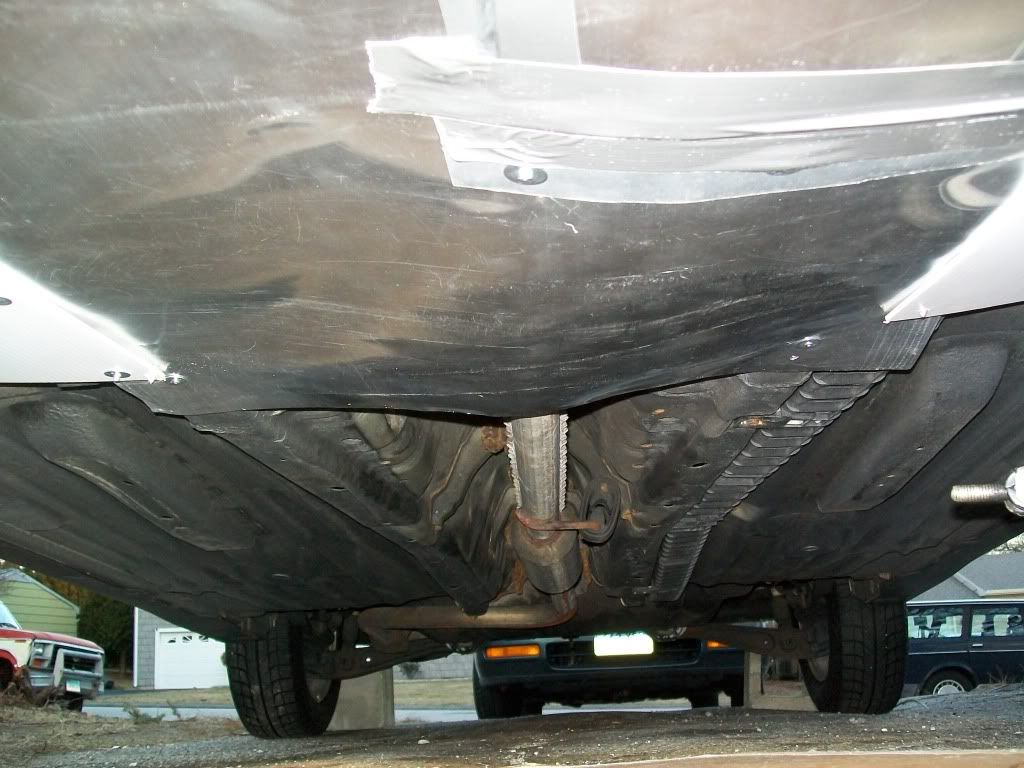
Here's a shot towards the rear. You can see the exhaust running down the middle. It takes a jog over to passenger side about a foot forward of the rear wheel well.


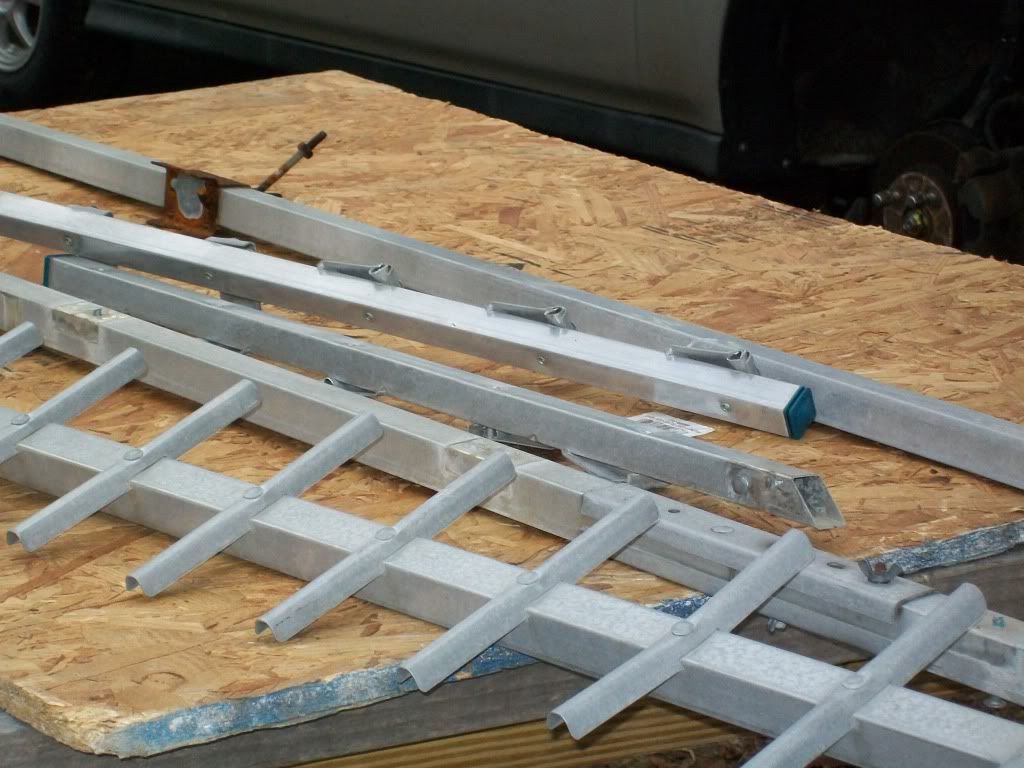
Rooftop antenna blew down a few weeks ago - so if I need some 1"x1" aluminum stock I'm all set.


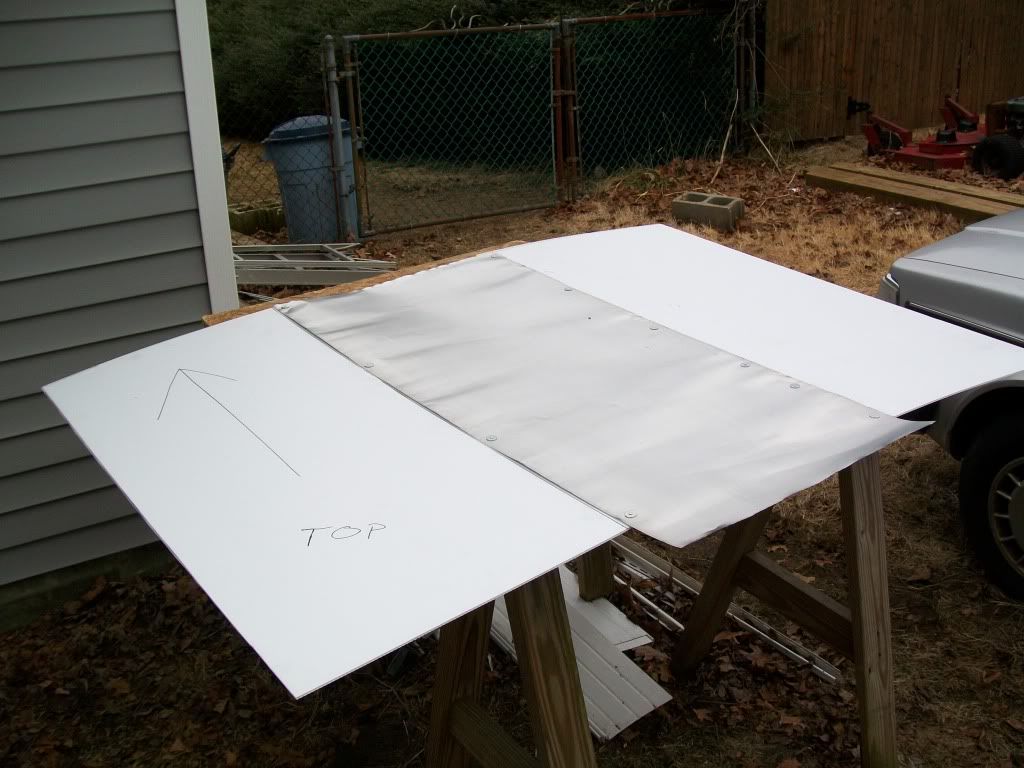
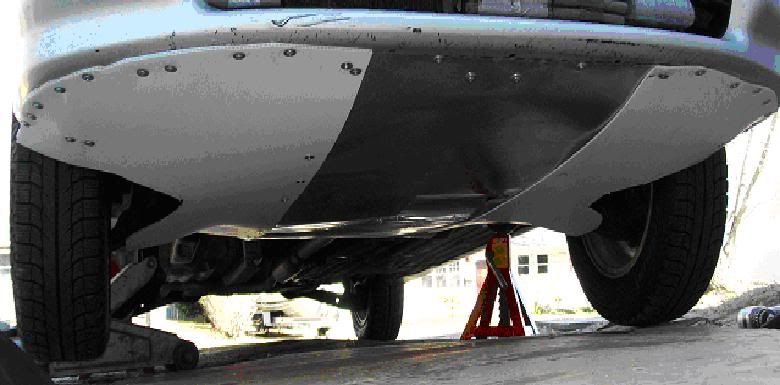
Here's the forward panel, riveted together. The overlap is just under 2". Calculated to give me the width I need from the 48" wide coro stock + 24" flashing. Measured to go from front bumper lip to rear of front wheel wells, and screw to underside of forward end of rocker panels. Is cut several inches larger in each direction because I know I'll need adjustments.


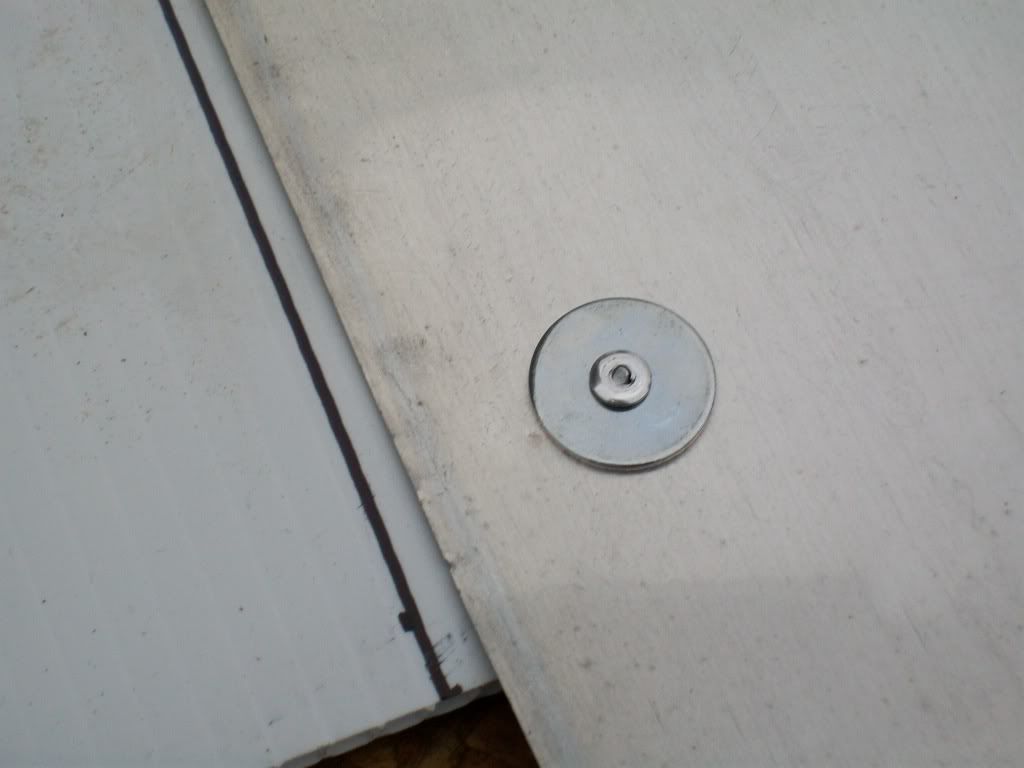
Closeup of aluminum pop rivet with fender washer. Coroplast is on left, 24" wide flashing on right. Under a gray sky, they look almost the same color.

I fastened these rivets from the top down but later found that some rivets let go. Better to attach from the bottom up but I can't say why. The rivets are 1/8" diam, with thickness range of up to 1/2". The next smaller size is only 1/4" capacity which is not enough to handle the coroplast + 2 washers + aluminum flashing. Coroplast = 4 mm. = about 0.15" thick, between 1/8 and 1/4" if you're not digitally inclined.


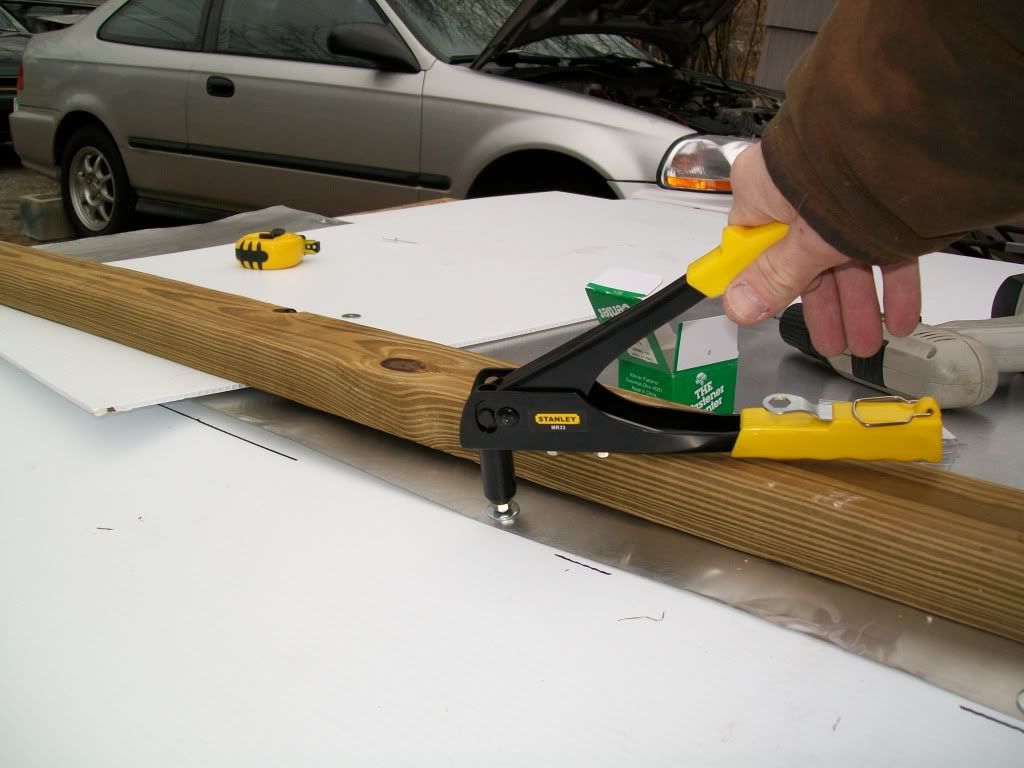
One-handed riveting technique. Without the 2x stud, the handle opens too far to grab and squeeze. I used my other hand to hold the washer in place on the underside. Needs to be held until the rivet pops, or it will drop off.


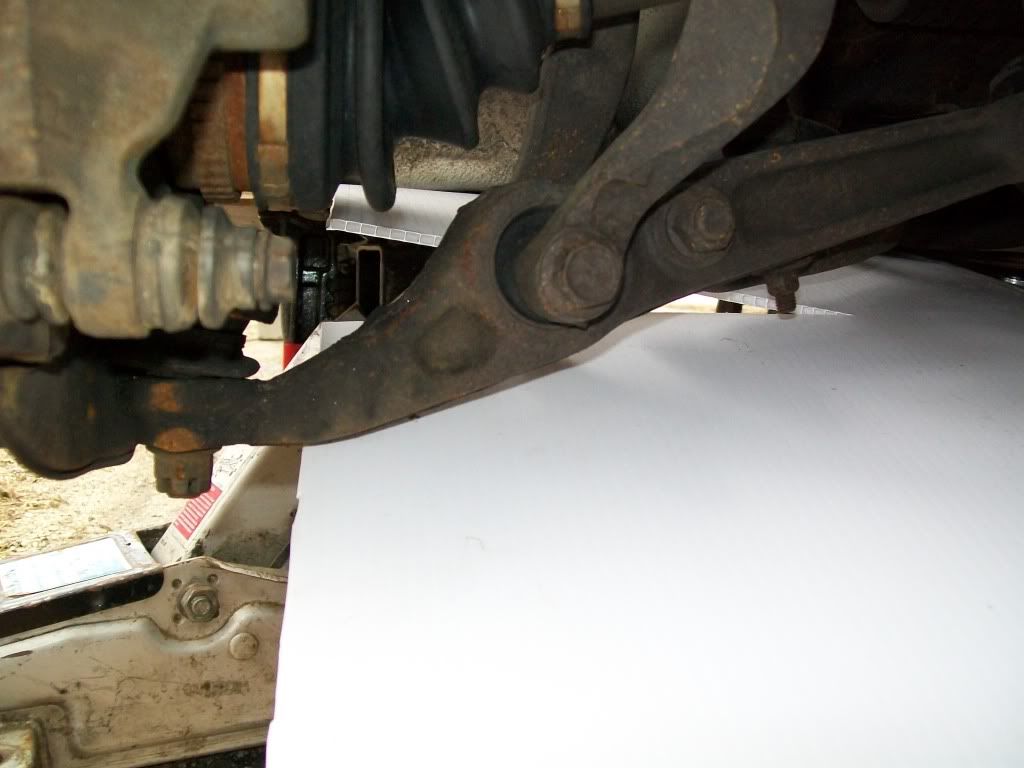
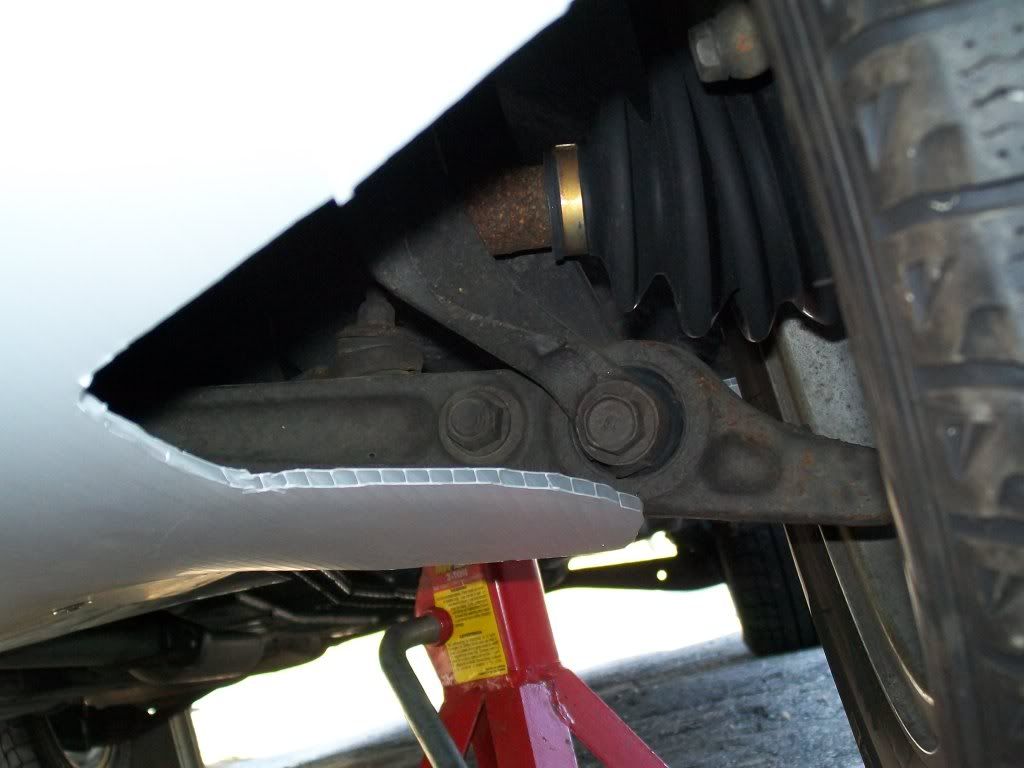
View of right front control arm, looking rearward. See cut into coroplast. Idea is, the coroplast should flex downward when the arm swings down. Rear part of coroplast behind the cut will stay where it is. That's the idea, anyway. Later, I might add an extension to the rear section, so they overlap under the control arm, and move together. Maybe.


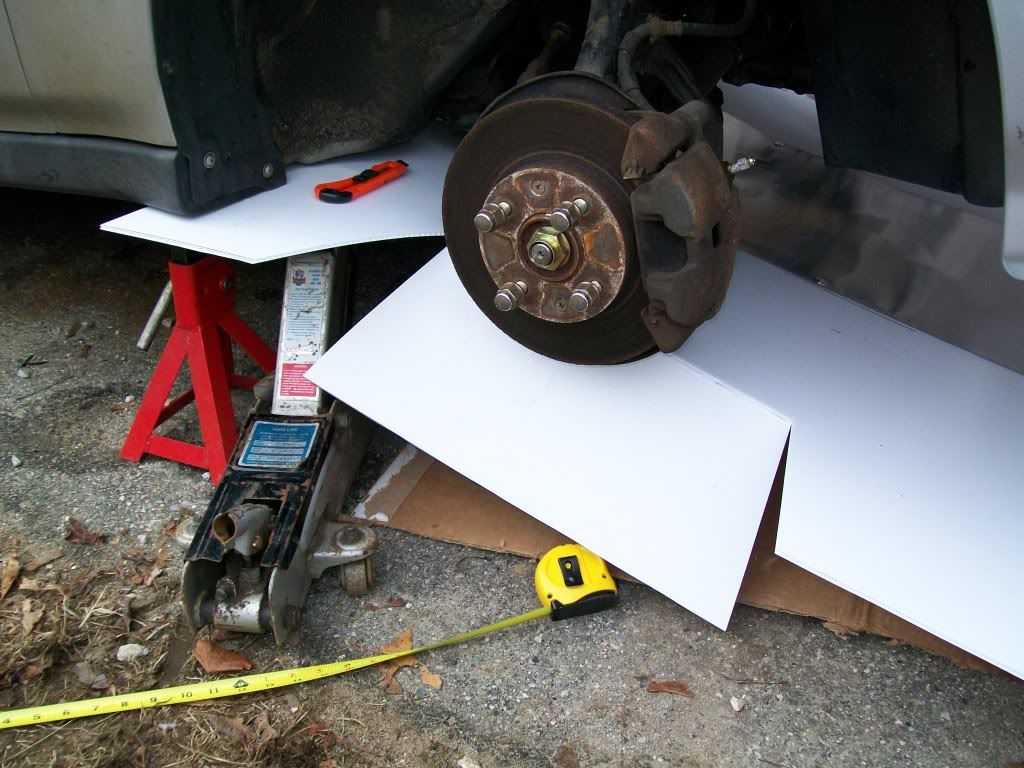
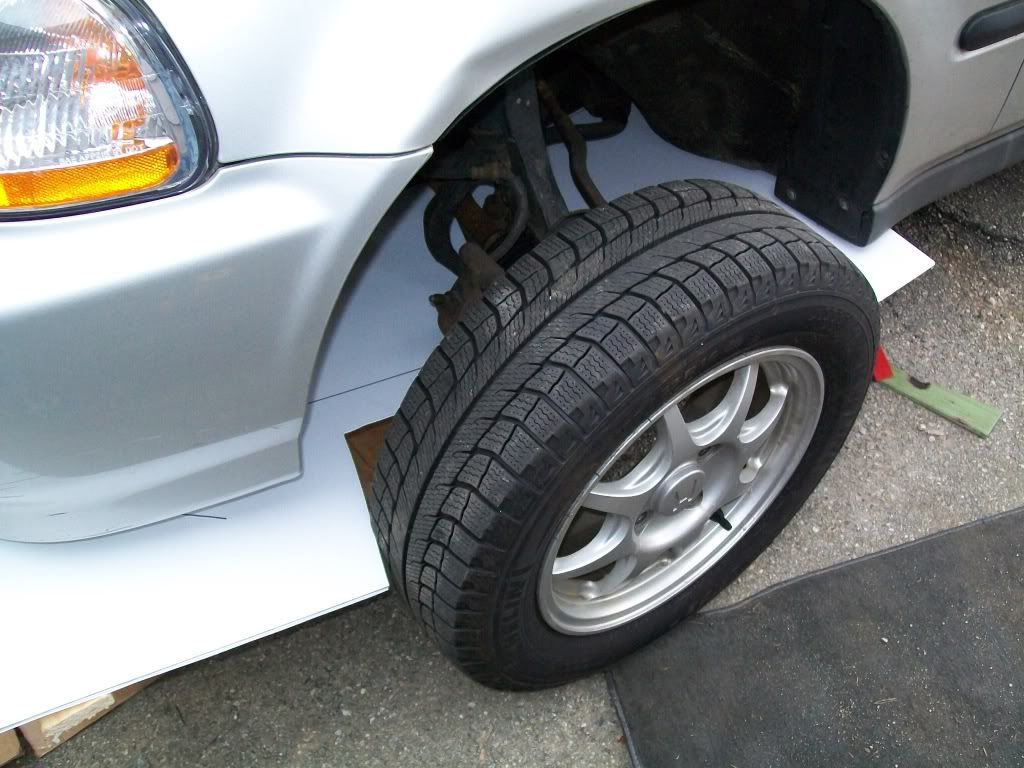
Right front wheel. Cutting away material for clearance. Working bit by bit. This shot is early in the sequence - there's not enough clearance yet to mount the wheel. Once it's on, I cut and test, turn wheel a few more degrees, cut and test, etc. etc. With both corners off the ground a one-hand tug will turn the steering.


Further along in trimming for the wheel. Left front this time.


I taped the edges of the oil change access cutout. But the tape didn't hold even 50 miles. FYI to save you the same grief.


Right front wheel well, looking forward at the bumper's rear edge. Note the upward slope of underside. I forced the coroplast to follow that slope.


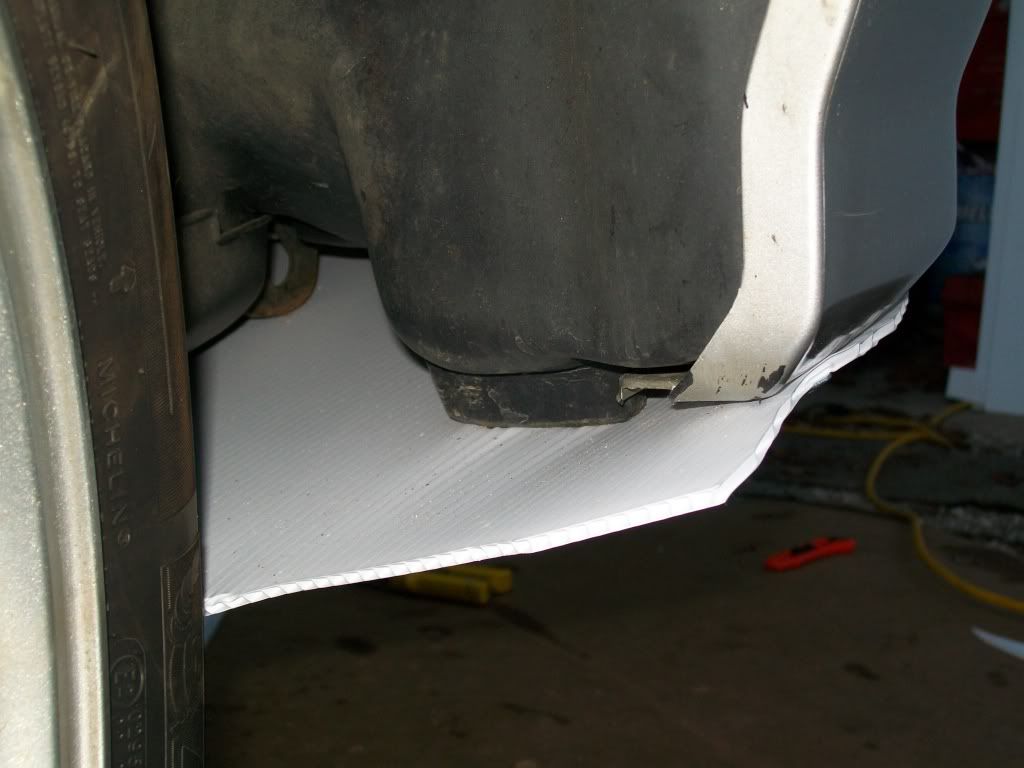
Underside of bumper lip. I put plenty screws here to hold the coroplast to that upward slope visible in previous shot. Same deal on the other side of the car.


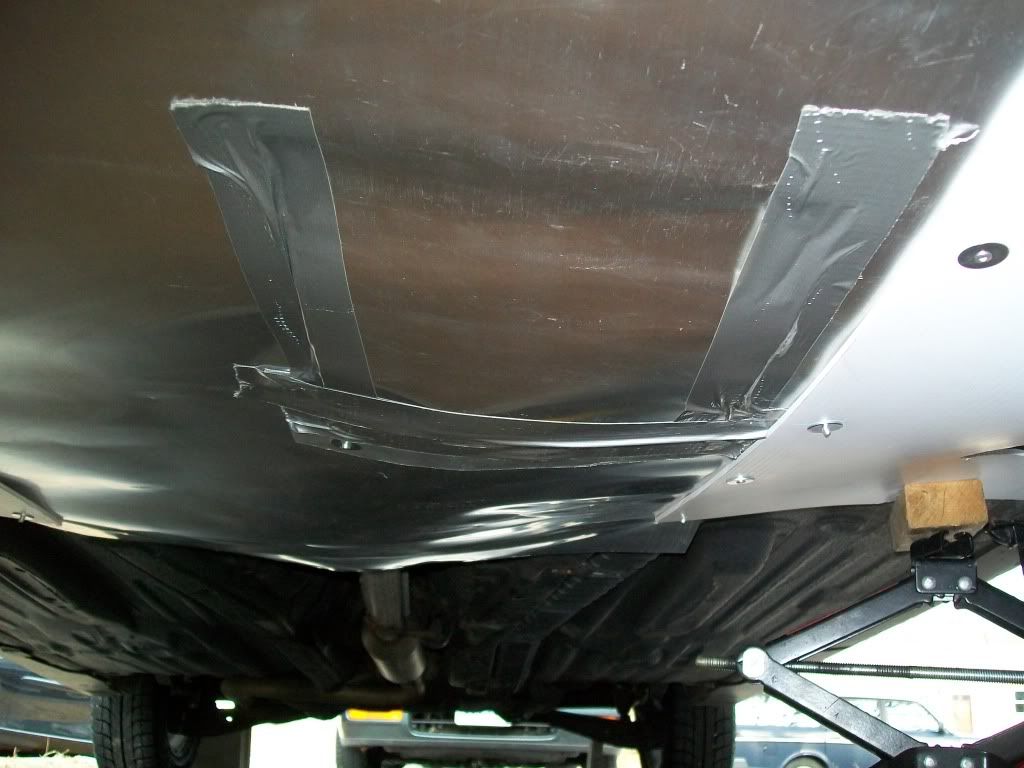
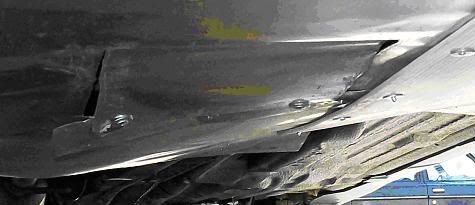
Rear half of engine bay, viewing towards rear. Aluminum is screwed on at either side of the exhaust tunnel, with extra material so it bows down to leave a gap. You can see the duct taped access panel on right side - the tape let go within 50 miles so I put in a couple screws.


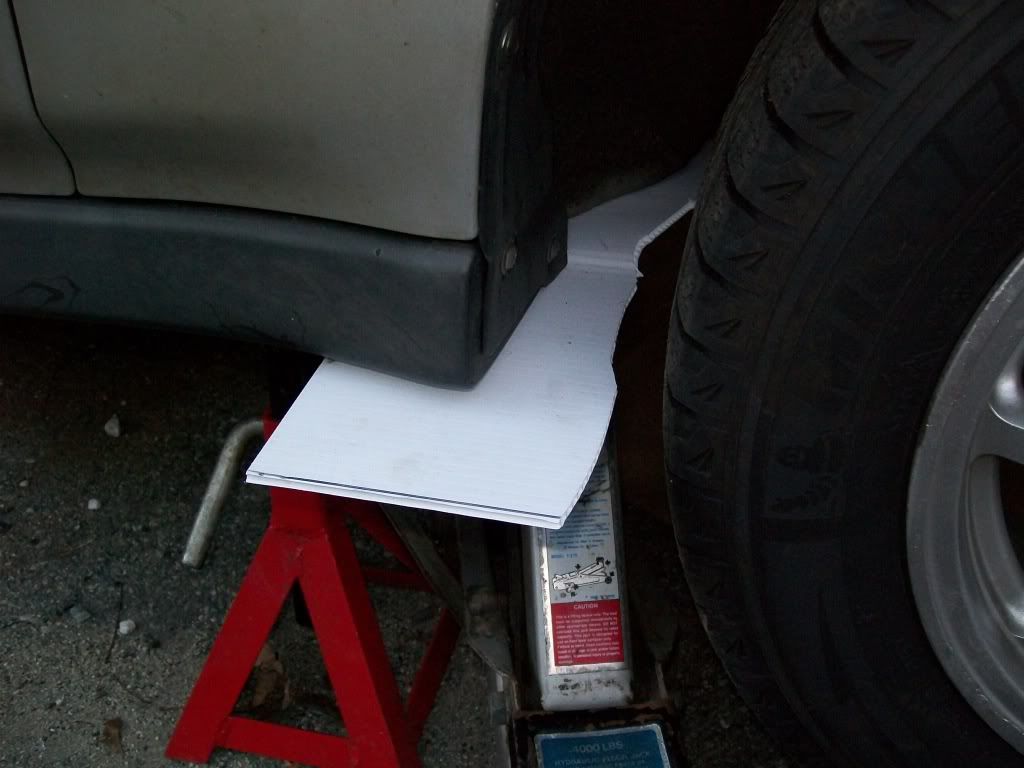
Floor jack holds coroplast panel in place against underside of car. Jack stand holds up car. Same deal on the other side of car, except it's a scissors screw type jack. Just enough pressure to keep it in place while working. Wood block between jacks and coro so it doesn't get completely mutilated by pressure.


I really want to put in a shot showing the cuts in coroplast to allow steering. But I'd have to pull the wheel off again to get the shot...
__________________
Coast long and prosper.
Driving '00 Honda Insight, acquired Feb 2016.


Last edited by brucepick; 03-18-2011 at 08:01 PM..
  Reply With Quote
The Following 8 Users Say Thank You to brucepick For This Useful Post:
California98Civic (03-31-2011), Cd (07-03-2011), Fr3AkAzOiD (03-20-2011), jedi_sol (03-30-2011), Piwoslaw (03-15-2011), TOOQIKK (03-15-2011), vtec-e (03-26-2011), wanna bECO (06-12-2011)
Old 03-14-2011, 10:58 PM   #3 (permalink)
EcoModding Lurker
 
Join Date: Feb 2011
Location: USA
Posts: 16
Thanks: 0
Thanked 1 Time in 1 Post
nice work... ill be working on one of these soon enough
  Reply With Quote
Old 03-15-2011, 12:27 PM   #4 (permalink)
Ecomodder
 
Fr3AkAzOiD's Avatar
 
Join Date: Jul 2008
Location: Raleigh, NC
Posts: 259

Cobalt XFE - '08 Chevrolet Cobalt XFE
Team Chevy
90 day: 41.1 mpg (US)

'05 Malibu V6 Tow Vehicle/Track Car - '05 Chevrolet Malibu LS V6
90 day: 23.12 mpg (US)

'08 XFE average for 2013 - '08 Chevrolet Cobalt XFE
90 day: 41.1 mpg (US)
Thanks: 41
Thanked 25 Times in 20 Posts
Looks good, keep up the pics.
I'd like to do this but most of my driving is below 50 mph so I don't know how much it would help and am a little tenative about puting screws through my cars body.
__________________
Lifetime mpg


2012 mpg
  Reply With Quote
Old 03-15-2011, 01:06 PM   #5 (permalink)
Administrator
 
Daox's Avatar
 
Join Date: Dec 2007
Location: Germantown, WI
Posts: 11,203

CM400E - '81 Honda CM400E
90 day: 51.49 mpg (US)

Daox's Grey Prius - '04 Toyota Prius
Team Toyota
90 day: 49.53 mpg (US)

Daox's Insight - '00 Honda Insight
90 day: 64.33 mpg (US)

Swarthy - '14 Mitsubishi Mirage DE
Mitsubishi
90 day: 56.69 mpg (US)

Daox's Volt - '13 Chevrolet Volt
Thanks: 2,501
Thanked 2,585 Times in 1,553 Posts
Quote:
Originally Posted by Fr3AkAzOiD View Post
I'd like to do this but most of my driving is below 50 mph so I don't know how much it would help and am a little tenative about puting screws through my cars body.
If you want to get a rough idea of how much power your car is using to push air out of the way I highly suggest using the Aerodynamic & rolling resistance, power & MPG calculator. My guess is even at 50 mph, a good deal more than half of your power required is lost to aero drag.

BTW, great work on the belly pan!
__________________
Current project: A better alternator delete
  Reply With Quote
Old 03-15-2011, 09:58 PM   #6 (permalink)
OCD Master EcoModder
 
brucepick's Avatar
 
Join Date: Dec 2007
Location: Eastern CT, USA
Posts: 1,933

Outasight - '00 Honda Insight
Team Honda
Gen-1 Insights
90 day: 54.18 mpg (US)
Thanks: 429
Thanked 391 Times in 261 Posts
Quote:
Originally Posted by Fr3AkAzOiD View Post
Looks good, keep up the pics.
I'd like to do this but most of my driving is below 50 mph so I don't know how much it would help and am a little tentative about putting screws through my cars body.
I think your Cobalt is an '08? Still pretty young. Anyway, the screw holes are pretty small and should have no effect on the car's lifespan.

I'm using #8 sheet metal screws with phillips heads and molded-on 'washers". Plus fender washers as I mentioned. Maybe should be stainless but that's another subtopic. Anyway, the drill holes for those are pretty small - I'm using 5/64". They're all on the underside of course. Most are into plastic such as the bumper cover. A few are into the framing members that are stamped onto the car's underbody panel.
__________________
Coast long and prosper.
Driving '00 Honda Insight, acquired Feb 2016.


Last edited by brucepick; 03-18-2011 at 08:05 PM..
  Reply With Quote
Old 03-19-2011, 09:44 PM   #7 (permalink)
OCD Master EcoModder
 
brucepick's Avatar
 
Join Date: Dec 2007
Location: Eastern CT, USA
Posts: 1,933

Outasight - '00 Honda Insight
Team Honda
Gen-1 Insights
90 day: 54.18 mpg (US)
Thanks: 429
Thanked 391 Times in 261 Posts
Weekend #2 - Saturday

After driving it for a week with the front section belly pan installed, I "learned" that it needed two issues corrected before I could proceed to the middle and rear sections.

1) The oil change access panel came loose within the first 50 miles;the duct tape attachment method was completely useless and potentially dangerous if I were to snag the dangling panel, say when backing up. I decided it needed a resuable fastener, ideally something that would screw into solid threads.

2) The belly pan was sagging too low to the ground. I think this was because I built it with the car on jack stands so the wheels were dropped to maximum depth while building. I had pulled the pan material tight when I built it the first time but there simply was too much slack.


This pic exaggerates the sag, but it did come within about 2 inches of the top of the 2x6, which approximates the level of the tire treads on the ramps.


Today I detached the fasteners at the rear while I had it up on ramps - not jack stands. So when tightening, the wheels were pressed up into normal position. I pulled it taught rearward and refastened. Next I put it on the stands to let the wheels drop - to verify enough give in the material, and to check wheel/tire clearance. Sure enough, it needed some additional trimming of the coroplast at the wheel cutouts.


Here's a shot of the driver's side control arm area. You can see the belly pan is pretty taught against the "dropped" control arm (car is on jack stands).
This photo reminds me - I think I need to run a bead of silicone sealer along all the coroplast edges where the channels are exposed. At the front I could make a regular bead so it has a pretty smooth transition from oem bumper cover to the coroplast.


Next I revisited how to attach the access panel. Here's a shot of the older version. The duct tape is gone and I had used a couple sheet metal screws to tack it together. Not very durable, as the aluminum flashing doesn't have enough "beef" to hold the screws.

This view is rearward, you can see the panel is cut on 3 sides so it will hang down when the fasteners are removed. Last weekend I'd riveted in a 3" wide strip across the rear so there would be something behind the panel when I push it up into place. You can kinda see the added strip here, but the next pic is more clear.
Before today's upgrades:


After today's upgrades (notes are below the pic):
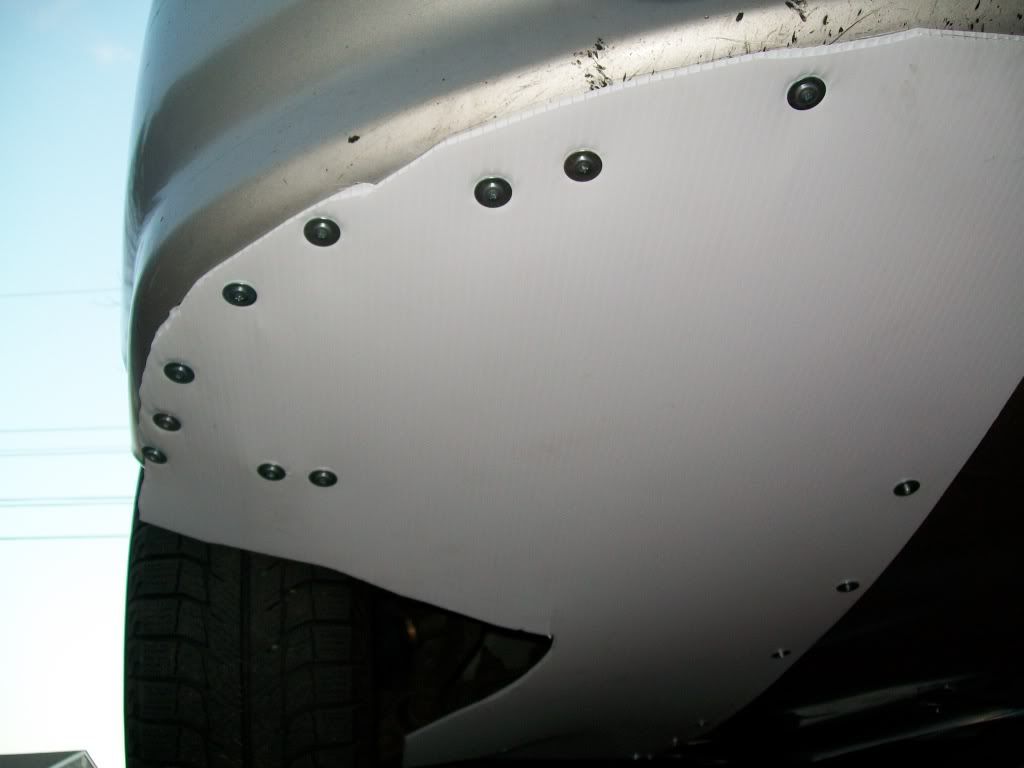
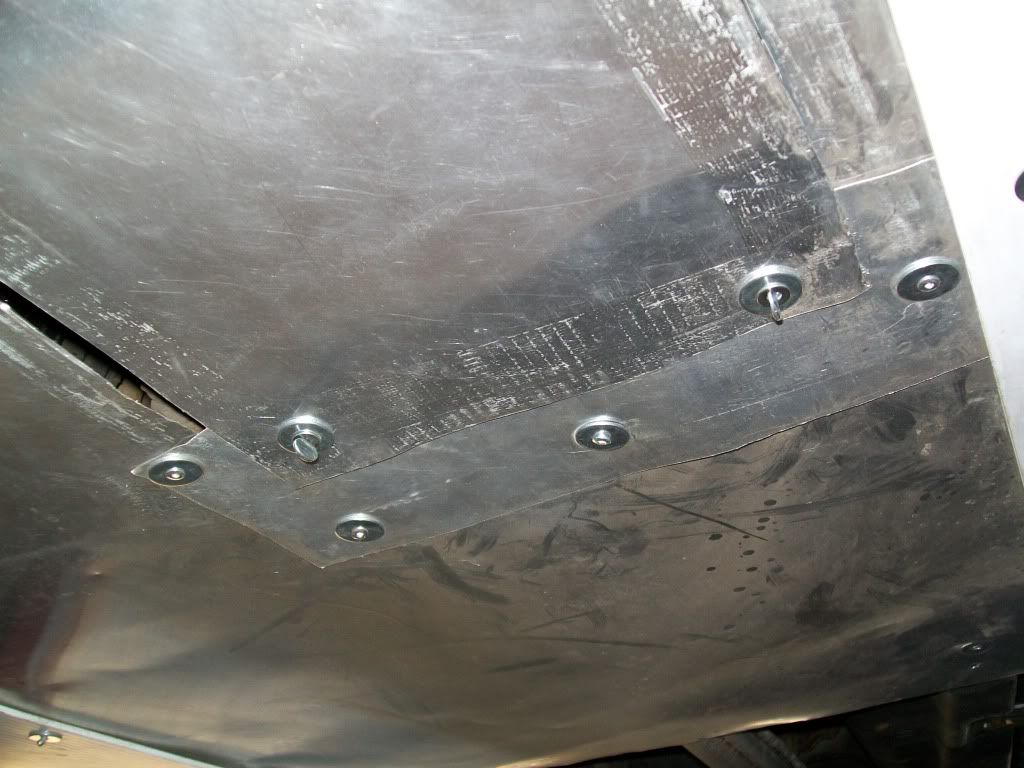
Here you can see the 3" wide strip at the rear of the access panel, riveted in 4 visible places. Those are #6-32 thumbscrews holding up the rear edge of the panel, with a couple washers each. They go into threaded fasteners that are similar to a wall anchor - when you tighten the screw the fastener gets fatter and shorter, pulls tight against the sheet metal. I put some thin lauan plywood behind the narrow flashing strip to give it some strength 'cause I consider the flashing alone to be kinda flimsy for holding the female threaded fastener. If ya don't like plywood on your car (I do!), use plastic or metal.


So here's how it looked today, up on jack stands, when I was all done.
__________________
Coast long and prosper.
Driving '00 Honda Insight, acquired Feb 2016.


Last edited by brucepick; 03-19-2011 at 10:25 PM..
  Reply With Quote
Old 03-20-2011, 12:24 AM   #8 (permalink)
EcoModding Lurker
 
Join Date: Jan 2011
Location: Texas
Posts: 82
Thanks: 3
Thanked 6 Times in 6 Posts
You might look into something like Dzus Fasteners if you want an easily removable and replaceable fastener.
  Reply With Quote
Old 03-20-2011, 08:40 AM   #9 (permalink)
Wiki Mod
 
Weather Spotter's Avatar
 
Join Date: Nov 2009
Location: Midland MI, USA
Posts: 2,042

Max - '14 Ford C-Max SEL
Thanks: 228
Thanked 304 Times in 210 Posts
looking good! I added your project to our wiki so please send me some data on how it works
__________________
  Reply With Quote
Old 03-21-2011, 08:02 AM   #10 (permalink)
recession proof rebel
 
k.civic.f4i's Avatar
 
Join Date: Sep 2009
Location: california
Posts: 129
Thanks: 16
Thanked 11 Times in 4 Posts
nice dude. still need to get around to doing this myself

__________________
how to.....
http://ecomodder.com/forum/showthrea...cks-11998.html
http://ecomodder.com/forum/showthrea...how-12301.html

true wealth comes from good health and wise ways
  Reply With Quote
Reply  Post New Thread


Thread Tools


Powered by vBulletin® Version 3.8.11
Copyright ©2000 - 2024, vBulletin Solutions Inc.
Content Relevant URLs by vBSEO 3.5.2
All content copyright EcoModder.com