 07-02-2014, 11:02 AM
|
#611 (permalink)
|
|
Thalmaturge
Join Date: Mar 2011
Location: The edge of nowhere
Posts: 1,167
Thanks: 769
Thanked 646 Times in 431 Posts
|
Are you updating your CAD model with the changes to fine-fit the SMART running gear?
|
|
|

|
 Today Today
|
|
|
|
 Other popular topics in this forum...
|
|
|
|
 07-02-2014, 01:43 PM
|
#612 (permalink)
|
|
Master EcoModder
Join Date: May 2008
Location: Maynard, MA Eaarth
Posts: 7,908
Thanks: 3,475
Thanked 2,952 Times in 1,845 Posts
|
I have in the past, gone back to correct or improve my CNC layouts (specifically to put spreaders in the hatch door opening to maintain the correct locations, as well as several other smaller issues), but for this it is not so easy. I will try to account for this, though. As I said earlier, this area of the model was only done on the outside surfaces, and the entire interior of the motor bay was a guesstimate I added in 2D to the sections of the model.
If I build another prototype, I will use a different method: I'd start with the aluminum honeycomb fiberglass composite sheets, and fold them to for the basic box of the passenger compartment, and then add layers of CNC cut foam to that to form the outside shape of the car. Much quicker, and more accurate, and with better 3D control of the shape and structure.
If you look at the Team TREV vehicle, I would do something very similar to that.
|
|
|

|
|
The Following User Says Thank You to NeilBlanchard For This Useful Post:
|
|
 07-03-2014, 10:59 PM
|
#613 (permalink)
|
|
Master EcoModder
Join Date: May 2008
Location: Maynard, MA Eaarth
Posts: 7,908
Thanks: 3,475
Thanked 2,952 Times in 1,845 Posts
|
Getting farther along in the carving of the firewall:
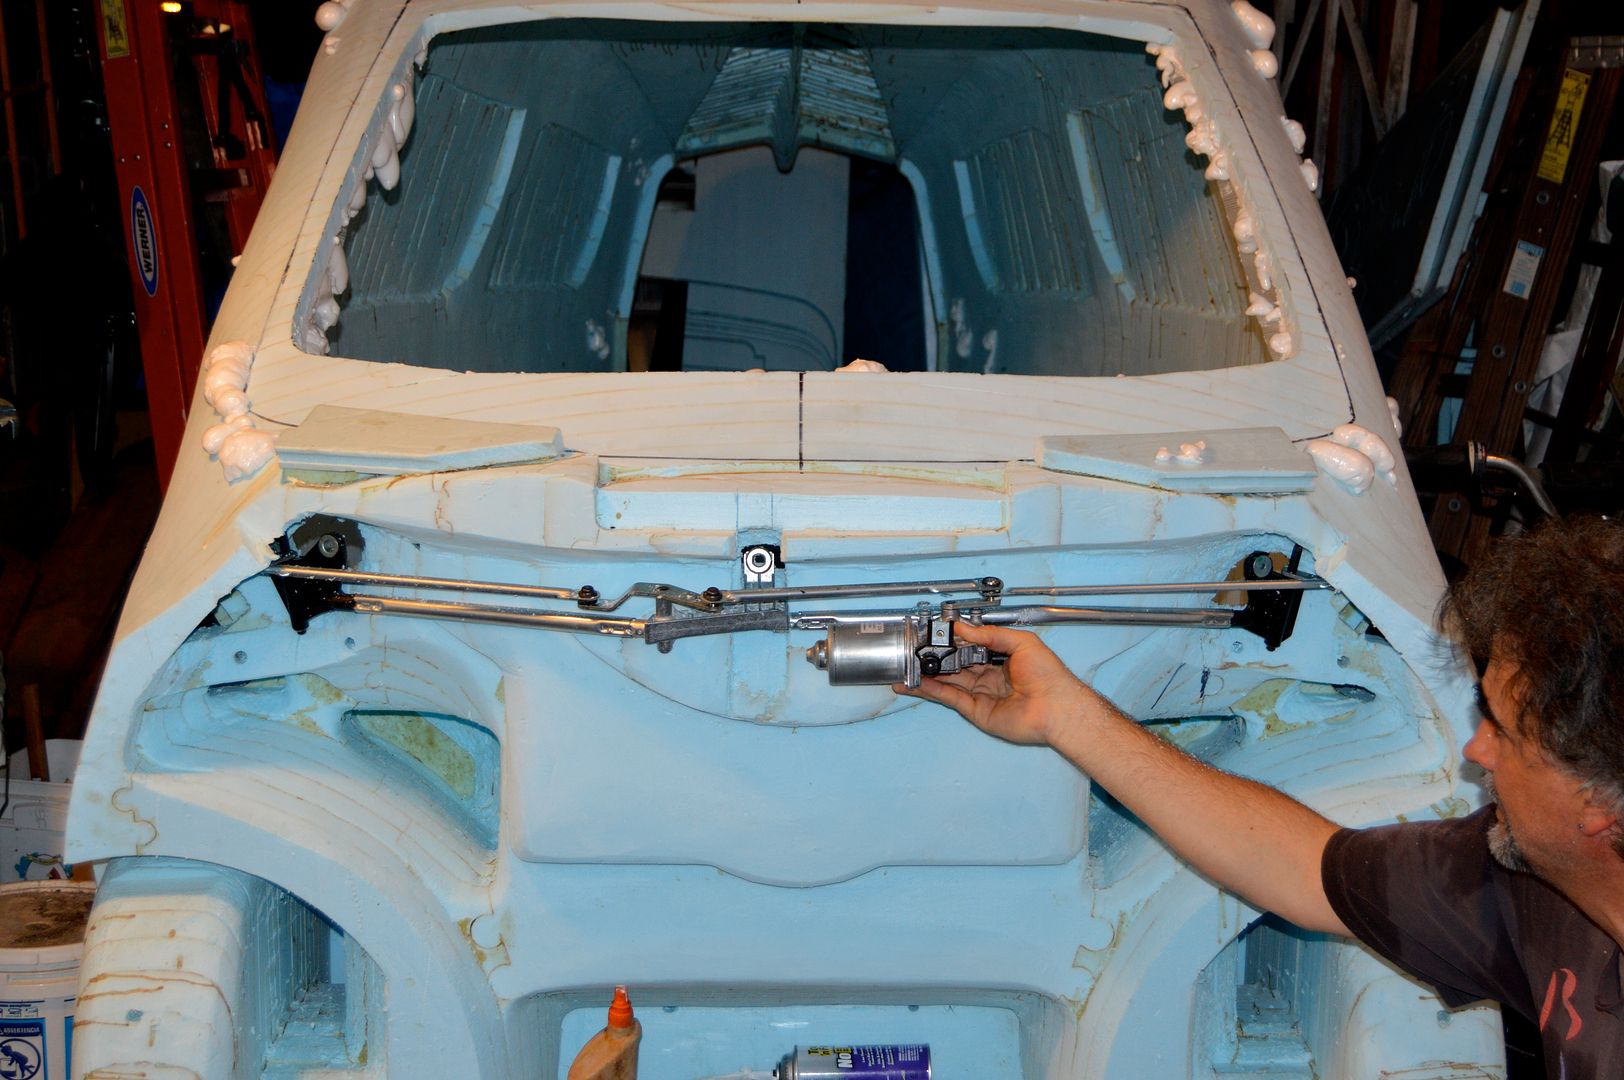
The wiper system is designed to fit kind of under the front edge of the windshield. The firewall is getting mighty thin in a few places. I will have to fill in up under the dashboard on the inside. I'll need to make room for the levers and arms. The cranks on the worm drive does full circles, and the 'reversing' arm just opposite the motor rocks back and forth, and the arms at either end sweep back forth.
It is hard to miss the lovely globs of spray foam - this is with some tape to try and hold the wet foam against the back of the 'A' pillars. I now will have enough material to cut the area to drop the windshield flush.
Tomorrow looks to be mostly a wash - Hurricane Arthur is coming relatively close by later in the day. We may get a lot of rain. |
|
|

|
 07-03-2014, 11:27 PM
|
#614 (permalink)
|
|
Drive less save more
Join Date: Jul 2011
Location: Vancouver Island, Canada
Posts: 1,189
Thanks: 134
Thanked 162 Times in 135 Posts
|
Its looking good ,
I want to mention from my Boating experiences that Boats have these very nice single windshield wiper motors/linkages that are *light* and surprisingly *small* made fairly high quality. They are actually somewhat affordable, being that they are Marine. $50 - $100 depending on quality. Probably to late to be giving you this information but its still good to know.
I am curious is your Avatar a depiction of your Car when its complete ?
For your foam taping
Drywall seam tape would work good with the spray foam, as it will breath so the foam expands and cures. I found out last month how covered spray foam cures, not well at all.
__________________
Save gas
Ride a Mtn bike for errands exercise entertainment and outright fun
__________________

|
|
|

|
|
The Following User Says Thank You to ecomodded For This Useful Post:
|
|
 07-04-2014, 12:53 AM
|
#615 (permalink)
|
|
Master EcoModder
Join Date: Aug 2012
Location: northwest of normal
Posts: 28,879
Thanks: 8,193
Thanked 8,971 Times in 7,411 Posts
|
Quote:
|
If I build another prototype, I will use a different method: ...If you look at the Team TREV vehicle, I would do something very similar to that.
|
I've felt pangs of sympathy watching you press forward against all obstacles, struggling with servo motors and the collapse of the lean-to. I respect your being able to make that statement. You've probably muttered it more than once.
It's not too late. Fold up the monocoque and carve a hole to stick it in.
ecomodded -- Yep. |
|
|

|
 07-04-2014, 09:28 AM
|
#616 (permalink)
|
|
Master EcoModder
Join Date: May 2008
Location: Maynard, MA Eaarth
Posts: 7,908
Thanks: 3,475
Thanked 2,952 Times in 1,845 Posts
|
The worst outcome for this chassis is that it becomes a plug. But I think it will serve it's purpose as a testable prototype; if not be drivable for a while.
Yes, my avatar is a rendering of the 3D computer model I used to build CarBEN.
I got a few hours of work in this morning before the rain (from Arthur) started. Here's the start of the day (after trimming off the globs of foam):
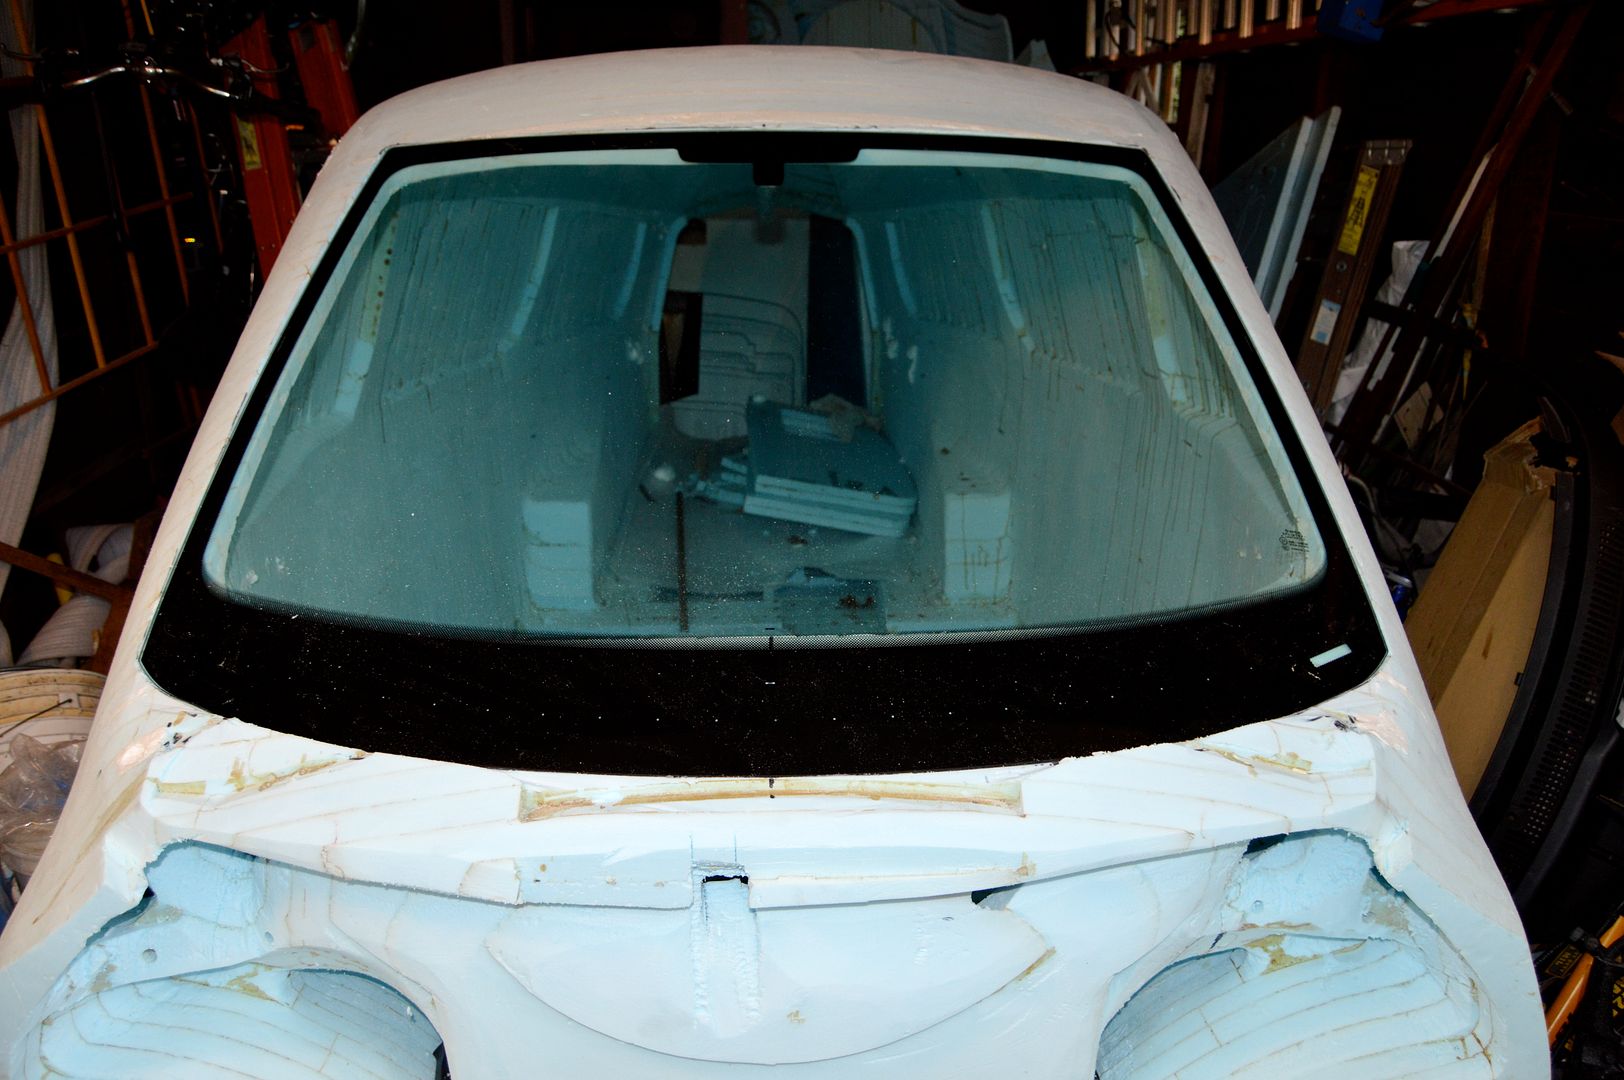
Click on the thumbnail to see the series of photos. I have the holes started for the wiper shafts, and a large portion of the firewall needs to be cut back even more. I'll have to rebuild it from the inside of the car, up under the dash.
The windshield is now flush!
Last edited by NeilBlanchard; 07-04-2014 at 01:54 PM..
|
|
|

|
 07-04-2014, 02:47 PM
|
#617 (permalink)
|
|
Master EcoModder
Join Date: Aug 2012
Location: northwest of normal
Posts: 28,879
Thanks: 8,193
Thanked 8,971 Times in 7,411 Posts
|
I know my Superbeetle is a congested mess, with air-handling, electrical wiring and mechanical linkages—all in about 2 cubic feet at the back of an alligator hood.
Are you modeling the interior structures? Or has it moved on to sculpture?
|
|
|

|
 07-04-2014, 03:36 PM
|
#618 (permalink)
|
|
Drive less save more
Join Date: Jul 2011
Location: Vancouver Island, Canada
Posts: 1,189
Thanks: 134
Thanked 162 Times in 135 Posts
|
Its a intense project, so much detail or attention to it , It is going to spectacular when its done, the image from the avatar reminds me of the Mercedes Bionic concept.
__________________
Save gas
Ride a Mtn bike for errands exercise entertainment and outright fun
__________________

|
|
|

|
|
The Following User Says Thank You to ecomodded For This Useful Post:
|
|
 07-04-2014, 06:01 PM
|
#619 (permalink)
|
|
Master EcoModder
Join Date: Jun 2009
Location: SC Lowcountry
Posts: 1,796
Thanks: 226
Thanked 1,353 Times in 711 Posts
|
.
Very impressive... 
> |
|
|

|
|
The Following User Says Thank You to redneck For This Useful Post:
|
|
 07-04-2014, 10:39 PM
|
#620 (permalink)
|
|
Master EcoModder
Join Date: May 2008
Location: Maynard, MA Eaarth
Posts: 7,908
Thanks: 3,475
Thanked 2,952 Times in 1,845 Posts
|
Quote:
Originally Posted by freebeard

I know my Superbeetle is a congested mess, with air-handling, electrical wiring and mechanical linkages—all in about 2 cubic feet at the back of an alligator hood.
Are you modeling the interior structures? Or has it moved on to sculpture?
|
I am debating about using my CNC machine to cut the seats that I had modeled, or to just do it from scratch. I had modeled much of the interior of the car, but certainly not all of it. The inside of the roof, I just offset it in DataCAD - after I cleaned it up from all the polygon segments. I just drew in the battery bays in DataCAD, as well. The inside of the motor bay and connecting the wheels to the chassis, were also just drawn in 2D.
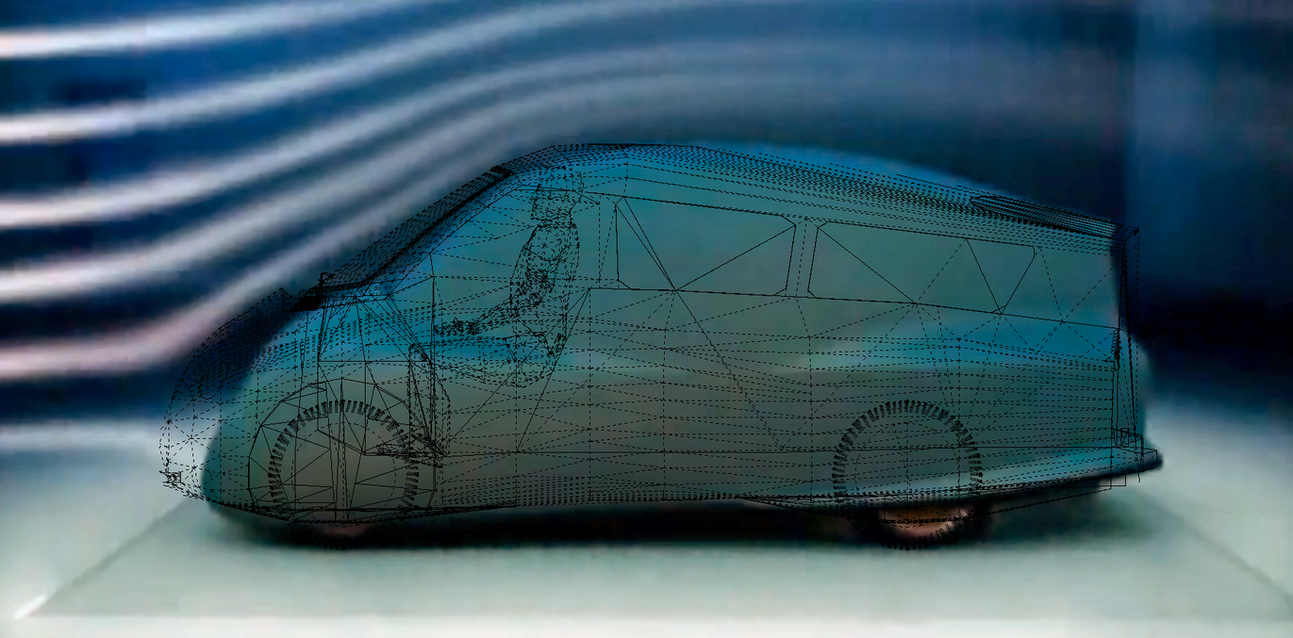
It is not a coincidence that CarBEN looks similar to the Bionic - I had started with the early clay model of the Bionic (aka Boxfish) when I designed it.
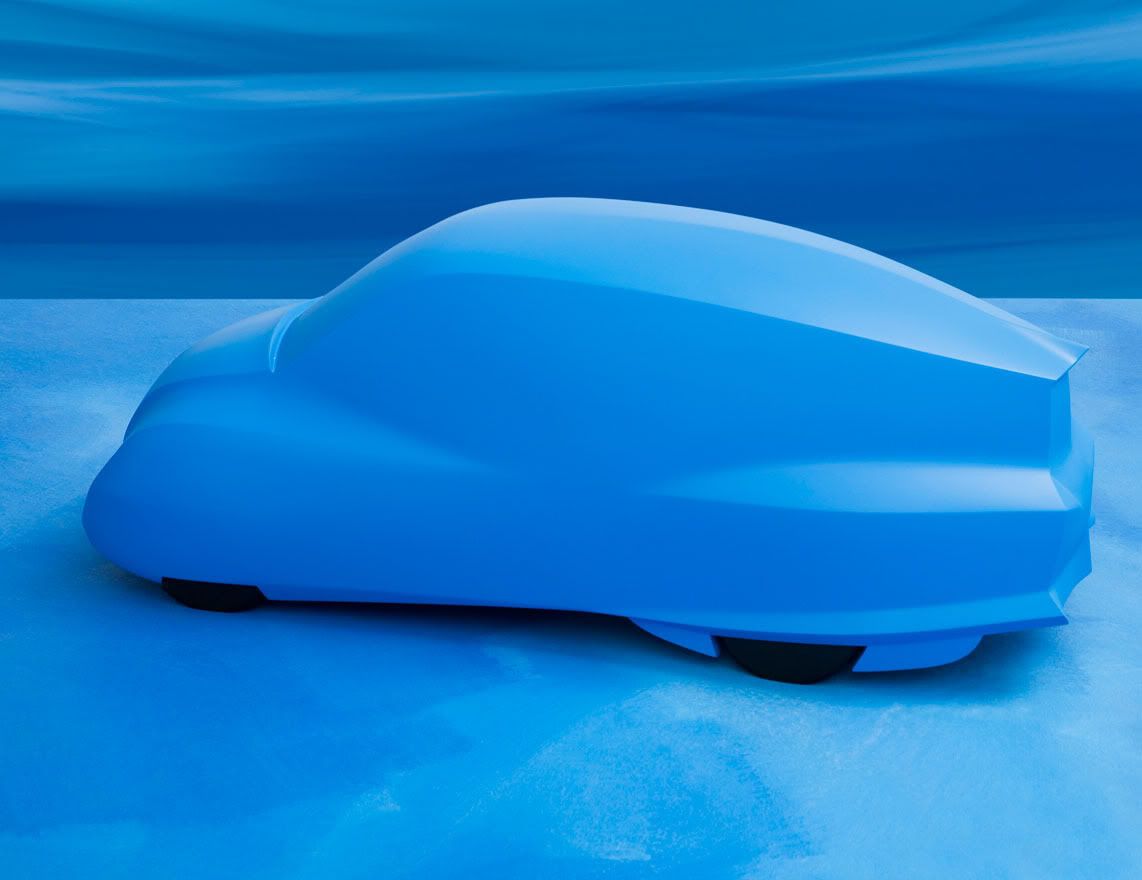
Later on, I found a video that had a quick transition from this clay model to the Bionic car, that I grabbed some stills from - these would have been helpful, but all I had at first was the one image.
        
Here's an overlay of the Bionic / Boxfish and CarBEN:
For anyone who wants to see the whole process - design and construction (so far) from the beginning, take a look at this:
CarBEN EV Concept Photos by NeilBlanchard | Photobucket
|
|
|

|
|
The Following User Says Thank You to NeilBlanchard For This Useful Post:
|
|
|