Go Back   EcoModder Forum > EcoModding > Aerodynamics
Register Now
 Register Now
 

Reply  Post New Thread
 
Submit Tools LinkBack Thread Tools
Old 03-08-2008, 05:40 PM   #11 (permalink)
Liberti
 
LostCause's Avatar
 
Join Date: Feb 2008
Location: California
Posts: 504

Thunderbird - '96 Ford Thunderbird
90 day: 27.75 mpg (US)
Thanks: 0
Thanked 7 Times in 7 Posts
A good primer for composite construction is Rutan's "Moldless Composite Sandwich Contruction." ~$15

Online vendors like Aircraft Spruce even sell kits aimed at first time aircraft builders on learning composite construction. The $80 price tag is definately high, but if a lot of parts are going to be built then the mistakes that are saved may be worth it...

If you guys build with heavy duty S-Glass or seek aerodynamic perfection, then learning how to make lightweight, smooth finishes might be valuable. This is the best site I have come across.

There are other, easier ways to learn the art and make composite pieces, but these are the best in my opinion. To stay on topic, I'd use 1/8" foam that can be heat-molded into shape, then sandwich that with some lightweight E-glass. As far as resin is concerned, Epoxy is the only thing to consider. Polyester resin is porous and lower grade...which may be fine for a short-term fairing. I suppose it's a question of buying the long-term investment or going cheap now.

- LostCause

  Reply With Quote
Alt Today
Popular topics

Other popular topics in this forum...

   
Old 03-08-2008, 07:13 PM   #12 (permalink)
EcoModding Minded
 
Chris D.'s Avatar
 
Join Date: Jan 2008
Location: Eagan, MN
Posts: 667

Lunar Mist - '02 Toyota Tacoma SR5
90 day: 25.31 mpg (US)

Silver Streak - '08 Toyota Corolla S
90 day: 38.25 mpg (US)
Thanks: 67
Thanked 25 Times in 12 Posts
Send a message via AIM to Chris D.
E-Glass?

either way, made a little progress...


I had my wire feed welder bind up on me a few times, PITA>>

I wish I had gotten into this far sooner or I wouldn't have gone as wide as I
did with the wheels/tires, or else I could have just made a fairly flush cover....
__________________


  Reply With Quote
Old 03-08-2008, 11:30 PM   #13 (permalink)
OCD Master EcoModder
 
brucepick's Avatar
 
Join Date: Dec 2007
Location: Eastern CT, USA
Posts: 1,936

Outasight - '00 Honda Insight
Team Honda
Gen-1 Insights
90 day: 54.18 mpg (US)
Thanks: 431
Thanked 396 Times in 264 Posts
Quote:
Originally Posted by MetroMPG View Post
... the bug deflector. If it's there to protect the paint, I'd put on some of that plastic film instead.

EDIT: whoops, I see you've already taken it off.
What's the plastic film and where to get it? Finish paint on my front panel has taken a real beating, primer showing all over the place.
(Sorry for OT but hopefully others will also appreciate your reply).
__________________
Coast long and prosper.
Driving '00 Honda Insight, acquired Feb 2016.


  Reply With Quote
Old 03-09-2008, 12:08 AM   #14 (permalink)
Liberti
 
LostCause's Avatar
 
Join Date: Feb 2008
Location: California
Posts: 504

Thunderbird - '96 Ford Thunderbird
90 day: 27.75 mpg (US)
Thanks: 0
Thanked 7 Times in 7 Posts
Quote:
Originally Posted by Chris D. View Post
E-Glass?
E-Glass is a type of fiberglass often used in the electronics industry (E means electrical). Motherboards are made from this type of fiberglass. It is cheap and easy to work with, but not very strong.

S-Glass is type of fiberglass used in load bearing structures (S means structural). It is a different chemical formulation that is 30% stronger (tensile strength) while being 15% lighter.


If you really care about weight, sandwiching foam (or honeycomb if you really, really care) between super-lightweight fiberglass (or Kevlar if you really x 3 care) is the way to go. Fender skirts aren't a big deal, but it would be good for anyone considering new hoods, body panels, etc.

Quote:
Originally Posted by brucepick
What's the plastic film and where to get it?
You see the same stuff covering ipods and film lenses. Here's a review article of 3M's Scotchguard Paint Protection Film.
__________________________________________________ ______

You have balls of steel. When I saw this all I could imagine was: bzzzzzzzzzz...POW!


Great job on the progress. I hope you show pictures of how you attach the metal to the body.

- LostCause

Last edited by LostCause; 03-09-2008 at 12:16 AM..
  Reply With Quote
Old 03-09-2008, 04:29 AM   #15 (permalink)
EcoModding Minded
 
Chris D.'s Avatar
 
Join Date: Jan 2008
Location: Eagan, MN
Posts: 667

Lunar Mist - '02 Toyota Tacoma SR5
90 day: 25.31 mpg (US)

Silver Streak - '08 Toyota Corolla S
90 day: 38.25 mpg (US)
Thanks: 67
Thanked 25 Times in 12 Posts
Send a message via AIM to Chris D.
oh yeah, I think my attachment setup will be pretty trick..

I orignally had one bar in the middle going upward but desided to run 2 insted..
That way I have more attachment points and I canget to them to remove it easier..
__________________


  Reply With Quote
Old 03-09-2008, 06:32 PM   #16 (permalink)
EcoModding Lurker
 
Join Date: Feb 2008
Location: VA
Posts: 30
Thanks: 0
Thanked 0 Times in 0 Posts
k

Need help here. hu?

you will need Bondo and hot Chicks.


you are doing good put metal on it and Bondo it.
then Jack the truck up and take the wheel off and fiberglass the wheel skirt from the inside.Then pull off the tape and make a fiber glass part.


Take yer time most of all.

What you are doing is custom Thee is no money in custom.
Email@hybrideffects.com

to bad you do not work for a design company.

Thanks Franklin
  Reply With Quote
Old 03-09-2008, 10:03 PM   #17 (permalink)
MP$
 
diesel_john's Avatar
 
Join Date: Jan 2008
Location: SW Ohio
Posts: 595
Thanks: 5
Thanked 19 Times in 14 Posts
Send a message via MSN to diesel_john
Smile

i did one in 05 but took it back off, and remade with clearance to remove wheel with suspension down.
Attached Thumbnails
Click image for larger version

Name:	sep05 032c.jpg
Views:	60
Size:	88.8 KB
ID:	435  
  Reply With Quote
Old 03-11-2008, 12:35 AM   #18 (permalink)
EcoModding Minded
 
Chris D.'s Avatar
 
Join Date: Jan 2008
Location: Eagan, MN
Posts: 667

Lunar Mist - '02 Toyota Tacoma SR5
90 day: 25.31 mpg (US)

Silver Streak - '08 Toyota Corolla S
90 day: 38.25 mpg (US)
Thanks: 67
Thanked 25 Times in 12 Posts
Send a message via AIM to Chris D.
I've hit a snag in the road here..

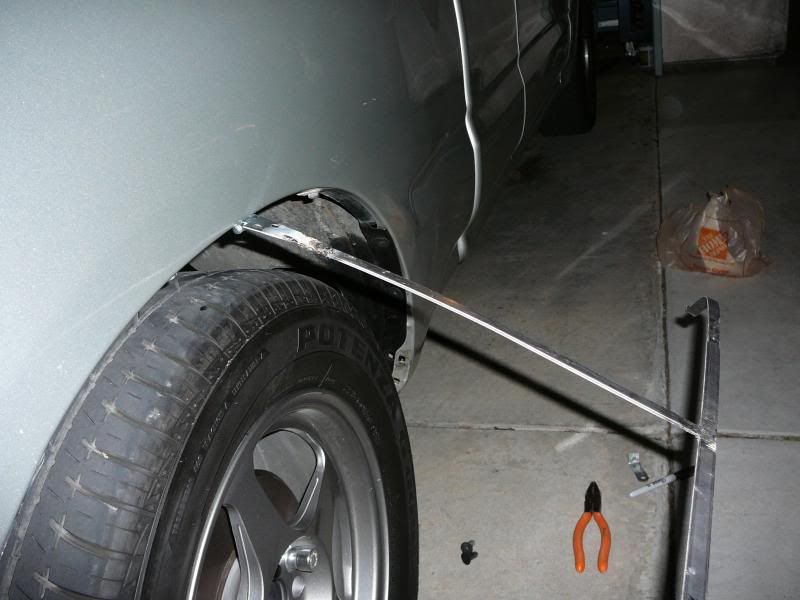
My orignal setup wouldnt work because the brackets wouldn't have anything to attach to..
I thought the inside lip was continious all the way around for an inch deep, but once i removed the splash sheild, my assumption left me having to reconfigure things..

so insted of the double setup I was going for, i ended up having to go back to an orignal setup of only having one leg going up..


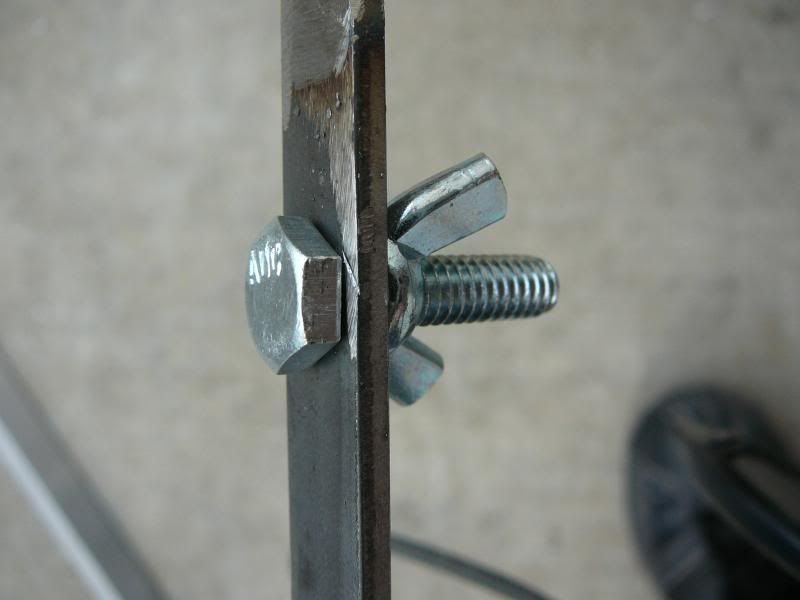
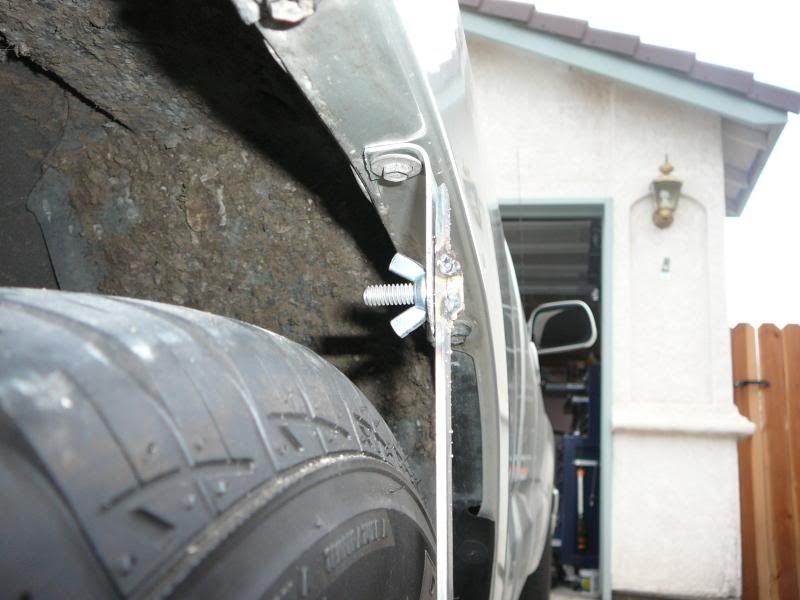
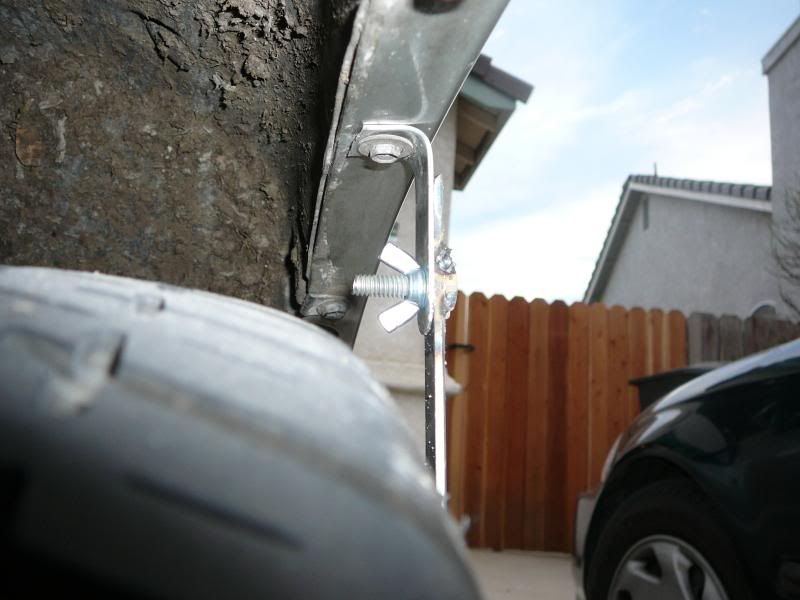
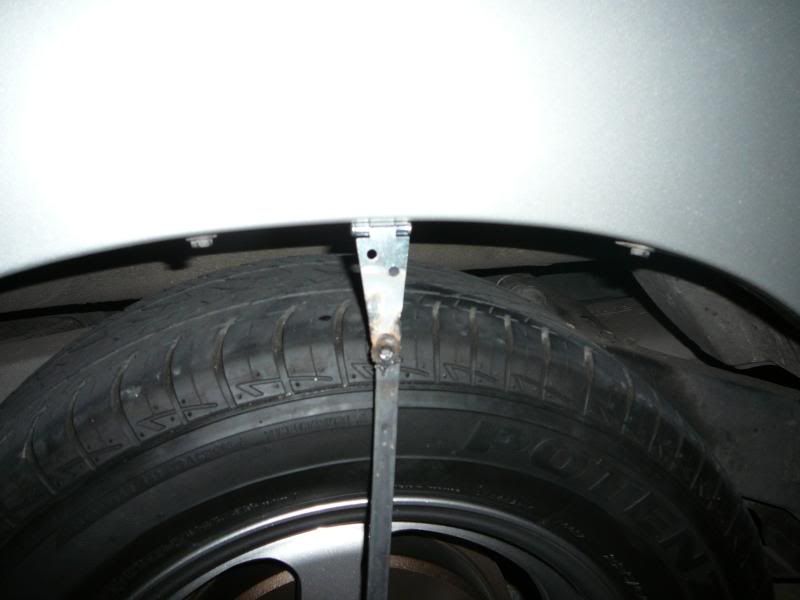
This is how I was going to attach the skirt orignally, but I came up on wheel/tire travel conflict even after trimming the bolt and threading it..
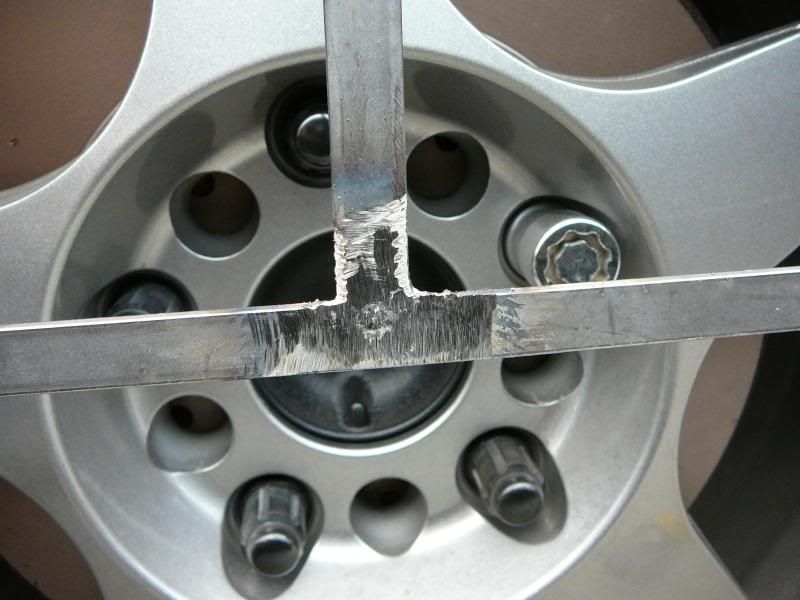
I drilled through the steel and tacked a bolt through it for an attachment point.


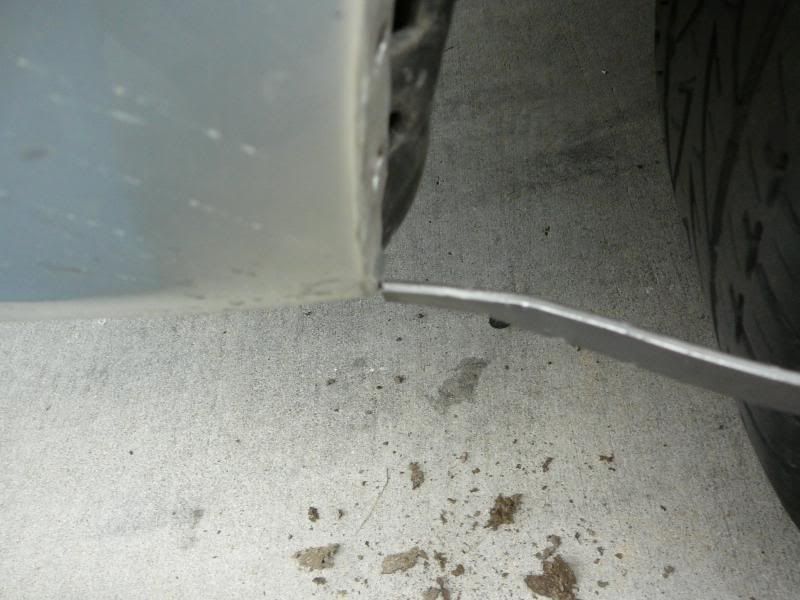
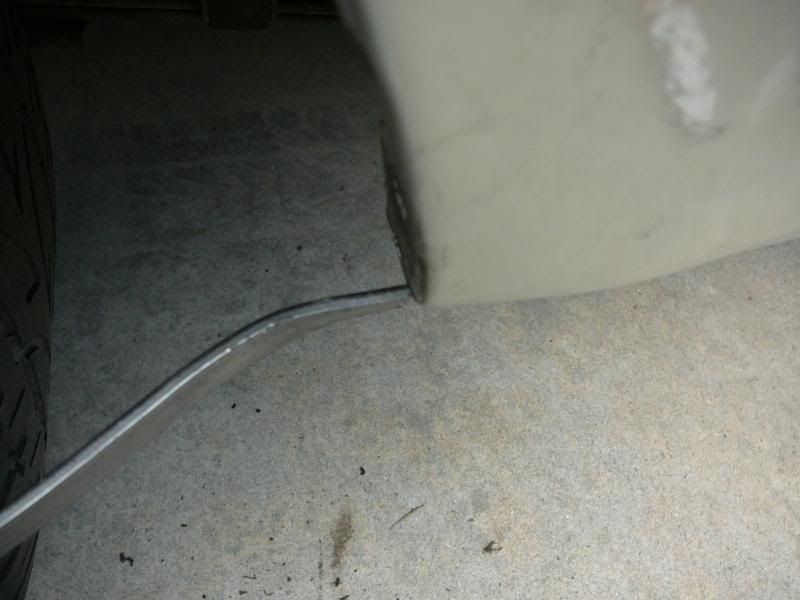
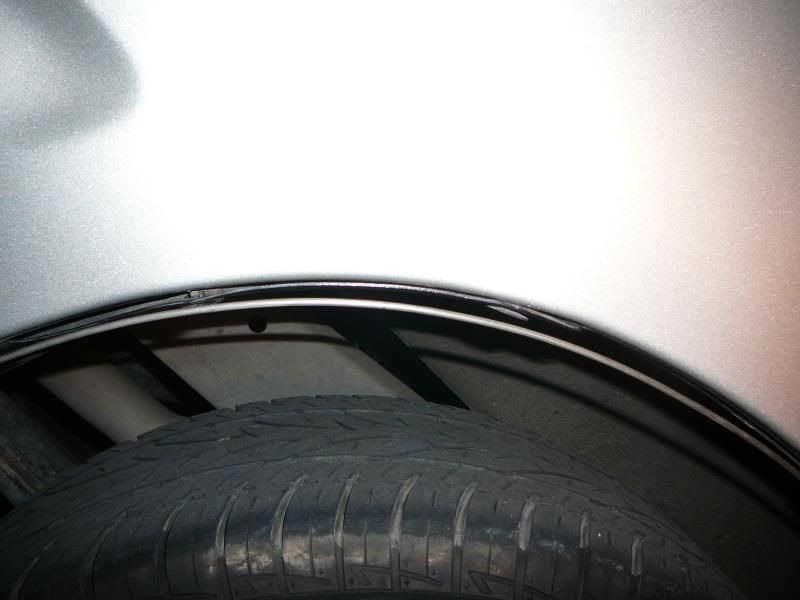
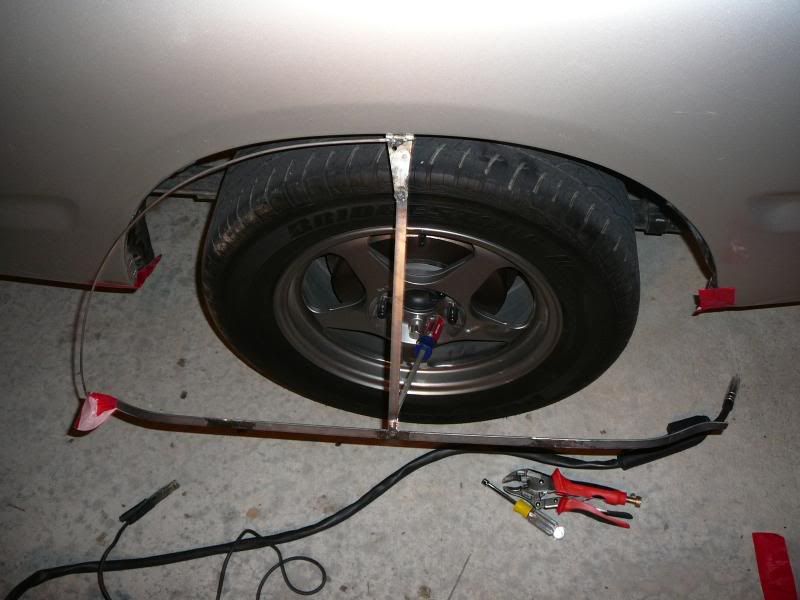
heres the bottom edge contouring the bedside..
(rear)

(front)


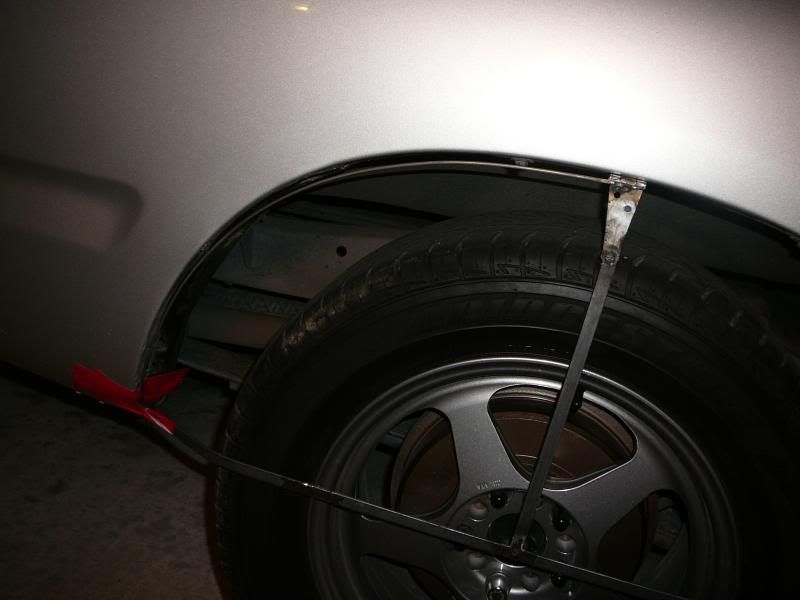
so after ditchign the upper wingnut idea, I thought, Why do I need to fully remove it?
So off I went to home depot (less than a block away) and I came up with this idea..


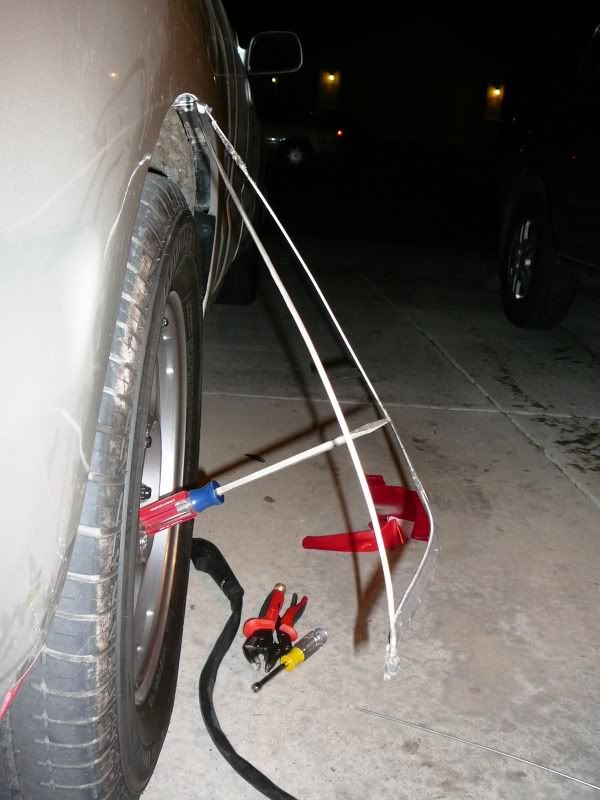
With that problem solved I've hit somewhat of a stumpped state..
I dont know how to frame the outside edge..

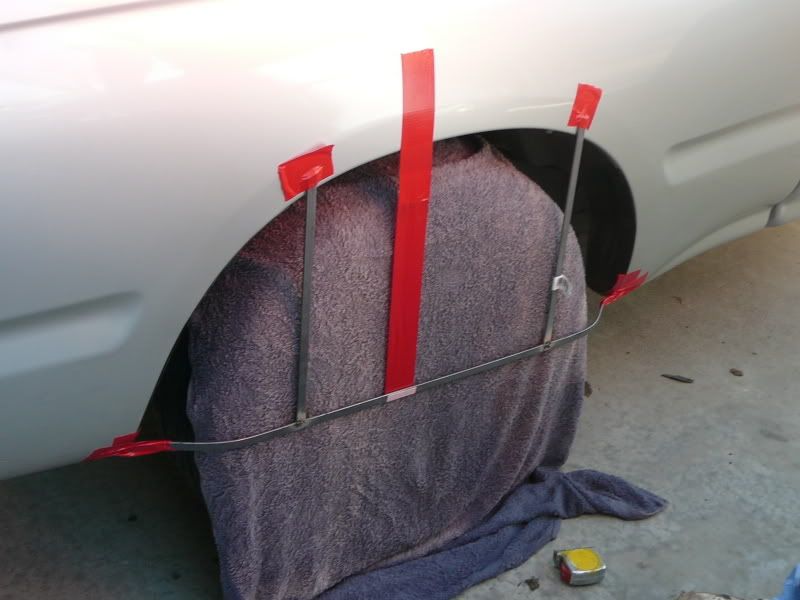
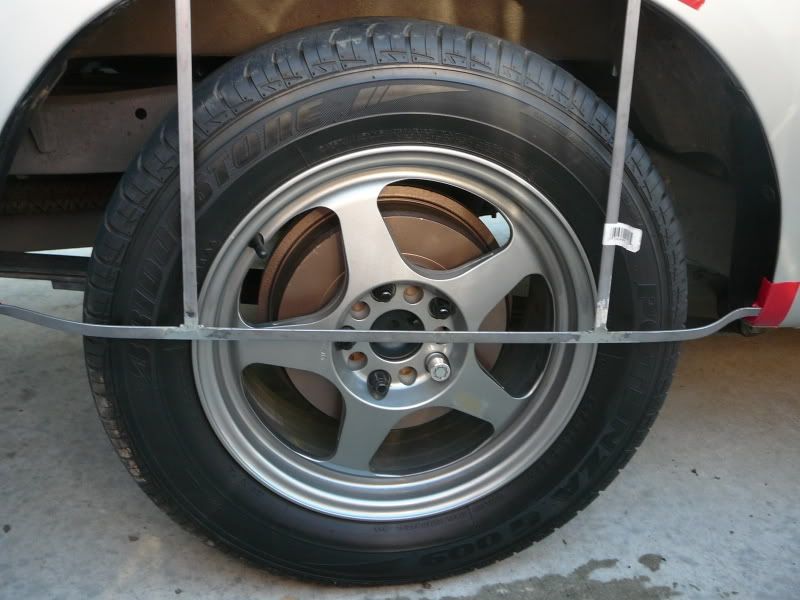
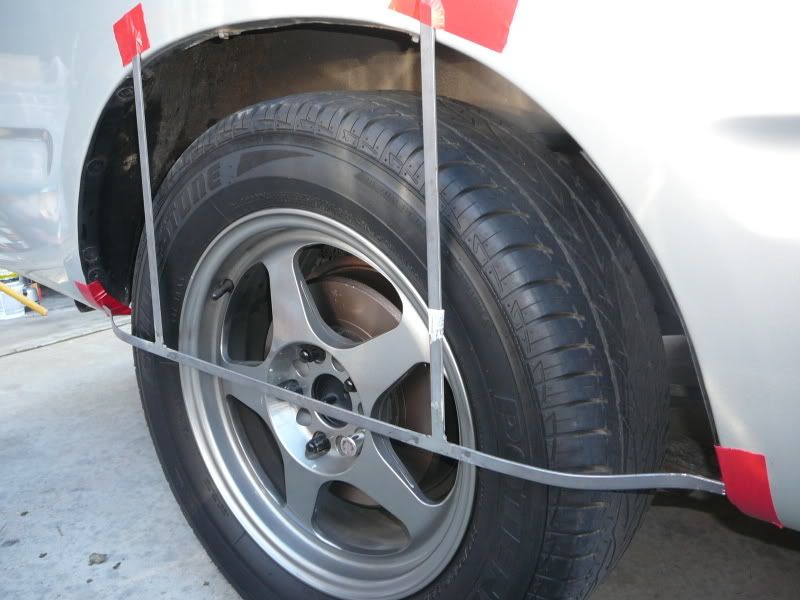
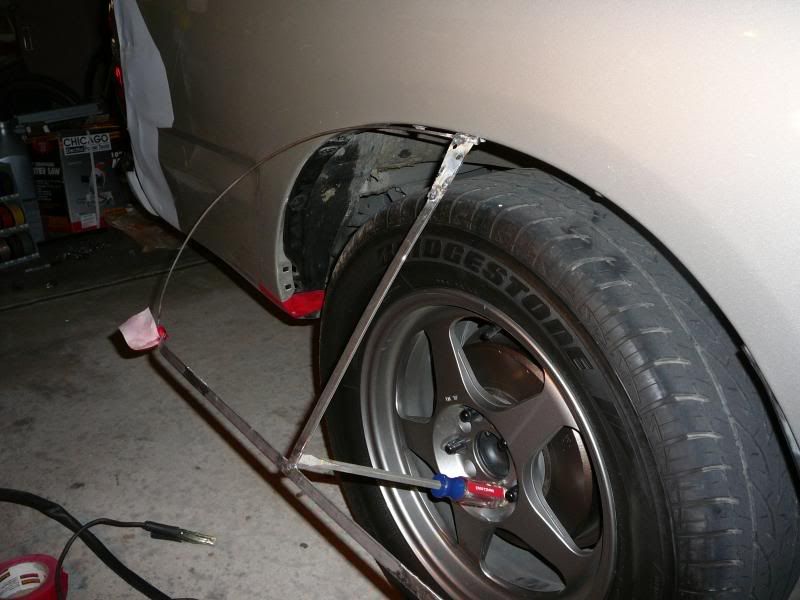
So I tacked some wire to see how well it would work..
its.. o...k.. but i'm not happy with it intirely..
I was running out of light, so I packed it in.


How should I finish this? I've got mental constipation here..
__________________


  Reply With Quote
Old 03-11-2008, 12:50 AM   #19 (permalink)
Liberti
 
LostCause's Avatar
 
Join Date: Feb 2008
Location: California
Posts: 504

Thunderbird - '96 Ford Thunderbird
90 day: 27.75 mpg (US)
Thanks: 0
Thanked 7 Times in 7 Posts
There are two possible ways I could think up of right off the bat.

Keep the wire for rigidity. If you use ABS plastic or something similar, you could notch the top edges of the fairing to create a ton of little flaps that can be folded over to create a lip perpendicular to the fairing face. Stick velcro to those flaps and the inner lip of the fender well. When you close the fairing, just stick your hand up in the well and push the velcro together. This is essentially what MetroMPG did. He ran into problems with the velcro eventually separating, so a better attachment might be needed.

The other idea is the reverse, if you use a rigid fairing like fiberglass, coroplast, aluminum, etc. Get a piece of thin aluminum angle and cut notches along one side so you can create a curve. Since you probably don't want 100 holes in your fender well, figure out a tightenable, secure clamp that can hold the angle to the lip. Stick velcro long the edge facing the fairing and on the fairing inside edge. When you close the fairing, the velcro will seat automatically.

I think it is important to make an air tight seal. If you don't use velcro, a gasket made out of a bicycle inner tube might be substituted. Leaving any type of hole will probably be detrimental. In any case, the fairing will still be better than nothing.

Quote:
Originally Posted by Frank Lee View Post
One of the things I hated most about skirts was it seemed inevitable that the dang valve stem was covered up when I parked.
Definately an inconvenience, but easily solved by by putting the car into neutral and rolling it a bit. I suppose filling tires with air will become a major PIA, but not a showstopper. I do like the valve stem idea, though. It could potentially replace balance weights with something functional.

- LostCause

Last edited by LostCause; 03-11-2008 at 12:56 AM..
  Reply With Quote
Old 03-11-2008, 01:03 AM   #20 (permalink)
EcoModding Minded
 
Chris D.'s Avatar
 
Join Date: Jan 2008
Location: Eagan, MN
Posts: 667

Lunar Mist - '02 Toyota Tacoma SR5
90 day: 25.31 mpg (US)

Silver Streak - '08 Toyota Corolla S
90 day: 38.25 mpg (US)
Thanks: 67
Thanked 25 Times in 12 Posts
Send a message via AIM to Chris D.
I'd just roll forward till I saw the valve stem.. no biggie.. I mite just get some plastic and cover what I have, but I have more contorurs than some of you have with having to accomodate the wider tires/wheels..

I want form and function..

I'm looking for the easy way out and getting a bit impatient..

__________________


  Reply With Quote
Reply  Post New Thread


Similar Threads
Thread Thread Starter Forum Replies Last Post
DIY: plastic rear wheel skirts (Geo Metro) MetroMPG DIY / How-to 57 06-12-2014 09:16 AM
DIY Rubber Front Wheel Skirts newtonsfirstlaw DIY / How-to 32 05-19-2011 07:45 AM
Done: A-B-A test on rear wheel skirts - Corolla, Camry Hybrid MetroMPG Aerodynamics 11 06-06-2009 03:49 PM
wheel skirts for 91 civic bbb3108 Aerodynamics 11 03-11-2008 12:39 AM
Wheel skirts for the aerodynamically minded Daox Aerodynamics 14 01-27-2008 11:23 PM


Powered by vBulletin® Version 3.8.11
Copyright ©2000 - 2024, vBulletin Solutions Inc.
Content Relevant URLs by vBSEO 3.5.2
All content copyright EcoModder.com