Go Back   EcoModder Forum > EcoModding > EcoModding Central
Register Now
 Register Now
 

Reply  Post New Thread
 
Submit Tools LinkBack Thread Tools
Old 06-09-2008, 07:18 PM   #1 (permalink)
Hi-Tech Redneck
 
Johnny Mullet's Avatar
 
Join Date: May 2008
Location: Ashtabula, Ohio
Posts: 1,436
Thanks: 6
Thanked 49 Times in 42 Posts
Send a message via AIM to Johnny Mullet Send a message via MSN to Johnny Mullet
Welcome to my Metro project!

This car was on it's way to the crusher after it's diagnosis of engine repairs needed and other issues the car had from being neglected by the former owner. I don't know what reasoning there is behind this, but I just had to have this car and save her from becoming scrap metal. I knew she had great potential so I decided to rebuild her and bring her back to life again.

I decided to start my very own thread on the progress of what I have done to save fuel with an already fuel efficient car. So far, I have increased fuel mileage on this car from 37 MPG to a whopping 54 MPG and will get even more miles per gallon after more repairs and mods are done. I have lots of pictures, so I will be updating this as I get those pics hosted and do a "Start to Finish" thread here. To get the most MPG, one must start with a properly running engine.

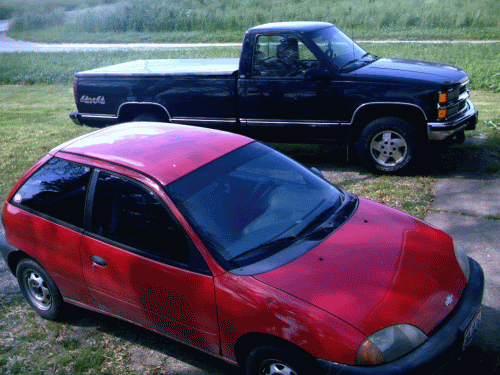
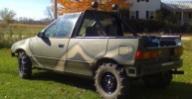
This is a 1998 Chevy Metro 1.0L 5 speed base model.
Her name is Christine.............


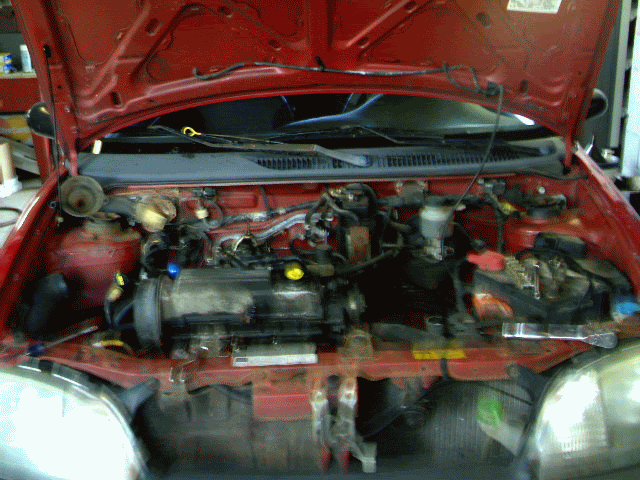
First off, I got the car for almost nothing ($75.00) because of no compression in Cylinder #1 so I did my research and found it needed new exhaust valves. This means the head needs pulled to see the problem. First thing is to take pictures of all the vacuum lines and hoses so when you get to putting it together, you have a reference point.
The most common issue with these 3 Cylinder engines for a dead cylinder in burnt exhaust valves from either timing or clogged EGR ports or other issues.

This guide can be used for all 3 Cylinder Suzuki engines.

Get the car in a suitable work area.


Set engine so Cyl #1 is at top dead center (TDC).
Disconnect battery.
Drain the oil and coolant. (17mm drain plug)
Remove upper rad hose from engine side. (squeeze clamp)
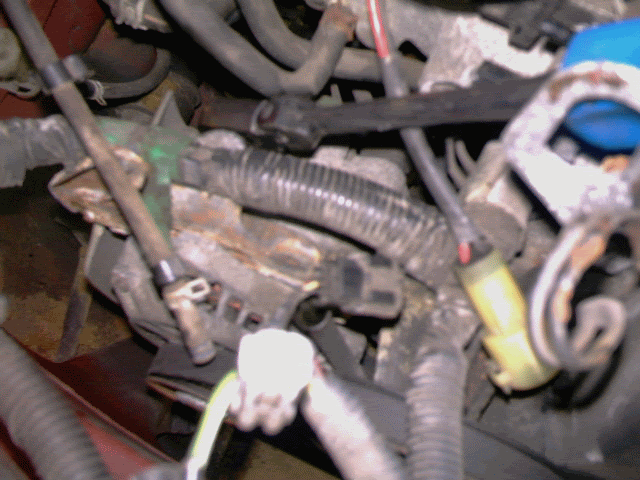
Remove throttle cable and all attached vacuum lines. (12MM locknut & squeeze clamps)
Mark plugs and wires and remove wires, cap and rotor. (8MM bolts)
Mark distributor and remove. (T40 or 12MM)
Remove the air cleaner housing and tube. (10MM bolt and nut)
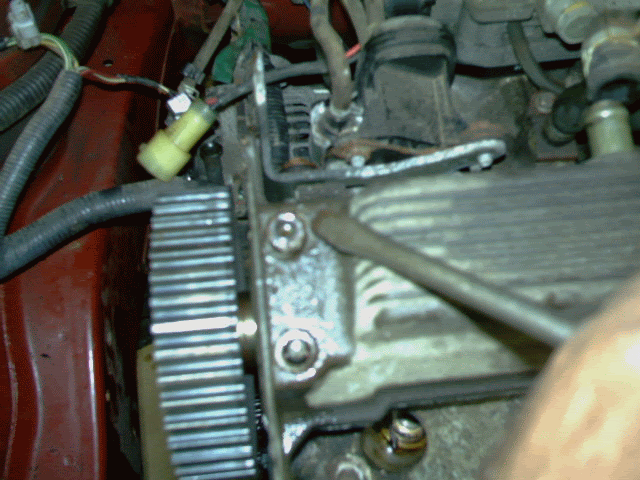
Loosen the alternator bolts (one on top and 2 below) and remove belt. (12MM bolts)

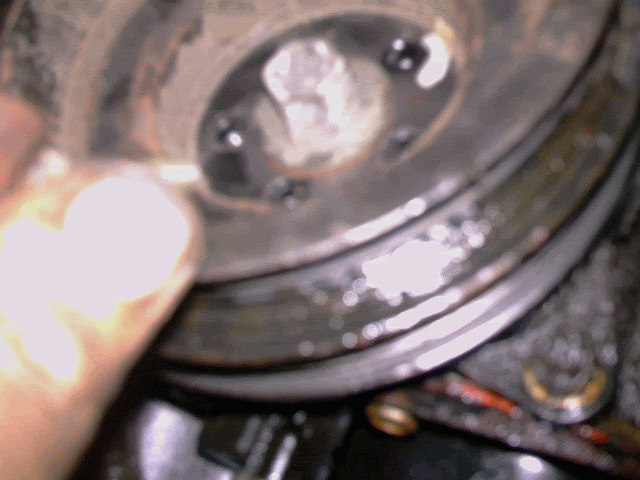
Remove the water pump pulley. (10MM bolts)
Remove the crank pulley. (5 8mm bolts - don't remove center bolt)

Remove timing belt cover. (8 10MM bolts and loom holders)
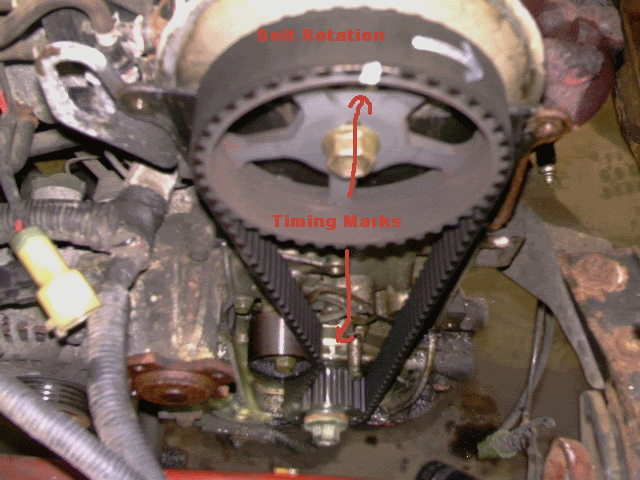
Check and correct timing marks and note rotation.
Loosen tensioner and remove belt and mark belt rotation if re-using it. (12MM bolt)

Inspect water pump and replace if questionable (wanna do this again?)
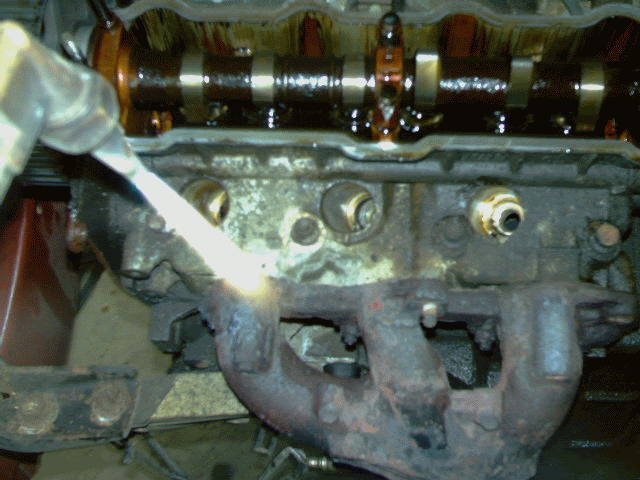
Remove exhaust manifold bolts and use heat if tight & pull away from head. (10MM bolts and nuts)

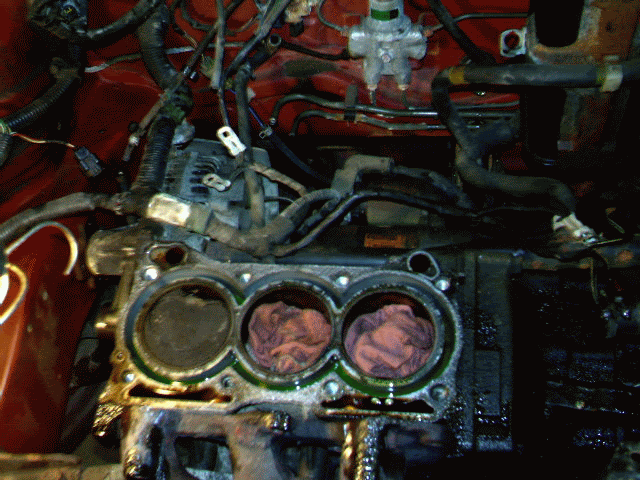
Remove the 4 valve cover nuts and strike the seals off. (10 MM)

Remove the head bolts with a breaker bar from outside in. (8 10MM 12 point bolts)
Get a buddy to lift up head & intake assy and remove vacuum lines, grounds, fuel lines, etc)
Look on cylinder head for the small oil check valve and don't loose it!
Place head in a clean work area with lots of room to work.

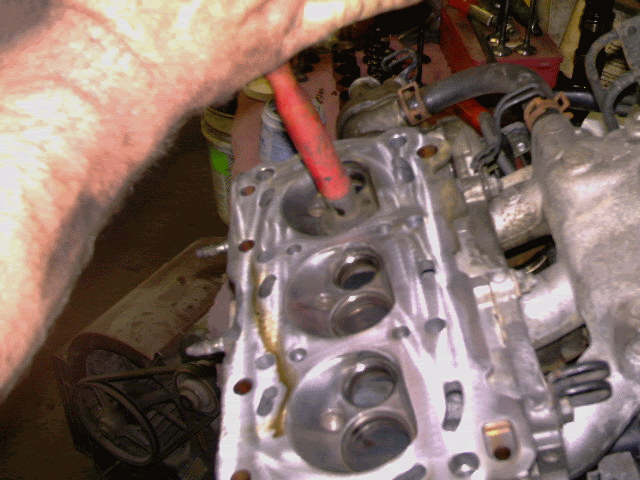
Put rags in cylinder holes and clean mating surface on head, pistons & exhaust manifold.

Clean head surface and clean out the EGR port.
Remove EGR valve and clean all ports.
Remove the camshaft bolts and cam and remove the gear and replace seal. (6 10MM bolts/studs - 17MM cam bolt)
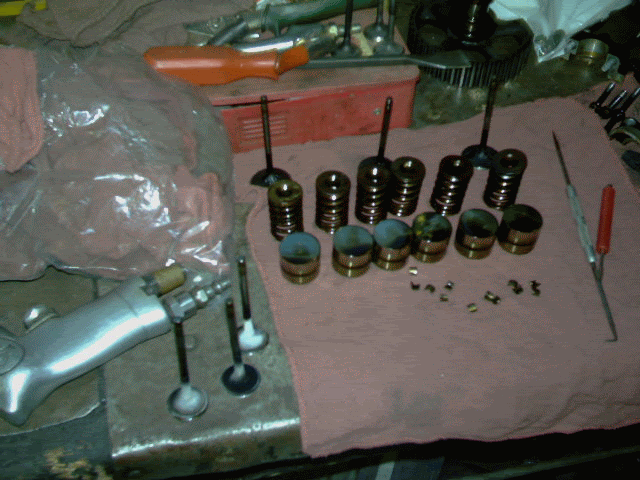
Remove the lifters put in order.
Use a valve spring compressor with adapter and remove the valves (keep parts ordered and use your buddy)

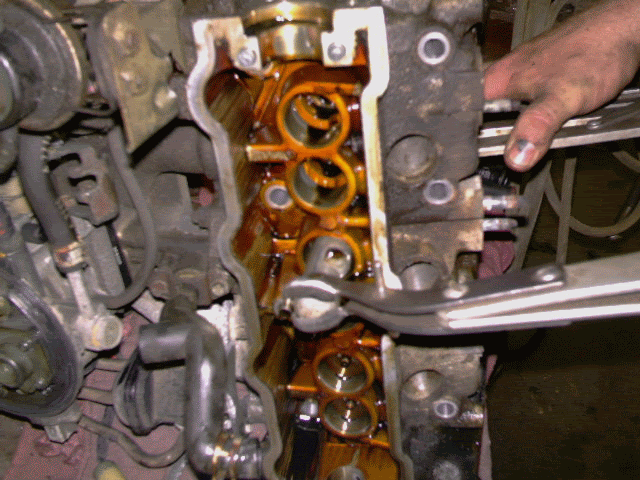
Clean surfaces and lap in all the valves (intake & exhaust) with lapping compound and re-install.

Re-install lifters and camshaft. (use torque specs from a manual)
Double check all of your work and gasket mating surfaces.

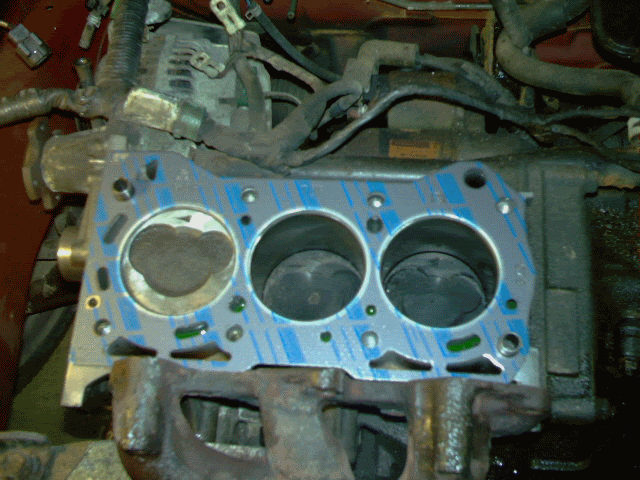
Remove intake from head and replace gasket. (optional)
Get your buddy to help you re-install the head and double check all connections!
Torque all 8 head bolts to specs and order with info from manual.
Install a new timing belt (or used one like a dummy) and check timing marks.
Re-assemble the same way you took it apart and please double check vacuum lines since there is a lot of them.
Clear all DTC if you forgot to disconnect battery.
Fill oil and coolant and fire it up!
Now you may have to set the timing, so reference your manual!
Let the car get to operating temperature and check for leaks and burp the coolant.
Test drive and watch the coolant temp since an air pocket may occur.

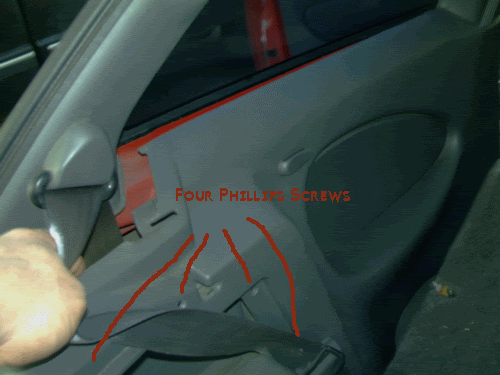
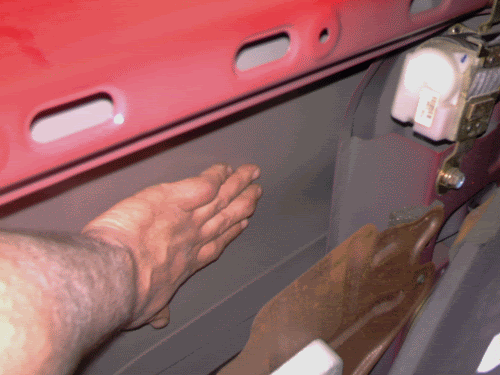
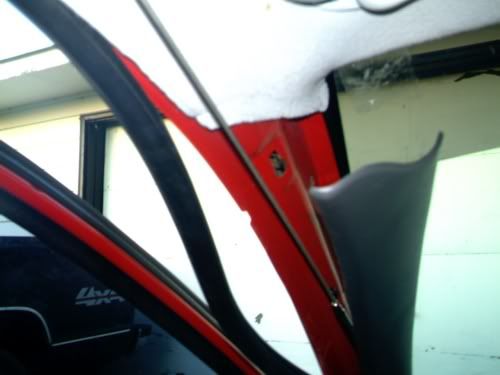
Sorry about the quality of those pics, but the lighting was real bad and my helper taking pictures must of been having the beer shakes going on. More updating to come.

Head Gasket Kit = $89.00
Timing Belt = $15.00
Oil and filter = $10.00
New Coolant = $7.00
3 Exhaust valves = $24.00

Total cost for parts = $145.00
Total Labor time = 7.0 HRS which was my time.

Attached Thumbnails
Click image for larger version

Name:	iapproveofthispost.jpg
Views:	198
Size:	25.9 KB
ID:	1415  
__________________

GeoMetroforum.com - got mpg?

Last edited by Johnny Mullet; 09-01-2008 at 12:45 PM..
  Reply With Quote
The Following User Says Thank You to Johnny Mullet For This Useful Post:
Xist (06-28-2020)
Alt Today
Popular topics

Other popular topics in this forum...

   
Old 06-09-2008, 07:49 PM   #2 (permalink)
EcoModding Seige Tank
 
digitaldissent's Avatar
 
Join Date: May 2008
Location: San Diego, CA
Posts: 159

yarii - '07 Toyota Yaris 4dr (auto)
90 day: 41.37 mpg (US)

Bullet Bill - '07 Toyota Yaris 2dr hatch
90 day: 36.19 mpg (US)
Thanks: 0
Thanked 0 Times in 0 Posts
cool, lots of pics is always helpful,,,, wait where is the other half of the engine?
__________________

I am not trying to save the planet, just trying to hurt it a little less

Yaris build thread

what is... http://en.wikipedia.org/wiki/COINTELPRO
  Reply With Quote
Old 06-09-2008, 07:58 PM   #3 (permalink)
Master Novice
 
elhigh's Avatar
 
Join Date: Jan 2008
Location: SE USA - East Tennessee
Posts: 2,314

Josie - '87 Toyota Pickup
90 day: 40.02 mpg (US)

Felicia - '09 Toyota Prius Base
90 day: 49 mpg (US)
Thanks: 427
Thanked 616 Times in 450 Posts
Awesome attention to detail - you don't see many guys walking you through the process, and tell you what size socket you're going to need next.
__________________


Lead or follow. Either is fine.
  Reply With Quote
Old 06-09-2008, 08:17 PM   #4 (permalink)
Hi-Tech Redneck
 
Johnny Mullet's Avatar
 
Join Date: May 2008
Location: Ashtabula, Ohio
Posts: 1,436
Thanks: 6
Thanked 49 Times in 42 Posts
Send a message via AIM to Johnny Mullet Send a message via MSN to Johnny Mullet
My very first "Aeromod" was actually removing dents. A dented body surface can disrupt air flow and these Metro car bodies dent very easily. Not only that, it makes a crappy car look even crappier 
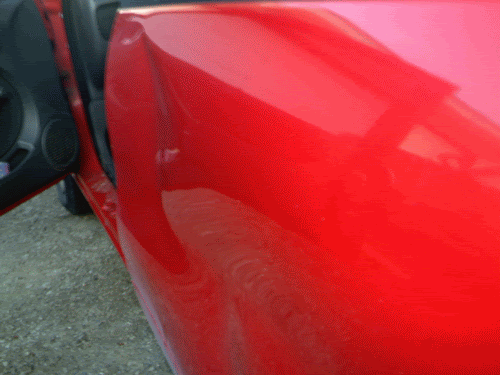
I actually added my very own dent when I got mad at the car for breaking down and I decided to make things right. There were actually dents on every body panel on this car except the hood and roof when I got it. and I got all of them out using my bare hands on the insides of the panels.

Here is a prime example of a (anger inflicted) dent...................


First thing to do is to access the inside of the panel by opening the rear hatch and removing the side panel by taking out the screws and pulling it out and up.


Next, I felt where the dent was and popped it out from the inside. If there is a crease or dimple after popping it out, you may have to use body panel tools or do like I did and grab a kitchen spoon!


Inspect your work and make adjustments where needed. I find you can get to the inner door simply by removing the door panel, the front fenders are easily accessed removing screws from the inner fender in the wheel well.

Here is the end result................


Total Cost = $0.00
Total labor time was about 2 hours.
__________________

GeoMetroforum.com - got mpg?

Last edited by Johnny Mullet; 07-21-2008 at 07:39 PM..
  Reply With Quote
Old 06-09-2008, 09:13 PM   #5 (permalink)
Hi-Tech Redneck
 
Johnny Mullet's Avatar
 
Join Date: May 2008
Location: Ashtabula, Ohio
Posts: 1,436
Thanks: 6
Thanked 49 Times in 42 Posts
Send a message via AIM to Johnny Mullet Send a message via MSN to Johnny Mullet
After rebuilding the head and getting the body in order, I found this website and learned a lot about saving fuel. The very next steps included...............

Changing driving habits (you learn more as you try it)
Inflating tire pressures to max (which in my case was 44PSI)
Advancing the ignition timing to 8 degrees (advanced to 10 then retard until ping goes away)
Weight reduction (removed spare, jack, tools, rear seat, etc)
Complete tuneup including a high quality Baldwin air filter
Disabled Daytime Running Lights (grounded park brake wire for now)
And finally, I removed and relocated radio antenna (see THIS THREAD)
These mods and changes got me to the 50 MPG mark.


Yard sale antenna = $0.50
Total cost = $0.50
Total labor time = 1 hour
Tomorrow, I will be posting another aeromod I am doing with more pictures for your viewing pleasure
__________________

GeoMetroforum.com - got mpg?

Last edited by Johnny Mullet; 07-21-2008 at 07:42 PM..
  Reply With Quote
Old 06-10-2008, 10:20 AM   #6 (permalink)
Administrator
 
Daox's Avatar
 
Join Date: Dec 2007
Location: Germantown, WI
Posts: 11,203

CM400E - '81 Honda CM400E
90 day: 51.49 mpg (US)

Daox's Grey Prius - '04 Toyota Prius
Team Toyota
90 day: 49.53 mpg (US)

Daox's Insight - '00 Honda Insight
90 day: 64.33 mpg (US)

Swarthy - '14 Mitsubishi Mirage DE
Mitsubishi
90 day: 56.69 mpg (US)

Daox's Volt - '13 Chevrolet Volt
Thanks: 2,501
Thanked 2,585 Times in 1,553 Posts
Great thread Johnny.

Have you tried using much pulse and glide? That should really kick your numbers up there.
__________________
Current project: A better alternator delete
  Reply With Quote
Old 06-10-2008, 10:23 PM   #7 (permalink)
Hi-Tech Redneck
 
Johnny Mullet's Avatar
 
Join Date: May 2008
Location: Ashtabula, Ohio
Posts: 1,436
Thanks: 6
Thanked 49 Times in 42 Posts
Send a message via AIM to Johnny Mullet Send a message via MSN to Johnny Mullet
My next aeromod I performed was removal of the passenger side mirror. With already having the antenna removed, removing that extra mirror only made more sense. Mine was already loose and ready to fall off, so I broke it the rest of the way off...............


If you would rather remove it normally, Pop off the inside cover and remove the 3 screws instead. This is actually a pic of the left side. A deer removed that one for me, but only left a minor dent.


Now to make the cover for the area the mirror was. I used a piece of a stiff, plastic mudflap found at any truck stop. I had a small piece left over from the fender skirt future project which will be posted on this thread at a later time.


I traced out and estimated the size with the old mirror and used a pocket knife to lightly scribe my mark.


Using a regular circular saw, I cut the needed piece and then shaved off the edges from burrs with the pocket knife.


The material this flap is made of is a stiff, yet slightly flexible plastic and holding the contour or slight bend is acheived by pre-bending it with your hands slightly and holding it for a minute. I then used Black Silicone RTV and carefully put a bead around the inside edge and set in place. After a few moments of holding the cover in place, I ran a bead around the outside perimeter and used my silicone skillz and my lucky finger to perfectly seal the entire piece.


The most important part of this is to let the silicone cure overnight. This ensures it stays in place and after the silicone if cured, it is slightly flexible to allow for any movement from temperature changes, highway speeds, shopping carts, curious kids, etc.

Not too shabby.....................


Mudflap material = $0.00
Black RTV = $7.00
Total cost = $7.00
Total labor time = 1 hour
__________________

GeoMetroforum.com - got mpg?

Last edited by Johnny Mullet; 07-21-2008 at 07:44 PM..
  Reply With Quote
The Following User Says Thank You to Johnny Mullet For This Useful Post:
Xist (06-28-2020)
Old 06-11-2008, 06:34 AM   #8 (permalink)
Hi-Tech Redneck
 
Johnny Mullet's Avatar
 
Join Date: May 2008
Location: Ashtabula, Ohio
Posts: 1,436
Thanks: 6
Thanked 49 Times in 42 Posts
Send a message via AIM to Johnny Mullet Send a message via MSN to Johnny Mullet
Transmission is being replaced. It made a grinding noise when I got it and just simply got worse as I drove it. It was so bad, it was slowing the car down. Car has been down for a few days, but I yanked it out last night and took pictures of the process while removing it.

Later I will post a complete illustrated guide on how to remove a 5 speed manual from a 1.0L Suzuki engine and the clutch replacement will also be included.

Stay tuned
__________________

GeoMetroforum.com - got mpg?
  Reply With Quote
Old 06-11-2008, 11:01 AM   #9 (permalink)
EcoModding Lurker
 
Warhawk626's Avatar
 
Join Date: Jun 2008
Location: Louisiana
Posts: 43

SlowZoom - '98 Mazda 626 DX
Last 3: 31.36 mpg (US)

Das Tank - '00 Dodge Carvan Base
Thanks: 0
Thanked 0 Times in 0 Posts
Great thread mulletman
__________________
1998 Mazda 626 DX
2.0 4 cylinder
5 speed manual
AC and PS Delete
17x7 Drag DR 19 wheels ( I know )
Hankook z rated tires ( again, I know

Future plans: Mazda miata 14'' BBS wheels
  Reply With Quote
Old 06-11-2008, 09:18 PM   #10 (permalink)
Hi-Tech Redneck
 
Johnny Mullet's Avatar
 
Join Date: May 2008
Location: Ashtabula, Ohio
Posts: 1,436
Thanks: 6
Thanked 49 Times in 42 Posts
Send a message via AIM to Johnny Mullet Send a message via MSN to Johnny Mullet
Trans/Clutch Removal

Here is my transmission and clutch removal guide for you to enjoy. Make sure you are working on a clean, concrete surface since you will be lying directly on your back with no room for a creeper unless you are an anorexic. First thing you need to do is jack up the driver side front until the tire is at least 4" off the ground and place a jack-stand securely under the frame. Give it a good shakin' (without denting the body -lol-) to make sure the car is safe because you will be directly under the car and nobody wants to die unless you think you can bench-press a Metro.

Start off under the hood and..........

Remove battery (2 10MM nuts)
Remove battery tray (3 14MM bolts)
Remove the speedometer cable (remove clip and pull)
Remove clutch cable (14MM nut)
Remove clutch cable bracket (2 12MM bolts)
Unplug reverse light connector (duh)
Remove ground cable and clean it (14MM bolt)
Reference pic below..................


Now you are done under the hood for now. Next thing is to get to the axle shaft removal.

Drain the transmission (3/8 ratchet)
Remove the LF tire (4 19MM)
Remove the brake caliper and pads (12 MM)
Remove the axle nut with a impact wrench (1 1/4 nut)
Push in axle shaft to see if it's free


Remove the lower ball joint pinch bolt (14 MM bolt)
Use a chisel to spread the pinch area and pound down on the control area to separate.


Pull the complete knuckle outwards and push axle through until free
Use a prybar and pop out the axle shaft and set aside


Now it is time to get under the car and here is where all the fun starts. First thing is to place a floor jack with a block of wood under the oil pan to support the engine. If you are lucky enough to have an engine sling, then use it. Jack the engine/trans assembly up slightly to take tension off the mounts.

Directly behind the trans under the car, you will find the shift rod linkage and the brace. These may look like ordinary bolts and nuts, but I found out removing these were actually the hardest part of the entire job! These are actually pins going through a bushing and if they are seized up, use lots of penetrating oil and strike the housing part (eye) many times with a hammer to break up the rust. The shift rod link a double joint (not the kind you roll) and you can take it off from either location. Heat is not recommended and don't even try whacking the threaded side with a hammer unless you have a nut on it flush.


After getting this far, it's time for a short break to collect your senses and thoughts so you don't screw up.

Part #2 coming right up......................

__________________

GeoMetroforum.com - got mpg?

Last edited by Johnny Mullet; 06-11-2008 at 09:25 PM..
  Reply With Quote
The Following User Says Thank You to Johnny Mullet For This Useful Post:
Xist (06-28-2020)
Reply  Post New Thread


Thread Tools


Similar Threads
Thread Thread Starter Forum Replies Last Post
Why I'm Choosing a Civic Over a Metro Wayneburg General Efficiency Discussion 43 03-02-2011 05:11 PM
Geo Metro XFI Convertible Project Finished Coyote X EcoModding Central 227 11-14-2009 10:31 PM
$10 Metro on Craigslist. Project car, anyone? MetroMPG The Lounge 6 08-31-2009 01:21 AM
New to the forum, with my RX-7 EV Project... BigMouse Fossil Fuel Free 14 02-28-2008 04:14 PM
Radical Metro Aero Mods? Coyote X Aerodynamics 8 01-01-2008 04:05 PM


Powered by vBulletin® Version 3.8.11
Copyright ©2000 - 2024, vBulletin Solutions Inc.
Content Relevant URLs by vBSEO 3.5.2
All content copyright EcoModder.com