 08-11-2014, 11:41 PM
|
#21 (permalink)
|
|
Cyborg ECU
Join Date: Mar 2011
Location: Coastal Southern California
Posts: 6,302
Thanks: 2,374
Thanked 2,176 Times in 1,471 Posts
|
A welcome to the OG VX! Hahaha. I'm looking forward to pics of your "new" EG soon. So cool to see the experienced old racer-honda guys coming into the realm of eco-modding these same cars. The car is a great base for ecomodding, just like it was for 1990s racing around. You should have a good knowledge base. Looking forward to your contributions around here.
__________________
See my car's mod & maintenance thread and my electric bicycle's thread for ongoing projects. I will rebuild Black and Green over decades as parts die, until it becomes a different car of roughly the same shape and color. My minimum fuel economy goal is 55 mpg while averaging posted speed limits. I generally top 60 mpg. See also my Honda manual transmission specs thread.


|
|
|

|
 Today Today
|
|
|
|
 Other popular topics in this forum...
|
|
|
|
 08-13-2014, 10:14 PM
|
#22 (permalink)
|
|
JDM hypeR mileR
Join Date: Aug 2014
Location: Mooresville, NC
Posts: 418
Thanks: 475
Thanked 418 Times in 198 Posts
|
Quote:
Originally Posted by Baltothewolf

It looks wonderful to me for a 22 year old car! And it's good he did the timing belt that's a 150$ job minimum if you do the work yourself. If not, it's close to 500. Anyway, I can't wait to see more progress on this!
|
Quote:
Originally Posted by vrmouseyd15b

Absolutely LOVE the wagovan! Nice cars!
|
Quote:
Originally Posted by California98Civic

A welcome to the OG VX! Hahaha. I'm looking forward to pics of your "new" EG soon. So cool to see the experienced old racer-honda guys coming into the realm of eco-modding these same cars. The car is a great base for ecomodding, just like it was for 1990s racing around. You should have a good knowledge base. Looking forward to your contributions around here.
|
--------------
Thanks guys. Yes, I was fortunate to have found this VX in such great condition. The wagovan was my a beast of a project. Everything was tough on that one, but it was certainly a cool car once finished.
Def funny to see the F&F generation coming around full circle with the Eco mods. Basically, we are getting older and appreciate FE. Plus, IMHO, things are getting out of hand with the Honda scene. Dudes obsessing over bolt kits for the engine. Mil-spec firewall connections for tucked harnesses. Weird stuff. You used to could "hang" with the rest of the top by spending circa $3K on a build/parts and some good ol' fashion elbow grease. Now, that's just enough $$ to get you in-line with the ricers down at the local Sonic. Thanks to companies like Hybrid Racing, Chase Bays, and Bolt Boys, show-quality Honda builds take three times as long to complete and are $15K affairs once all the dust settles. Then your left with a....Honda. So, you have to part-out the build to make your money back (since no one wants to pay $15K for a used Honda, no matter how nice/"perfect" it is).
I'm excited to begin what I think is the "new frontier" for Honda-heads. Clean built Eco cars. We'll, it's really not new for Honda, as I think being eco-minded is what put them on the map in the first place 
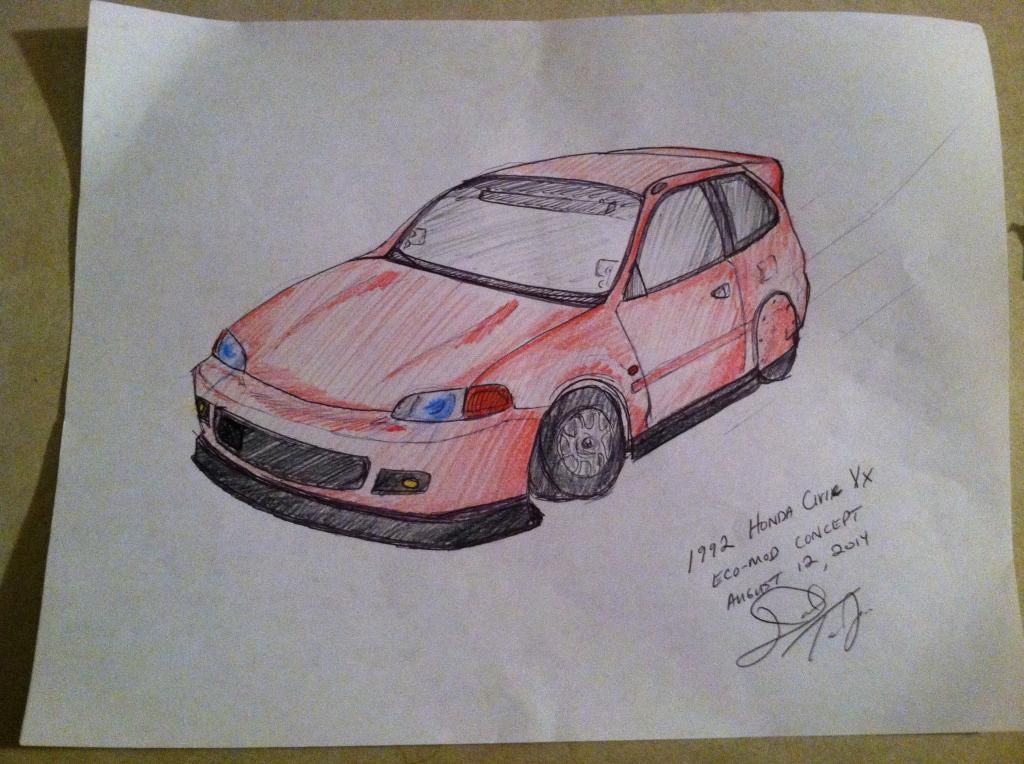
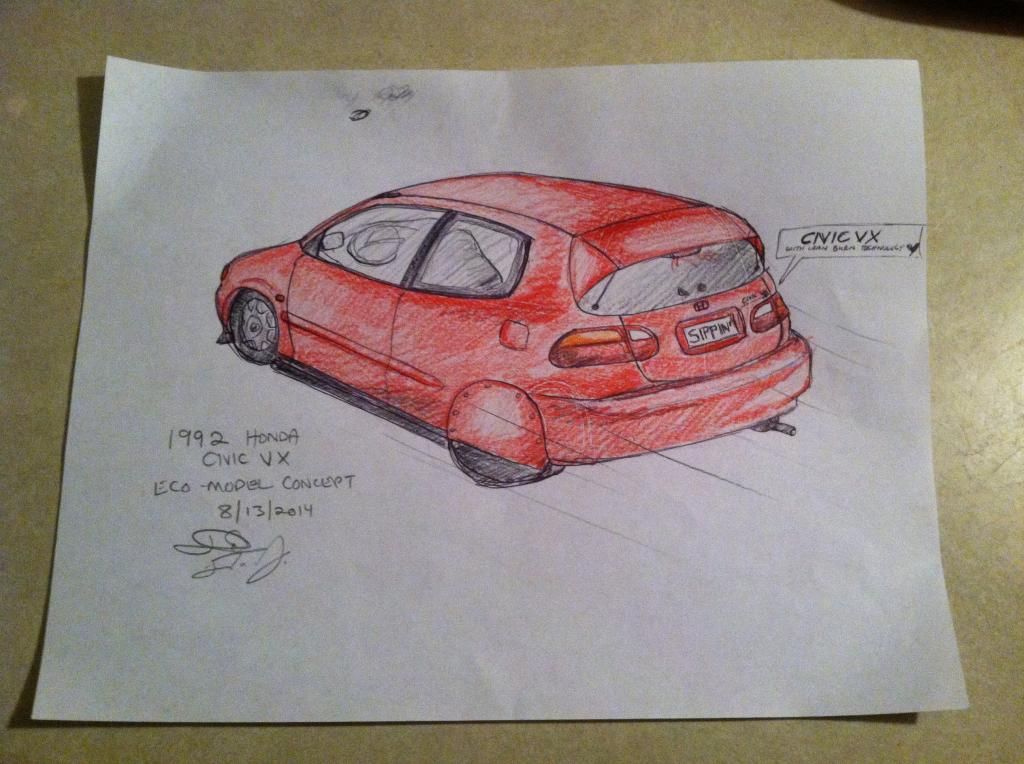
Here's some conceptual sketches I put together for the aesthetics. Should be a fun build!


Last edited by OG VX; 08-14-2014 at 01:49 PM..
|
|
|

|
|
The Following 5 Users Say Thank You to OG VX For This Useful Post:
|
|
 08-13-2014, 10:30 PM
|
#23 (permalink)
|
|
Cyborg ECU
Join Date: Mar 2011
Location: Coastal Southern California
Posts: 6,302
Thanks: 2,374
Thanked 2,176 Times in 1,471 Posts
|
Yup. That's the ticket. Underbody tray?
I have always wished I had enough experience/knowledge to make fiberglass body panels... I'd replace the hood and trunk/hatch.
__________________
See my car's mod & maintenance thread and my electric bicycle's thread for ongoing projects. I will rebuild Black and Green over decades as parts die, until it becomes a different car of roughly the same shape and color. My minimum fuel economy goal is 55 mpg while averaging posted speed limits. I generally top 60 mpg. See also my Honda manual transmission specs thread.


|
|
|

|
 08-14-2014, 12:47 AM
|
#24 (permalink)
|
|
Master EcoModder
Join Date: Feb 2013
Location: TN
Posts: 300
Thanks: 399
Thanked 564 Times in 189 Posts
|
Looks great OG, I look forward to your build tread.
|
|
|

|
 08-14-2014, 01:50 AM
|
#25 (permalink)
|
|
ALL UP ON THE INTERWEB!!!
Join Date: Apr 2014
Location: quad cities illinois/iowa border
Posts: 520
Thanks: 185
Thanked 178 Times in 139 Posts
|
You have a beautiful vision for that car. I'm definitely interested. That's More like what those crz's should look like, in my opinion.a little more "swoopy" with the sexy lines.
Sweet!
|
|
|

|
 08-14-2014, 01:14 PM
|
#26 (permalink)
|
|
JDM hypeR mileR
Join Date: Aug 2014
Location: Mooresville, NC
Posts: 418
Thanks: 475
Thanked 418 Times in 198 Posts
|
Man, so much support here. I really appreciate it!
I’ll be back on my next post with some actual progress. Just haven’t had time to post up this weeks pics/progress.
For now, here’s an overview of my plans for this build. I’m sure they will evolve somewhat as my knowledge base in eco-tuning increases...I know it’s a long/laborious list to read through, but this list is for my own records/planning as well, so please bear with me.
PLANS FOR THE BUILD:
Exterior
- Complete cleaning of all grease/dirt (including door/hatch jambs, engine bay, and wheel wells)
- Clean wheel-wells and spray with fresh black paint. Clean and paint calipers silver. Clean backside/inner part of OEM wheels. Paint OEM drums black.
- Attempt to restore original OEM Milano Red paint w/ cutting & buffing work.
- ABS grill block; small opening on left side (with black gutter-guard mesh) for flow to radiator
- ABS flush-mount fog light covers
- ABS extended front lip (fabricated to attach to, and lower, profile of existing OEM VX lip)
- ABS extended side skirts (fabricated to attach to, and lower, profile of existing OEM side skirts)
- OEM mirror delete on RH; DIY fiber-glass delete from old mirror on LH
- convex interior-mounted side mirrors; suction-mounted to windshield on both sides of vehicle
- upgraded rear view mirror (larger convex, or Wink)
- JDM-style thin side moldings
- JDM Stanley side-marker lights on fenders
- SiR-style clear corner lights w/ 1157NA bulbs
- OEM headlights with H4 LED bulb conversion
- Nokya Hyper Yellow H3 fog bulbs
- DIY windshield wiper air deflector (made of ABS, fiberglassed onto wiper cowl)
- OEM antenna delete panel
- Rear wheel skirts with hidden-type cabinet hinge incorporated. Use of red-anodized dress washers and allen-key flush bolts to attach (clean look).
- All black trim pieces and body lips/moldings restored to “like new” appearance with Duplicolor Bumper Paint and/or Forever Black die.
- Bosch Icon wiper blades
- Front wheel deflectors valance connected to extended front lip
- Metal Kammback spoiler fabricated to mount to existing OEM wing and hatch shock hole locations. Painted to match body.
- Some sort of rear decal or sign added to inform that I’m a hypermiler, or that I’m currently hypermiling. May incorporate some amber lights into this as well.
- Corrugated plastic added to entire under-carraige
- Rear under-carraige, chassis, and exhaust all painted with black paint for rust protection and good looks.
- Rear exit-splitter added to rear bumper
- Light (20%) tint applied to hatch and rear windows.
- Deep Scrub applied to all exterior windows
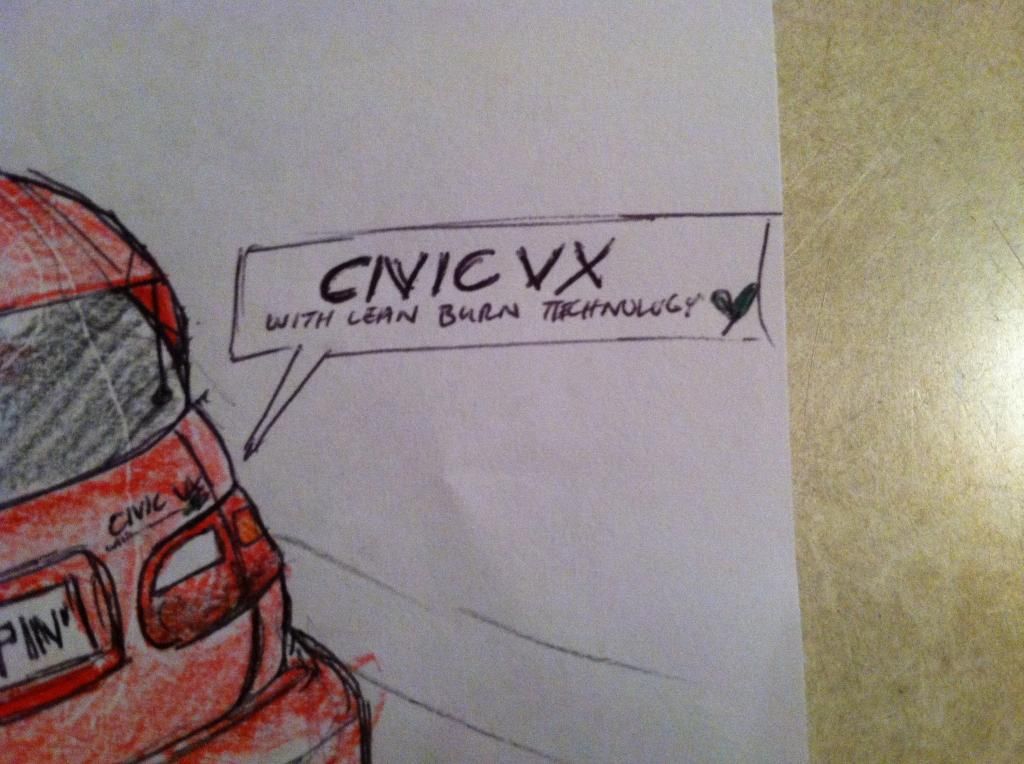
- Design and install custom Civic VX reproduced decal with addition of “With Lean Burn Technology” below; inc. green leaves into design.
INTERIOR
- Install Alarm System
- Remove front seats and center console.
- Complete cleaning of all dirt/dust/etc; wash and clean windows
- Clean and vacuum carpets and mats
- Swap passenger seat to driver’s side (if possible); disassemble and take drivers upper-seat to upholstery shop for repair and restoration. Swap back seats when drivers seat is repaired.
- Remove door cards. Troubleshoot and repair internal issue on LH side causing slow cranking for window. Grease and clean all window tracks.
- Troubleshoot speaker issue on front two (main and tweeters) speakers; check connections
- Remove and clean cloth panels on door cards and arm rest. Let dry. Fiberglass re-inforce cracked arm rest lid. Re-install/Glue fabric.
- Repair tweeter mounts on both sides.
- Install iPod goose-mount on passenger side seat bolt.
- Steering column single gauge mount w/ vacuum gauge installed.
- Find/purchase used MPGuino for VX, create custom fiberglass mount and fiberglass into existing steering column pod gauge plastic piece, on side adjacent to vacuum gauge.
- Install “Lean Burn” green LED in-between vacuum gauge and MPGuino
- Paint “5” from shift knob with green paint to match Eco theme in cluster.
- Complete amber conversion to climate control and all applicable interior buttons
- LED bulb conversion for dome light.
- Upgrade head-unit to an amber-lit model, with SD/USB/Aux connections, SiriusXM, Pandora, and Bluetooth hands-free audio & calling
- Install traditional radio antenna and XM antenna on top of windshield
- Mount custom “A/C” system from bolts that hold sun visor. (Basically, a cigarette lighter-powered mini-fan, with a small siphon pump to mist water through fan. Very high tech!)
MECHANICAL
- Replace Fuel Filter
- Remove intake manifiold; Clean: TB, IACV, FIV, EGR and EGR ports; install new PCV valve
- While intake removed, replaced coolant o-rings for coolant pipe on back of block.
- Flush coolant system, check and ensure thermostat is operating properly. Check all hoses for cracks.
- Brush paint bare spots on valve cover with wrinkle black paint.
- Install o-ring for Dizzy cap
- Install NGK spark plug wires and correct “4” heat-model NGK plugs
- Check compression (again) to see if any gains have happened from running better oil and Engine Restorer for a couple thousand miles
- Troubleshoot and repair RH washer spray nozzle, not spraying currently.
- Replace broken washer line clip with proper junk yard unit.
- Marvels Mystery Oil for Gas Tank
- Replace front brake pads and rotors
Last edited by OG VX; 08-14-2014 at 01:50 PM..
|
|
|

|
|
The Following User Says Thank You to OG VX For This Useful Post:
|
|
 08-14-2014, 02:10 PM
|
#27 (permalink)
|
|
ALL UP ON THE INTERWEB!!!
Join Date: Apr 2014
Location: quad cities illinois/iowa border
Posts: 520
Thanks: 185
Thanked 178 Times in 139 Posts
|
Wow. You don't play. I like your style! This should be a real cool build. ..
|
|
|

|
 08-14-2014, 02:20 PM
|
#28 (permalink)
|
|
Master EcoModder
Join Date: Dec 2007
Location: Upstate SC
Posts: 1,088
Thanks: 16
Thanked 677 Times in 302 Posts
|
There are two approaches to handling air flow under the car for minimum drag.
One is to lower the car and adding an air dam to divert air around the sides of the car and side skirts to maintain the low pressure zone under the car. This reduces frontal area (lowers drag) and creates a low pressure zone under the car (increases downforce and also drag, since it takes energy to create the low pressure zone). This is the approach that most race cars use since it increases downforce. Many ecomodders also do this since it is easy to implement.
The other approach is to reshape the nose to lower the stagnation point at the front of the car to divert most of the air over and around the sides of the car. This is combined with smooth underpanelling and rear diffuser to provide a smooth straight path for the remaining air flowing under the car, and a mix of wheel spats, double side skirts, and wheel boattails to deflect air smoothly around the car's wheels (4 individual wheel fairings or 2-wheel pontoons on each side of the car). This approach has no effect on frontal area and, depending on how it is implemented, can increase or decrease downforce. This is the approach that most solar race cars use. When using this approach you need to exhaust your radiator air out of the front wheel wells or out the top of the hood to keep it from disturbing the smooth airflow under the car.
Last edited by basjoos; 08-14-2014 at 02:30 PM..
|
|
|

|
|
The Following 7 Users Say Thank You to basjoos For This Useful Post:
|
|
 08-14-2014, 02:29 PM
|
#29 (permalink)
|
|
Furry Furfag
Join Date: Nov 2013
Location: Apple Valley
Posts: 2,084
Thanks: 67
Thanked 409 Times in 313 Posts
|
Quote:
Originally Posted by vrmouseyd15b

Wow. You don't play. I like your style! This should be a real cool build. ..
|
100% agreed! This is one of those threads that whenever I see an update I rush over and look, and have yet to be disappointed haha.
__________________

|
|
|

|
 08-14-2014, 03:05 PM
|
#30 (permalink)
|
|
Master EcoModder
Join Date: Feb 2013
Location: TN
Posts: 300
Thanks: 399
Thanked 564 Times in 189 Posts
|
reply to OG
OG, Looks like you are well into the planning stage. My only suggestion would be to obtain and install (even temporally) a MPGuino ASAP. Not only will it confirm the worth of any aero or mechanical changes, but also give you instant feedback as you change your driving style to a Hypermiler.
Also I have found that a vacumn gauge is very important to us "lean burn guys" as it will warn you as you are about to "go out" of lean burn so you can decide if you want to make a quick adjustment to throttle position.
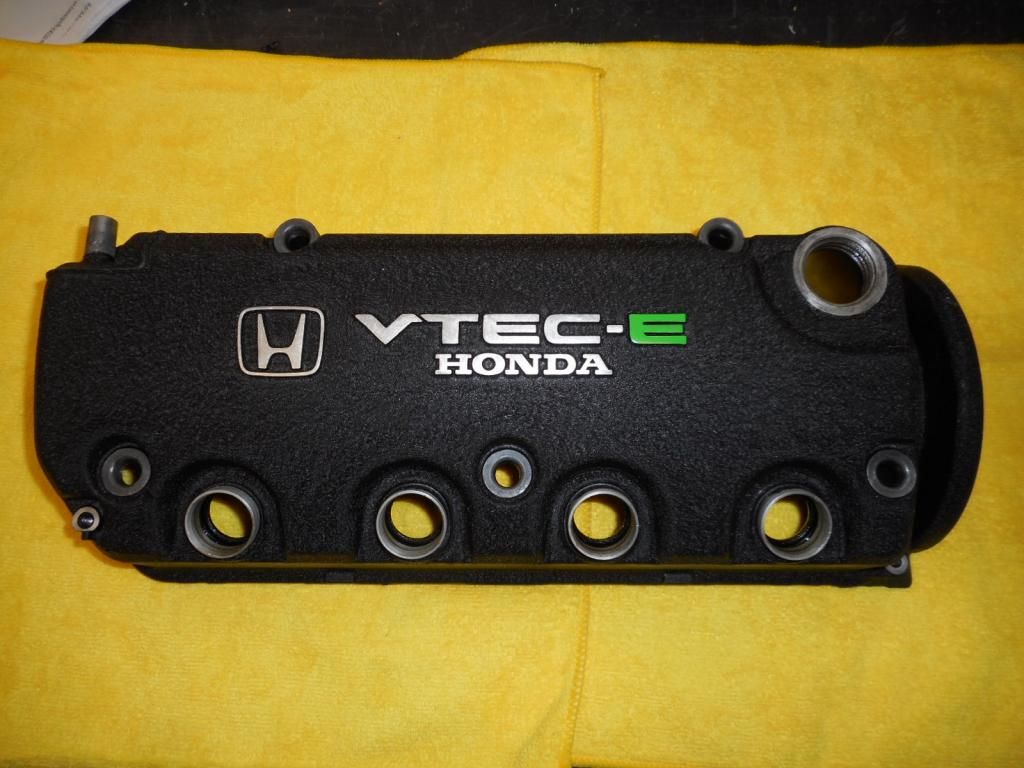
Here is a possible "GREEN" accent you may want to add to your valve cover. This one will be added to our 95 white VX "show car".

|
|
|

|
|
The Following 2 Users Say Thank You to The donkey CRX For This Useful Post:
|
|
|