 12-14-2011, 11:56 AM
|
#5311 (permalink)
|
|
PaulH
Join Date: Feb 2008
Location: Maricopa, AZ (sort of. Actually outside of town)
Posts: 3,832
Thanks: 1,362
Thanked 1,202 Times in 765 Posts
|
Oh they're soldered! I used solder paste:
This video is a pile of crap, but it shows the basic process. I just left out the finished product and dipping it in water. When I filmed it, I still didn't know exactly how I was going to do the whole process.
|
|
|

|
|
The Following User Says Thank You to MPaulHolmes For This Useful Post:
|
|
 Today Today
|
|
|
|
 Other popular topics in this forum...
|
|
|
|
|
12-14-2011, 06:31 PM
|
#5312 (permalink)
|
|
EV DIYer
Join Date: Jun 2009
Location: Vancouver, BC
Posts: 28
Thanks: 8
Thanked 6 Times in 5 Posts
|
I picked up an optocoupler from the nearby supplier, soldered it in, powered up the controller, and as the precharge time expired, the contactor clicked closed! It was working again! However the mosfet Q1 was getting hot, so back to the store to get a replacement.
They did not have the exact part, but assured me that an IRF5210, a P-Channel 100v 40A MosFET would work just as well. And it did work, activating the contactor just like it used to before the problems. It stays cool to the touch as well.
I will reassemble and test it in the car a little later on. Maybe I should put a diode accross the coil -- I will check what they say on their website first.
Amin
|
|
|
|
|
The Following User Says Thank You to amino For This Useful Post:
|
|
|
12-14-2011, 08:17 PM
|
#5313 (permalink)
|
|
EcoModder
Join Date: Mar 2010
Location: New Zealand
Posts: 181
Thanks: 0
Thanked 33 Times in 20 Posts
|
You should DEFINITELY put a diode across the contactor coil. Cathode to +, anode to - and it needs a PIV rating of a couple or more times the supply voltage with a current rating equal to the coil current. If you don't fit a diode, the inductive spike generated when you open the contactor will destroy most things.
__________________
Sometimes I sits and thinks and sometimes I just sits.
|
|
|
|
|
12-14-2011, 08:38 PM
|
#5314 (permalink)
|
|
EV DIYer
Join Date: Jun 2009
Location: Vancouver, BC
Posts: 28
Thanks: 8
Thanked 6 Times in 5 Posts
|
The reason I did not use a diode was that I read somewhere it was not needed and could actually damage the KiloVac EV200AAANA contactor with the built in economizer circuit. The specs sheet says: "Built-in coil economizer – only 1.7W hold power @ 12VDC and it limits back EMF to 0V. Models requiring extenal economizer also available."
Amin
|
|
|
|
|
12-14-2011, 11:34 PM
|
#5315 (permalink)
|
|
PaulH
Join Date: Feb 2008
Location: Maricopa, AZ (sort of. Actually outside of town)
Posts: 3,832
Thanks: 1,362
Thanked 1,202 Times in 765 Posts
|
The IRF5210 is definitely a superior part. I once had an EV200 with the economizer not working. I wonder if that's part of the problem. It caused the mosfet to fail. Do you have a way to monitor the current being used by the coil?
|
|
|
|
|
12-15-2011, 12:02 AM
|
#5316 (permalink)
|
|
EV DIYer
Join Date: Jun 2009
Location: Vancouver, BC
Posts: 28
Thanks: 8
Thanked 6 Times in 5 Posts
|
With a DMM in series with the contactor coil, the current drops from just over an amp down to 0.1 amp when the contactor closes, and stay there.
It says on their website in 'Technical Support' :
"............The problem is easy to avoid; simply don't put anything across the relay coil that will slow down the release time of the relay................because the contacts will usually "tack weld" on the make, and improper coil suppression reduces the coil energy which is needed to break the weld."
|
|
|
|
|
12-15-2011, 12:24 AM
|
#5317 (permalink)
|
|
PaulH
Join Date: Feb 2008
Location: Maricopa, AZ (sort of. Actually outside of town)
Posts: 3,832
Thanks: 1,362
Thanked 1,202 Times in 765 Posts
|
Well the economizer is working! I just don't get why a part rated for 18 amps can't do 0.1 amps. I'm just glad it's working now.
|
|
|
|
|
12-15-2011, 12:41 AM
|
#5318 (permalink)
|
|
EV DIYer
Join Date: Jun 2009
Location: Vancouver, BC
Posts: 28
Thanks: 8
Thanked 6 Times in 5 Posts
|
Paul, at the risk of breaking Rule #1 : Blame someone else when it doesn't work, I think it was probably something I probably did in the process of looking for the cause of the initial malfunction.
Thanks for your input and also to Adam and harlequin2.
|
|
|
|
|
The Following User Says Thank You to amino For This Useful Post:
|
|
|
12-15-2011, 01:57 AM
|
#5319 (permalink)
|
|
PaulH
Join Date: Feb 2008
Location: Maricopa, AZ (sort of. Actually outside of town)
Posts: 3,832
Thanks: 1,362
Thanked 1,202 Times in 765 Posts
|
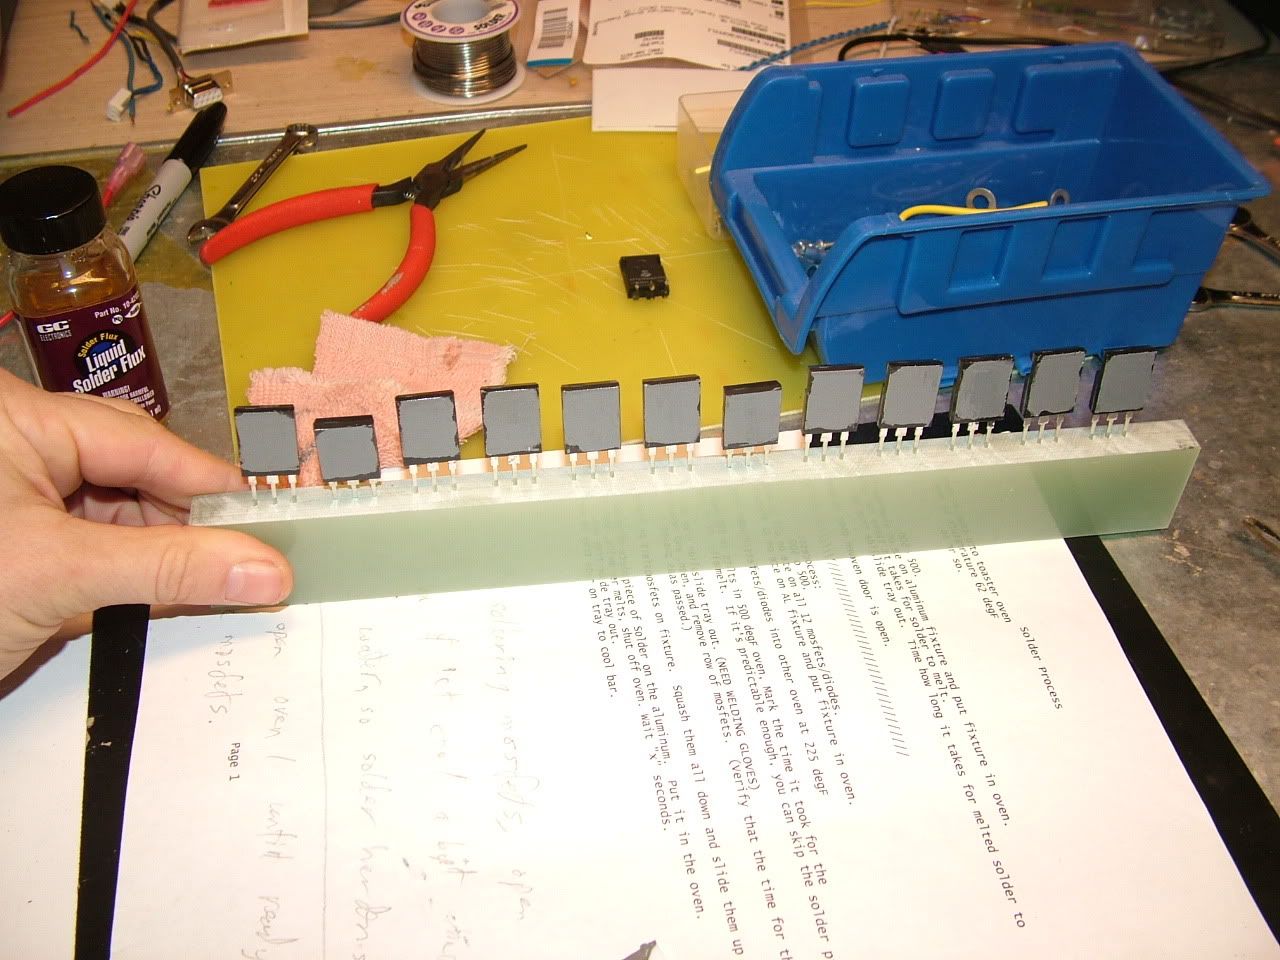
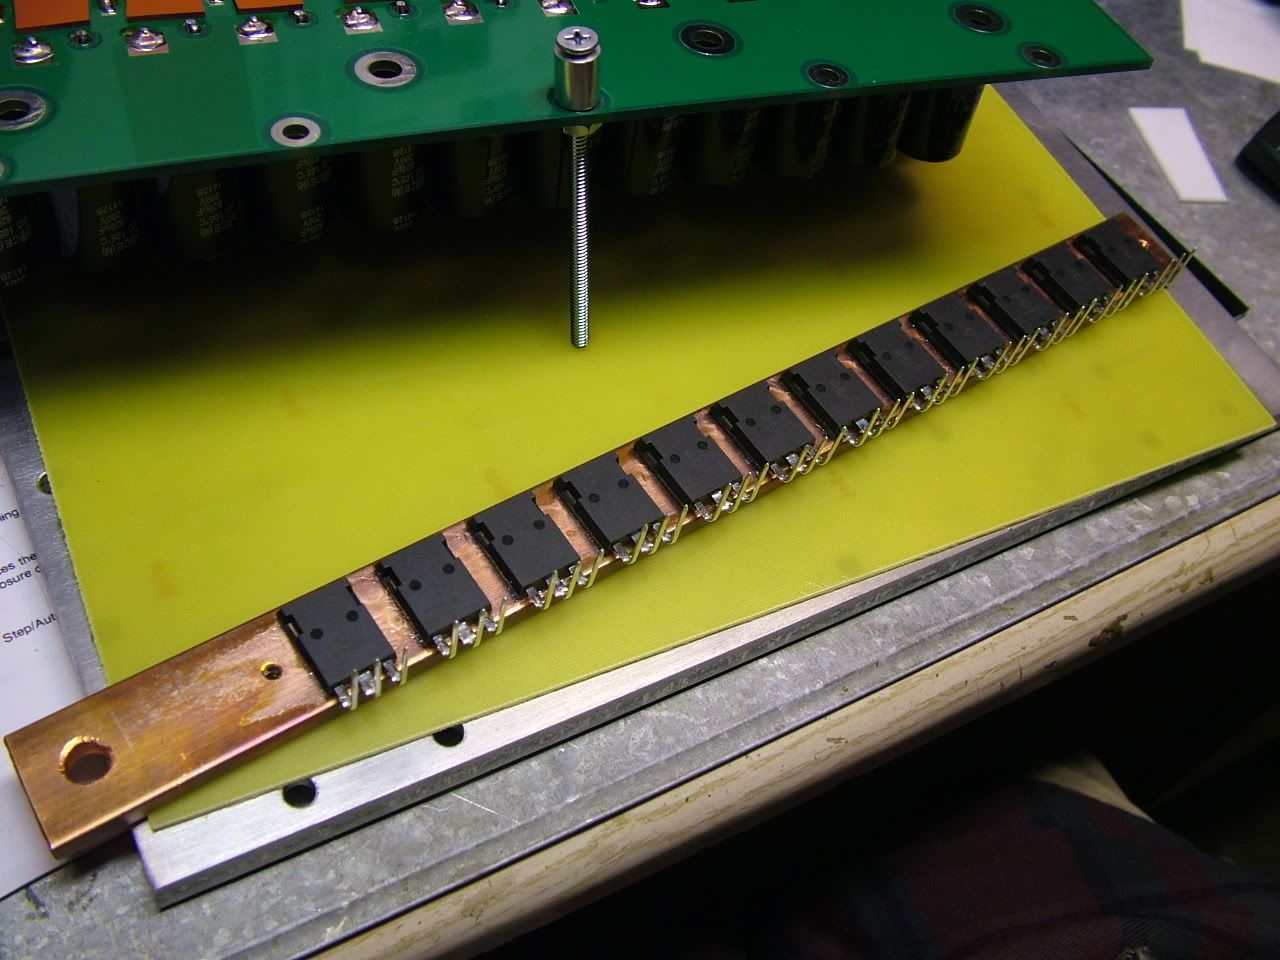
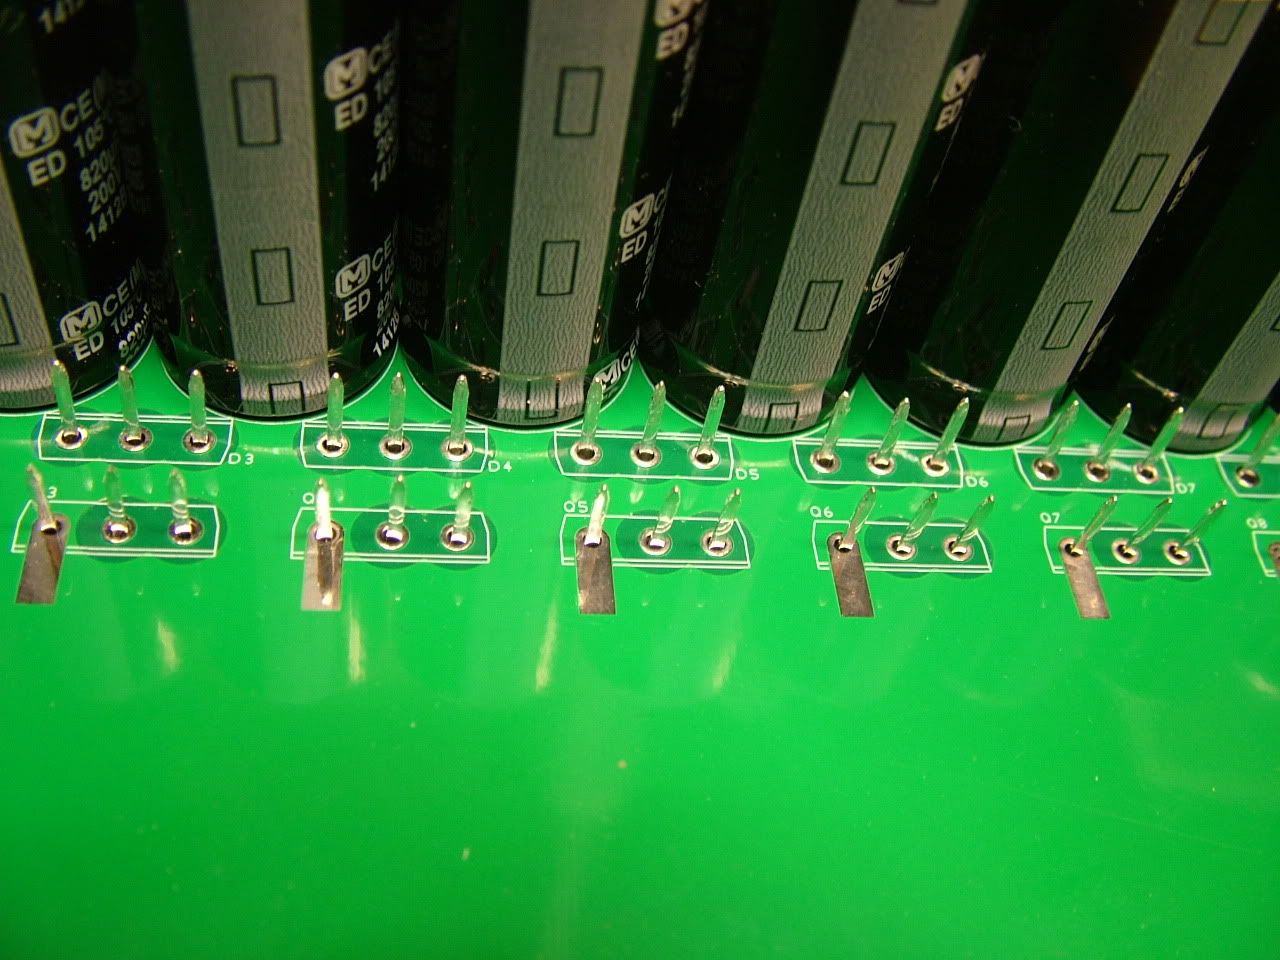
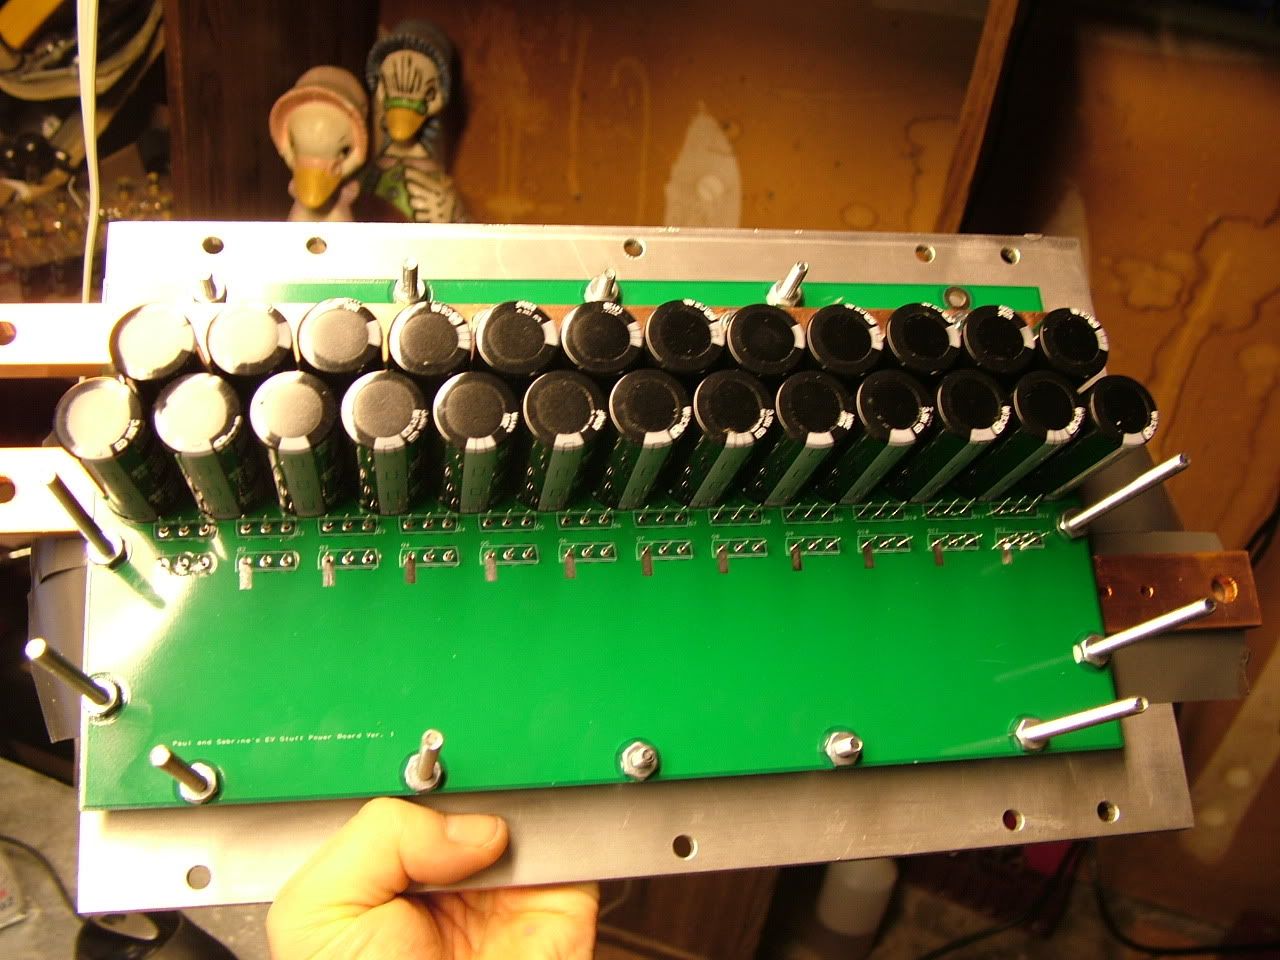
Power section and base plate attached!:
Solder paste. 63/37, which has a melting point of like 180 degC.
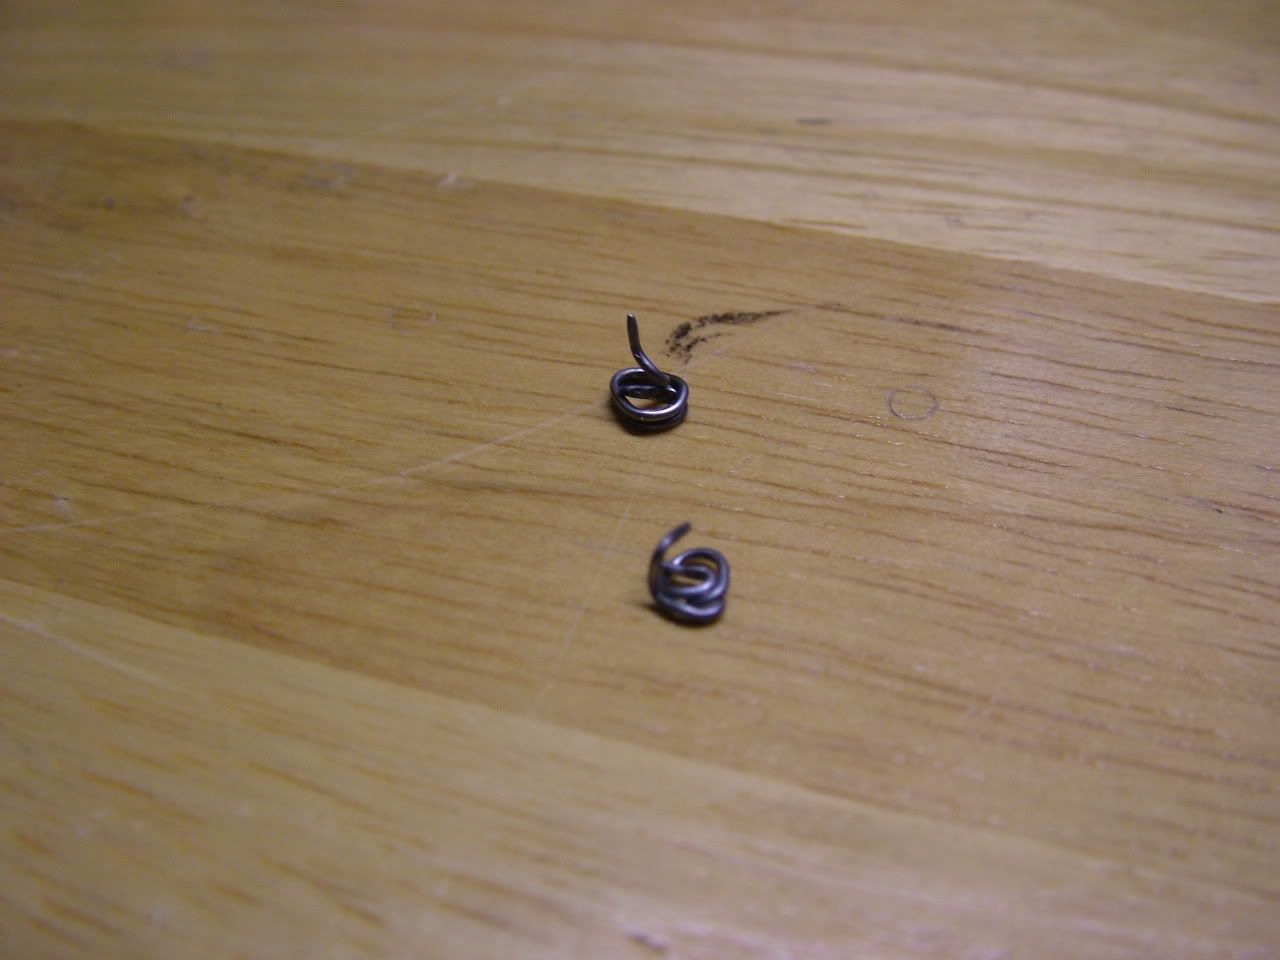
My little "thermometers". They melt at 185 degC or so:
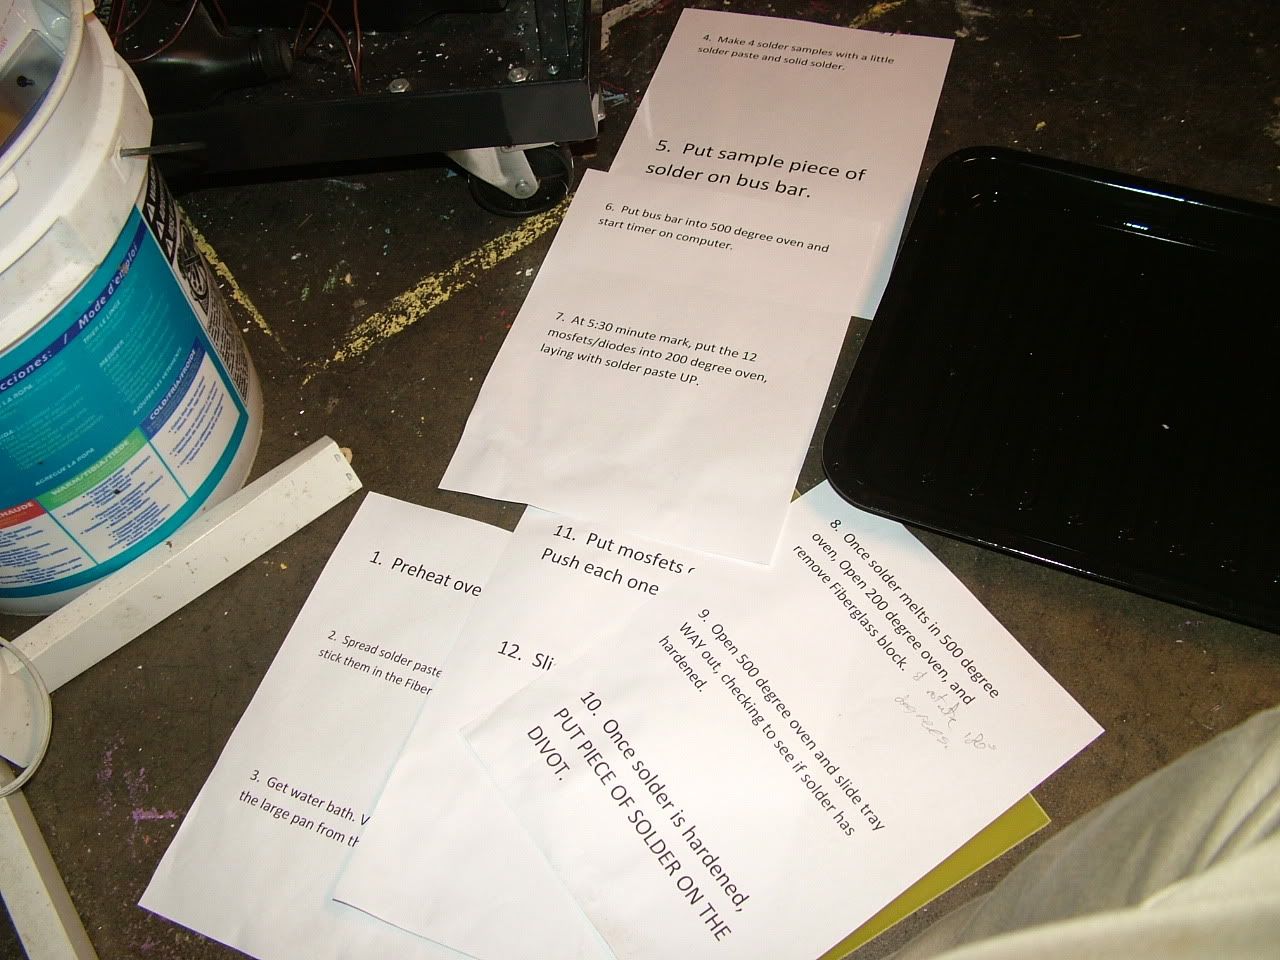
My step by step directions, since I don't think well under pressure.:
Heat up the bus bar:
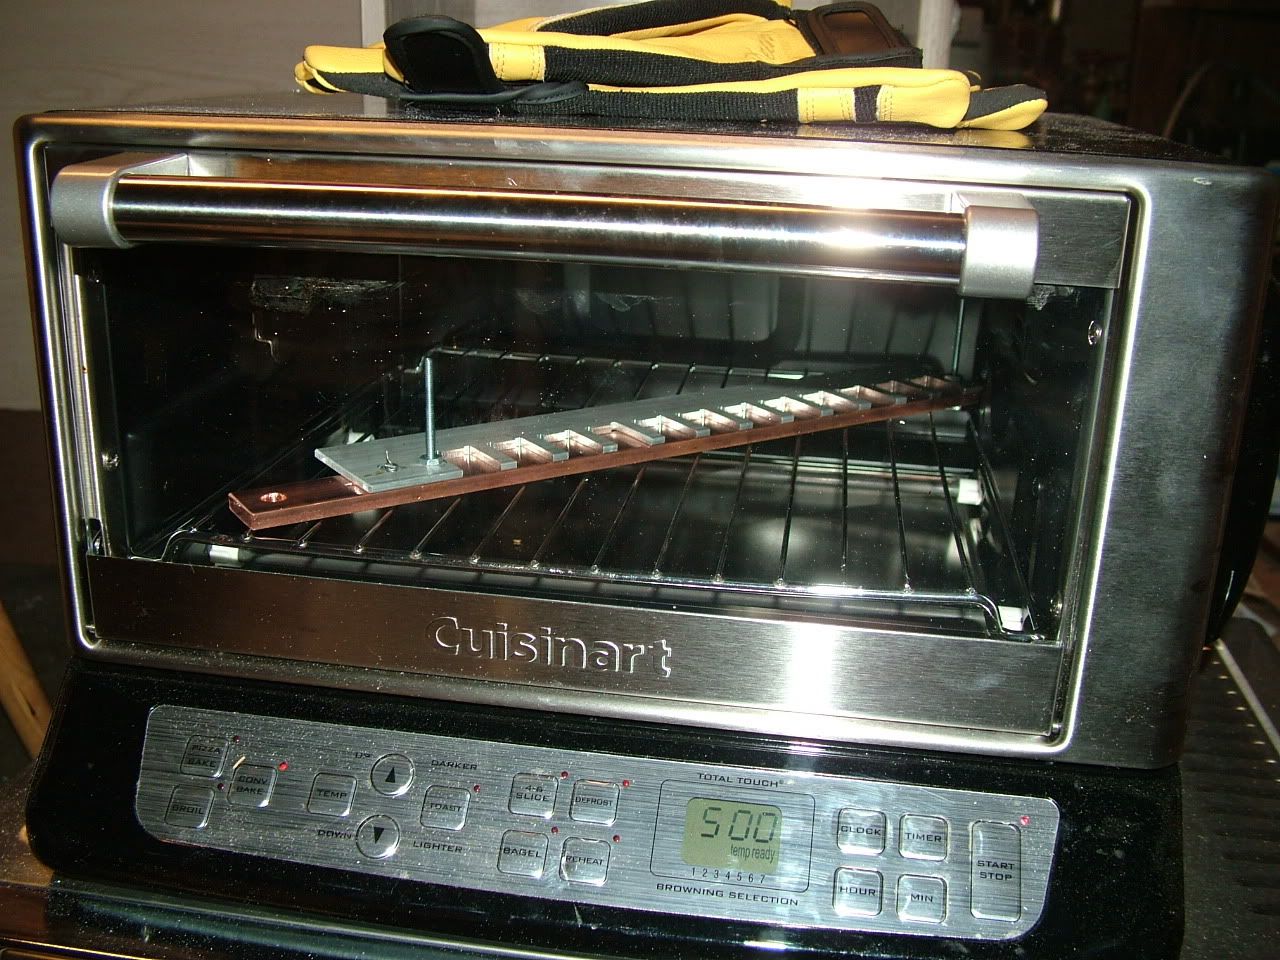
Heat mosfets in different oven to around 200 degF, just to cut down on the thermal shock a bit. Hotter would be better, but I don't want to dry out the solder paste.
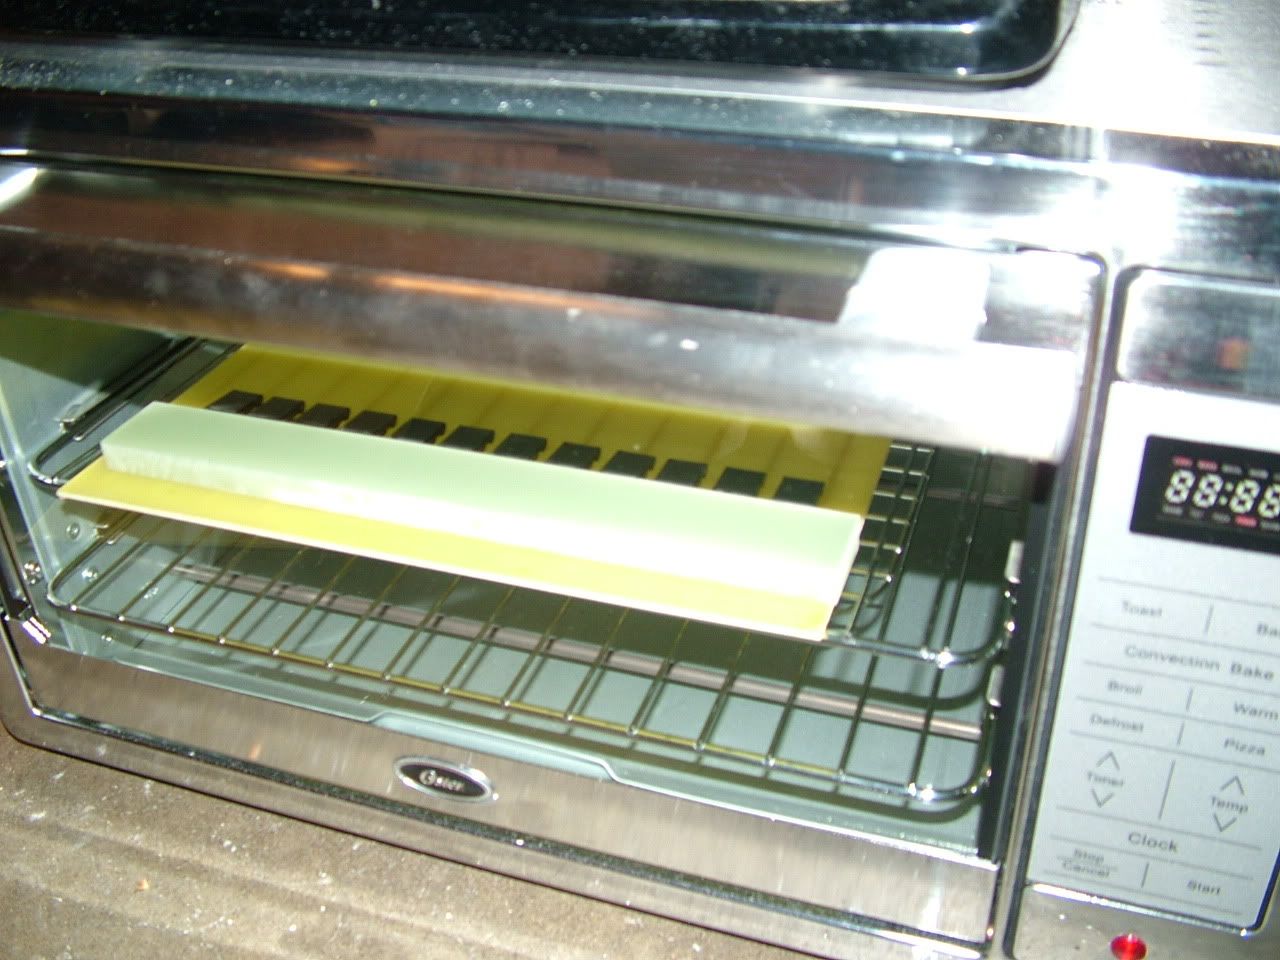
Make the transfer and bake!:
1/16" thick high temperature silicone with hardness of 40. haha whatever that means.
Bend the legs 90 degrees, and then stick them through the holes:
Now do the diodes:
 |
|
|
|
|
The Following 4 Users Say Thank You to MPaulHolmes For This Useful Post:
|
|
|
12-15-2011, 02:04 AM
|
#5320 (permalink)
|
|
PaulH
Join Date: Feb 2008
Location: Maricopa, AZ (sort of. Actually outside of town)
Posts: 3,832
Thanks: 1,362
Thanked 1,202 Times in 765 Posts
|
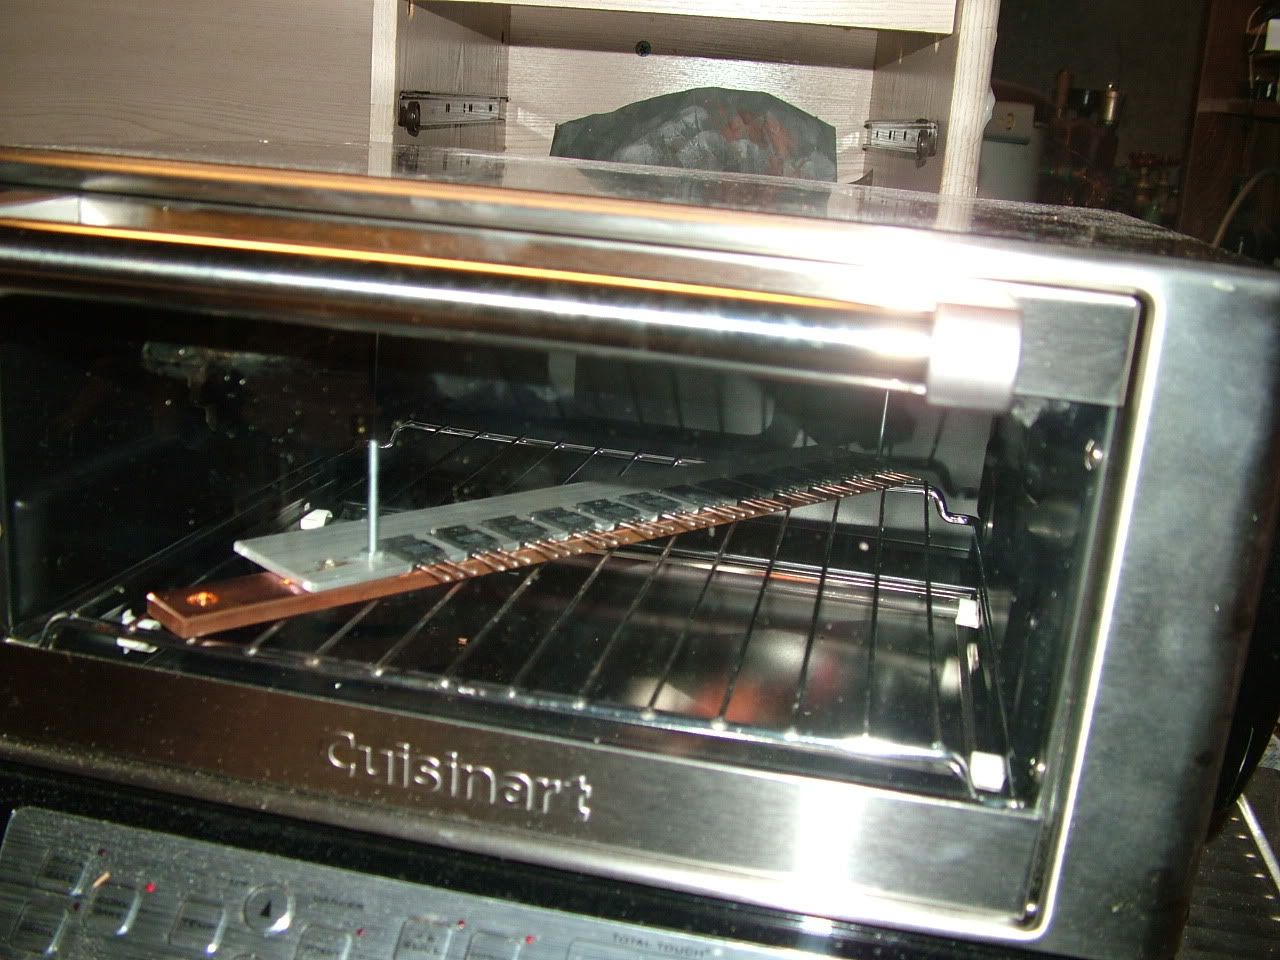
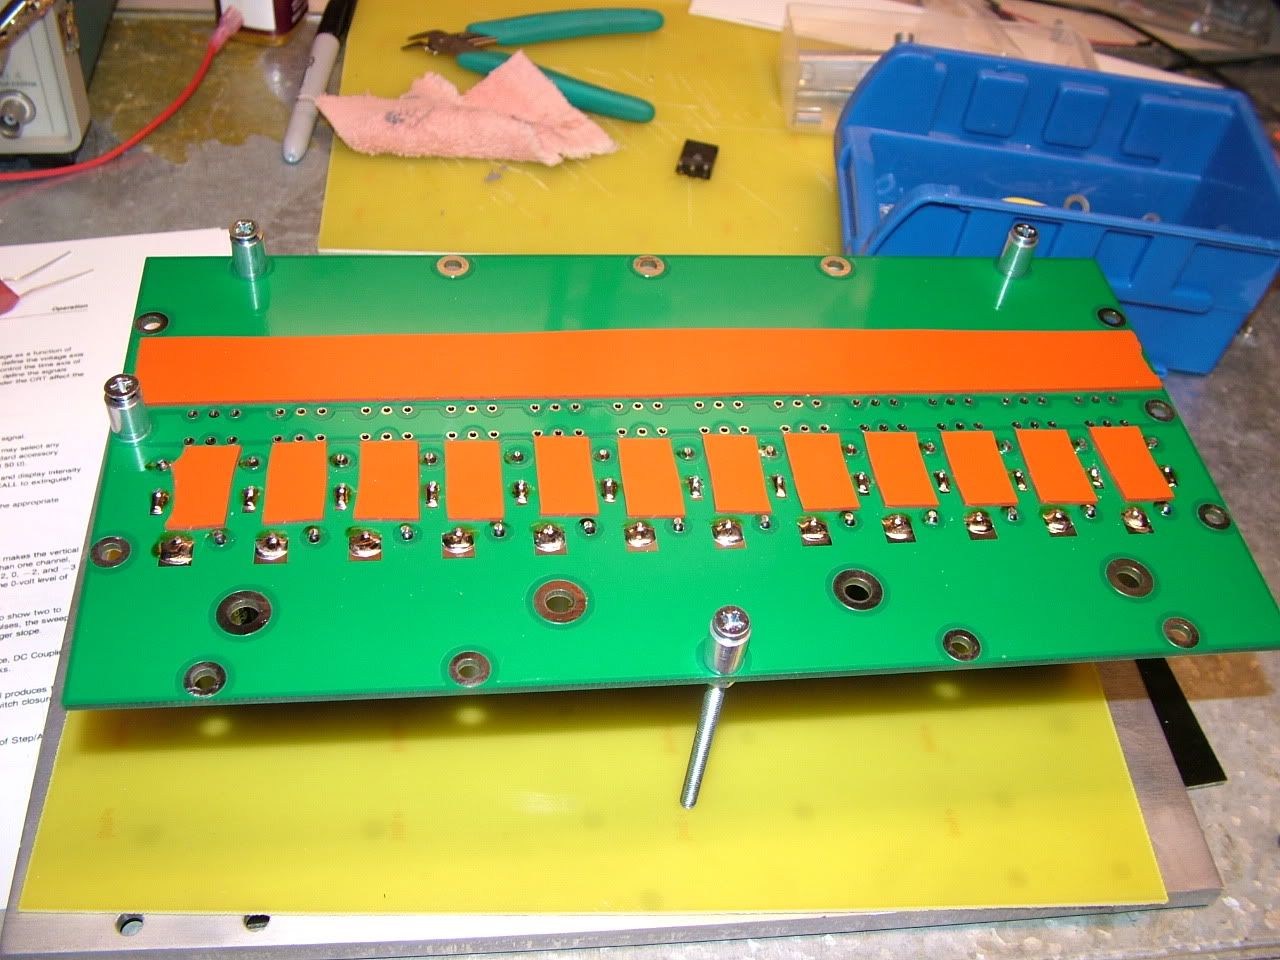
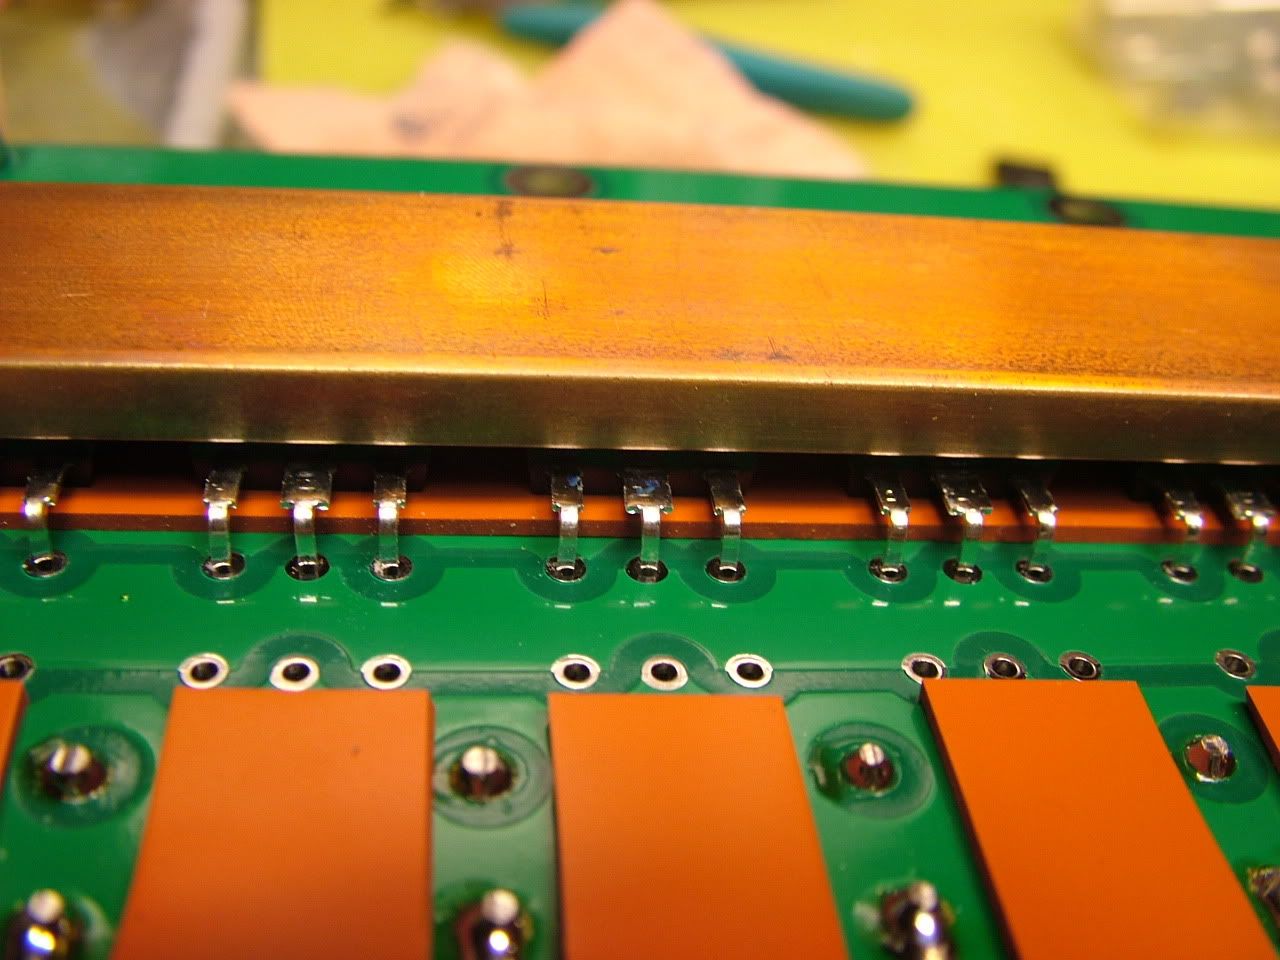
Hey look! The legs go through the holes:
Isolate the bus bars from the base plate:
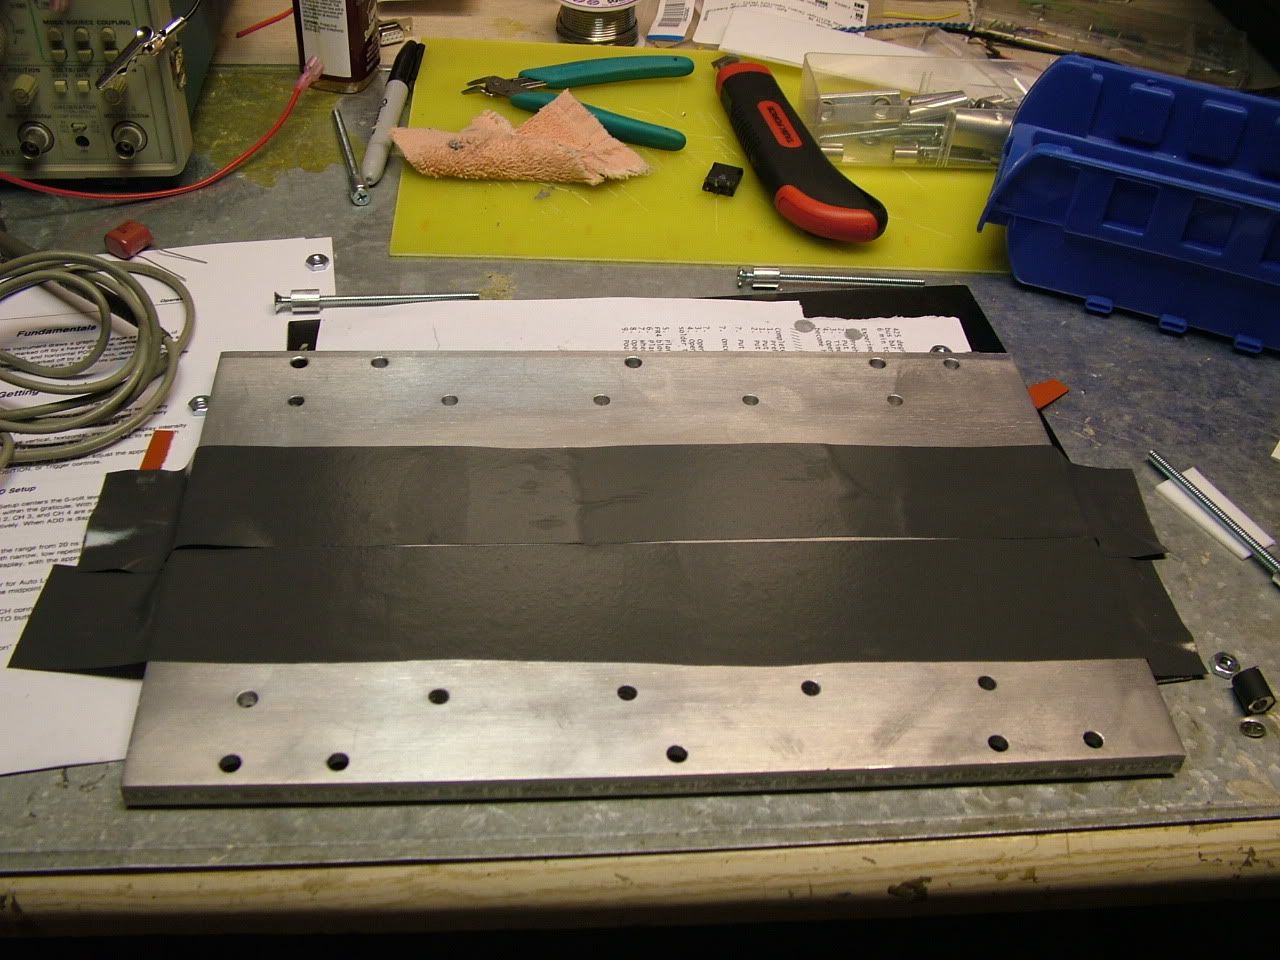
Those bars are squashed DOWN now! And they are still isolated from the base plate. Oh hurray. And the mosfets and diodes are still functional after soldering (PHEW)!
Here's the bottom of the plate. Man, I think I need to trim the isolation pad just a bit. haha:
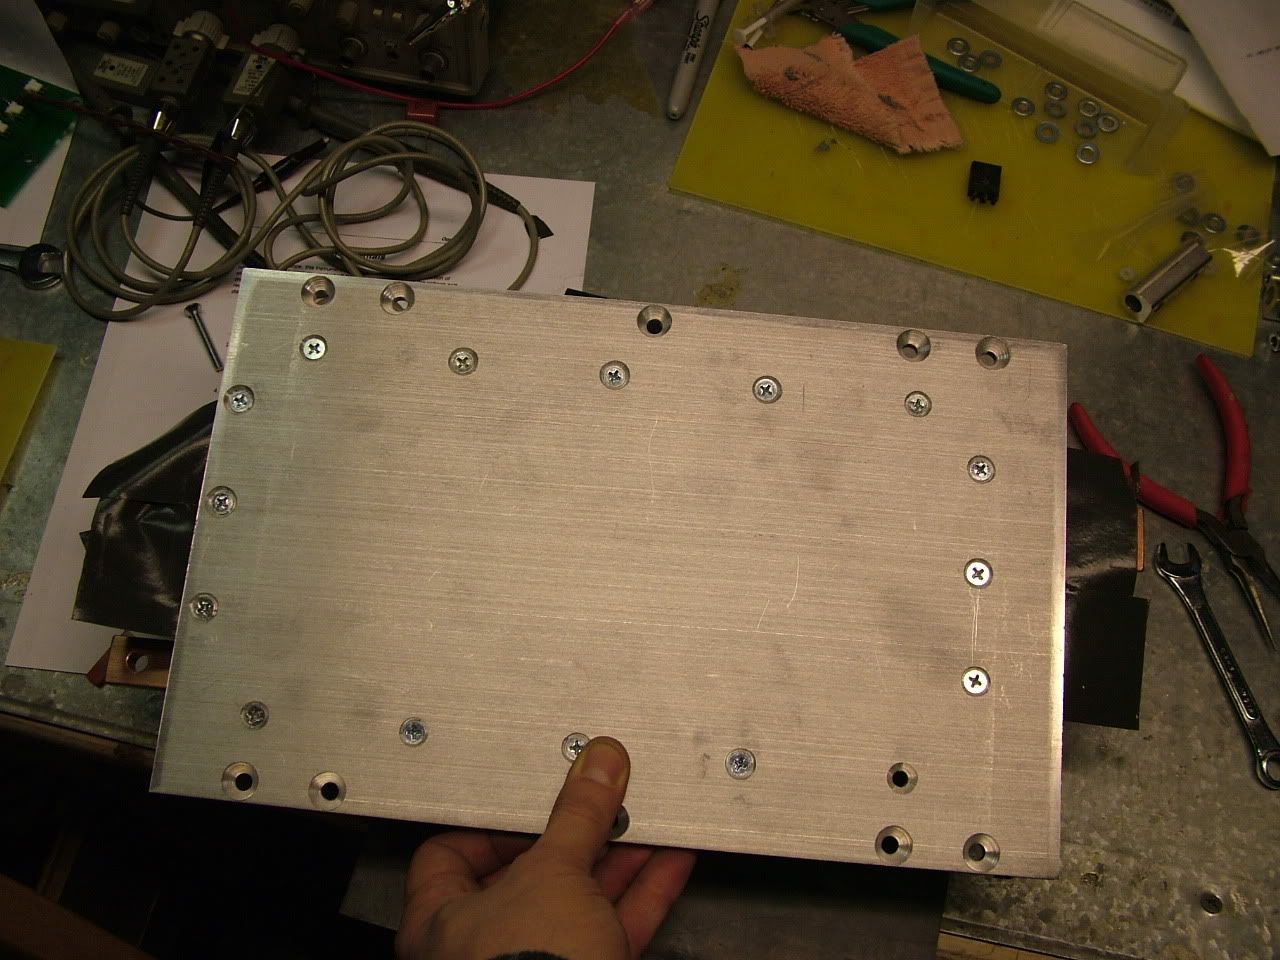
It's almost done! And there is going to be VERY VERY good thermal transfer from those bars to that plate.
|
|
|
|
|
The Following 6 Users Say Thank You to MPaulHolmes For This Useful Post:
|
|
|


