08-14-2014, 09:29 PM
|
#31 (permalink)
|
|
JDM hypeR mileR
Join Date: Aug 2014
Location: Mooresville, NC
Posts: 418
Thanks: 475
Thanked 418 Times in 198 Posts
|
Basjoos, great info. for aerodynamics. Thanks for sharing sir!
Quote:
Originally Posted by vrmouseyd15b

Wow. You don't play. I like your style! This should be a real cool build. ..
|
Haha, thanks bro. Sometimes I tend to over-plan. But I do enjoy it. Sad truth/confession: I've already turned nearly every bolt in this project in my head. Some of the elements didn't go so well, and I had to do them over again...I've already built the sides skirts three times already, and I'm still racking my head on the mount--thats-going-to-mount the cabinet mount to the body for the wheel skirts. It's been engineered 3 different ways, but I think I'm settled on it now. 
Quote:
Originally Posted by Baltothewolf
100% agreed! This is one of those threads that whenever I see an update I rush over and look, and have yet to be disappointed haha.
|
Thanks my friend. I'll try to keep fresh content coming 
Donkey: Thanks SO much for that pic. That is awesome! I'll def. be looking for one of those VC's to do that mod. See my first update below here in a sec. I think it will flow perfect with my other planned "green mods".
Brings on a question: Did the 92 model VX covers not have the "VTEC-E" stamping? If so, what year did they start coming with the revised VC?
|
|
|

|
|
The Following User Says Thank You to OG VX For This Useful Post:
|
|
 Today Today
|
|
|
|
 Other popular topics in this forum...
|
|
|
|
|
08-14-2014, 09:57 PM
|
#32 (permalink)
|
|
JDM hypeR mileR
Join Date: Aug 2014
Location: Mooresville, NC
Posts: 418
Thanks: 475
Thanked 418 Times in 198 Posts
|
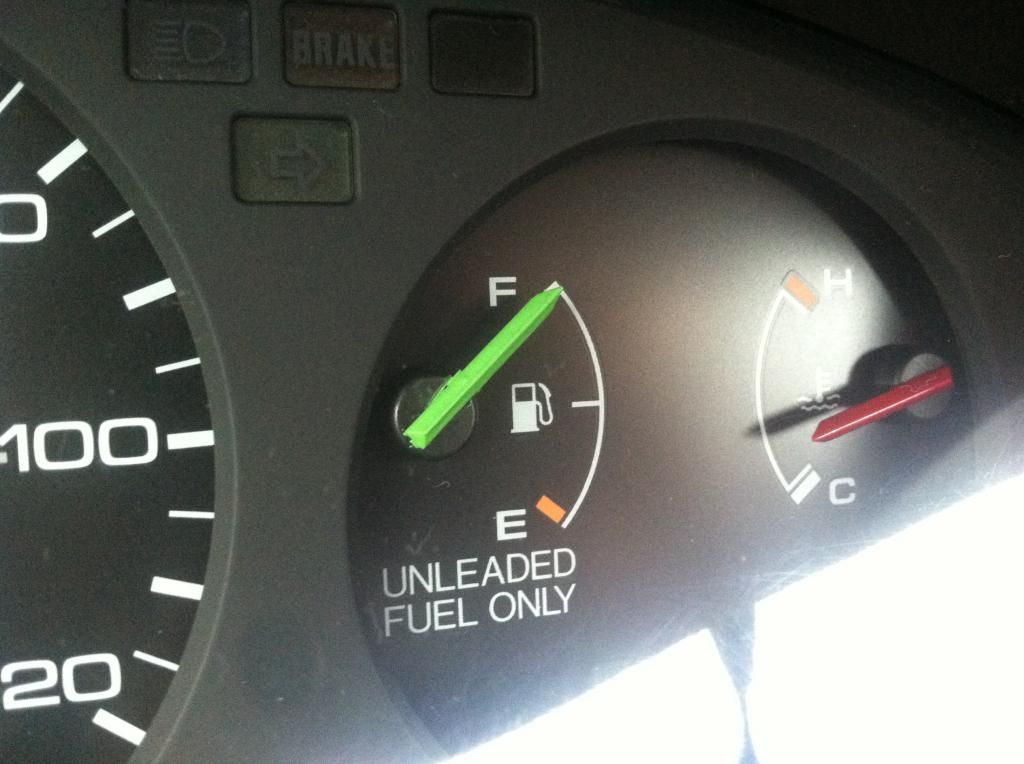
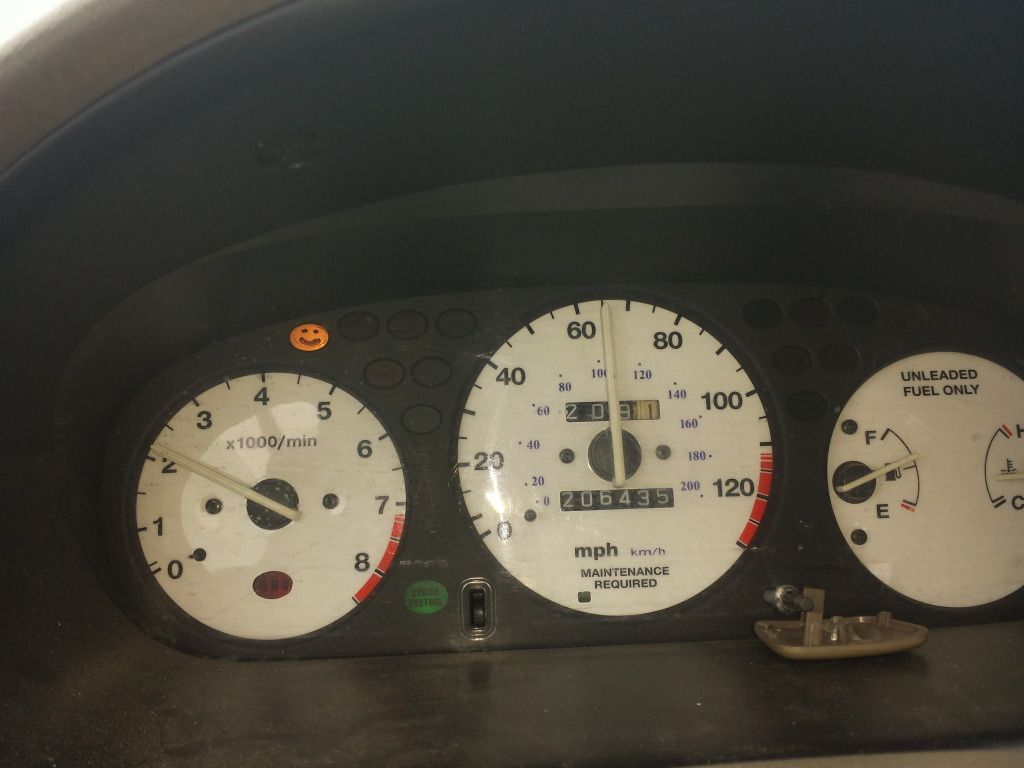
Update: Registration/First Maintenance/Gauge Cluster Modifactions
We'll, finally folks, after all my talk, here's some "walk".
First up was registration. I'll post a pic because of the appraised value. HA!
Moving on...Maintenance work commenced as soon as I got the car back to the house.
I wanted to know exactly what I was "working with", so I ran a compression test. I'd like to think EricTheCarGuy, my favorite dude for Honda tutorials on YouTube, for the excellent advice on how to properly do compression testing.
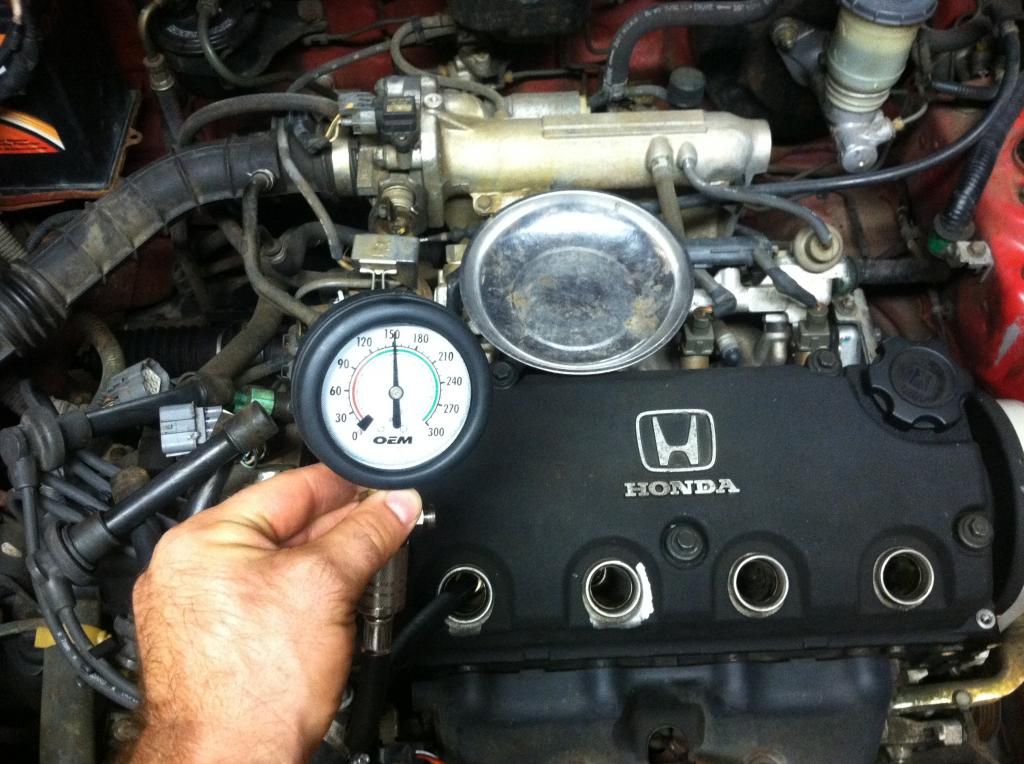
First, I ran the tests on a cold engine ("dry" cylinders); then again with "wet" cylinders. Then, I drove the car for a couple of days with fresh oil and Engine Restorer additive. I then did the compression test once more, and achieved a bit more favorable numbers.
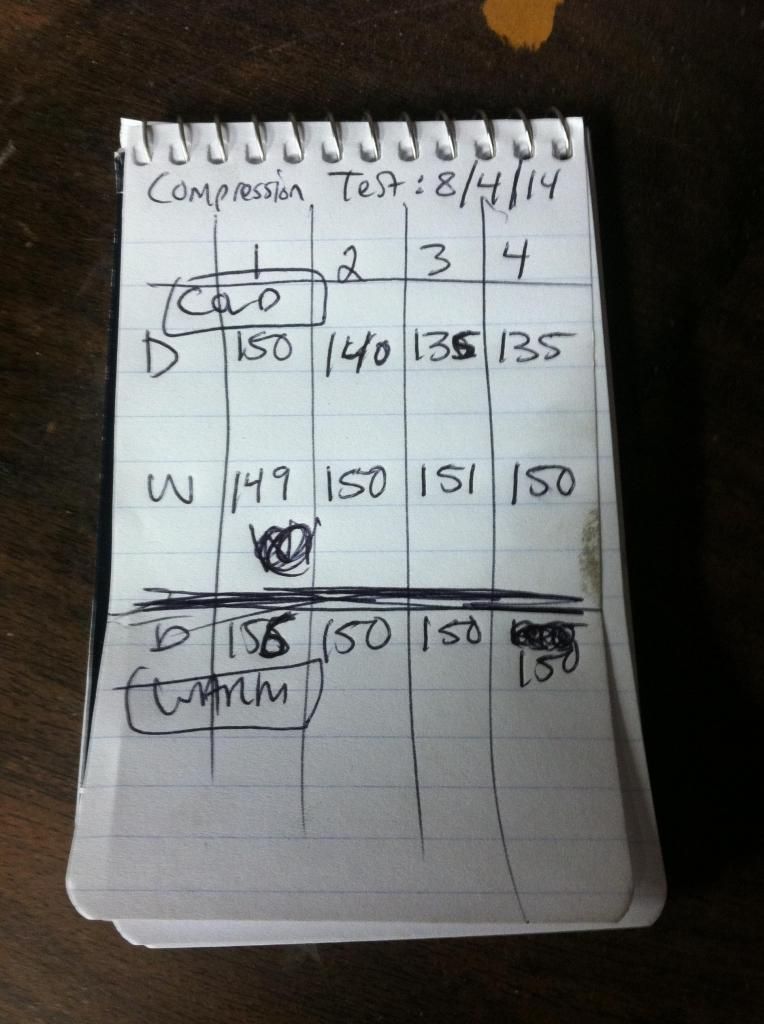
Overall, certainly not stats good enough to slap your momma about. However, they are within the working limits from Honda (135 psi, I understand, is the service limit). And most importantly, they are even. So, OK, now I don't feel too bad putting some time and money into this car.
The transmission got fresh Honda MTF. However, after a week of driving with it in, things still felt "crunchy". After some research, I decided to try Penzoil Syncromesh. Man, glad I did! Transmission is shifting much better now. I highly recommend it vs. the Honda stuff. The "crunch" is almost gone entirely. The syncros are worn, but I'm hoping that using this stuff in regular intervals will help prevent a tranny re-build....or at least, drastically delay it.
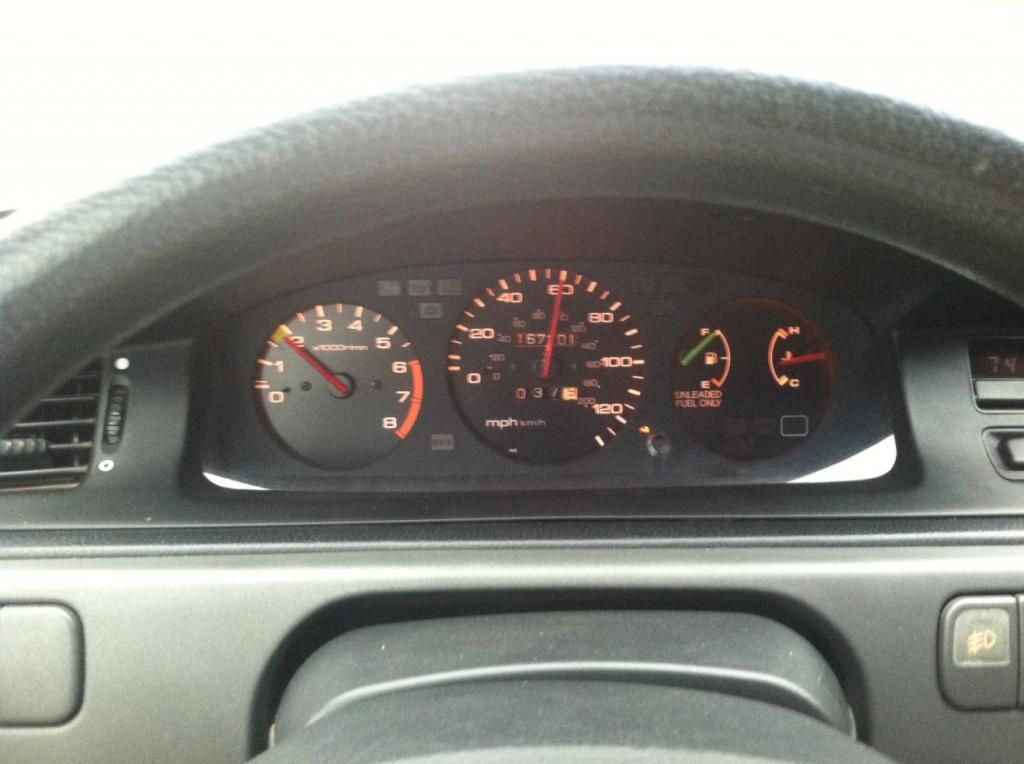
Lastly for this first update, I did some research into the dash lighting. My cluster was rather dull, even with the illumination knob turned all the way up. I did an LED swap on my truck and liked the brightness of it, but do have some "hot spots" on the truck cluster. After some research, I found and decided to follow this awesome DIY linked below from a Honda-Tech user; amber halogen bulb swap. I'll be following his council for the climate control and remainder of the dash buttons + clock as well.
My EG speedo cluster & climate control in amber - done right - Honda-Tech
And so, off I set removing the cluster and setting up for the bulb swap.
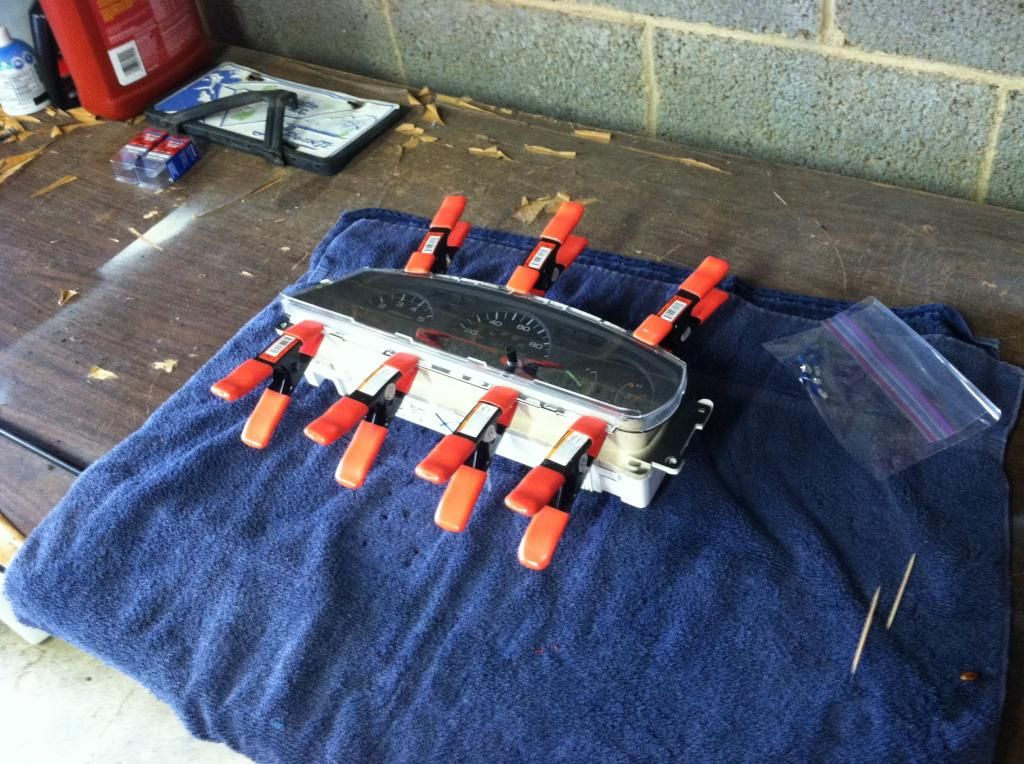
But while I was in there, I decided to do some custom paint work as well. Time to break out an old friend for my model car days...
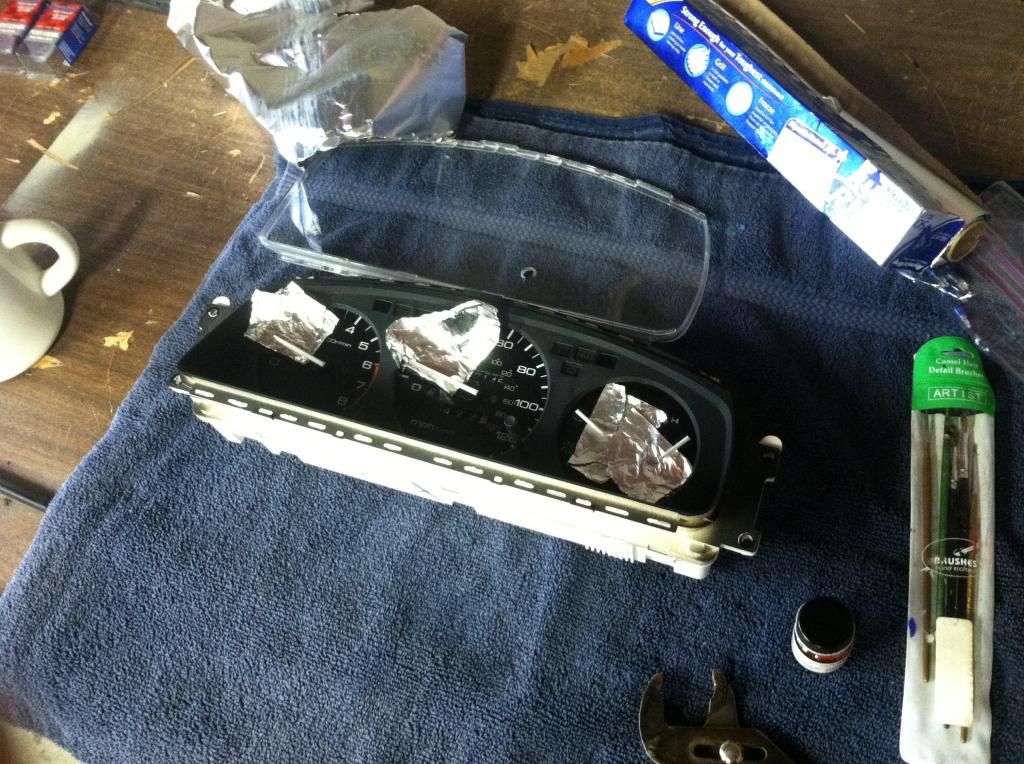
All sealed up and drying post-paint.
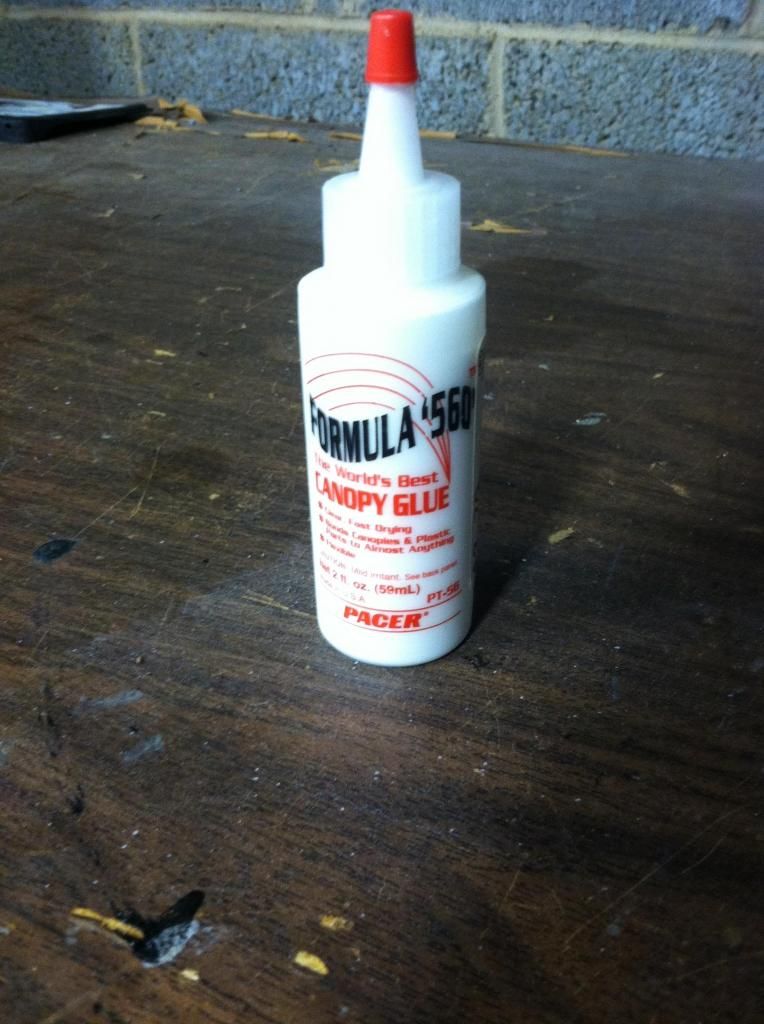
Used this stuff. Dries clear. Great stuff. Called "Canopy Glue". Used to glue plastic canopy's on model airplanes.
V.1 all done and in the car the next day:
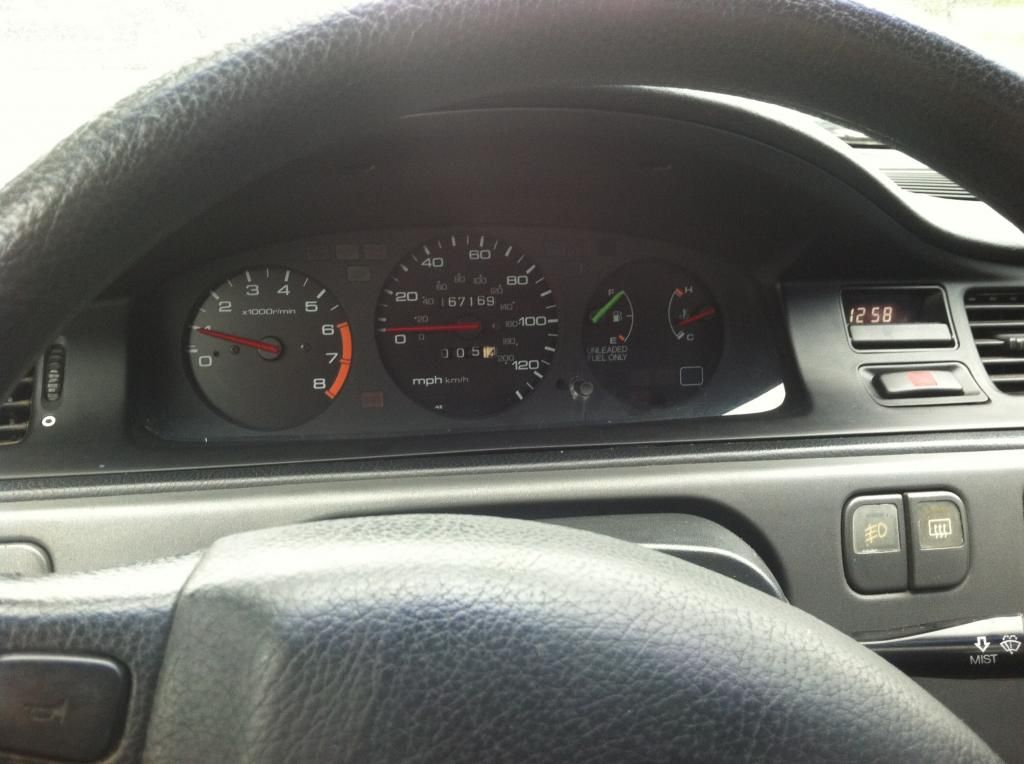
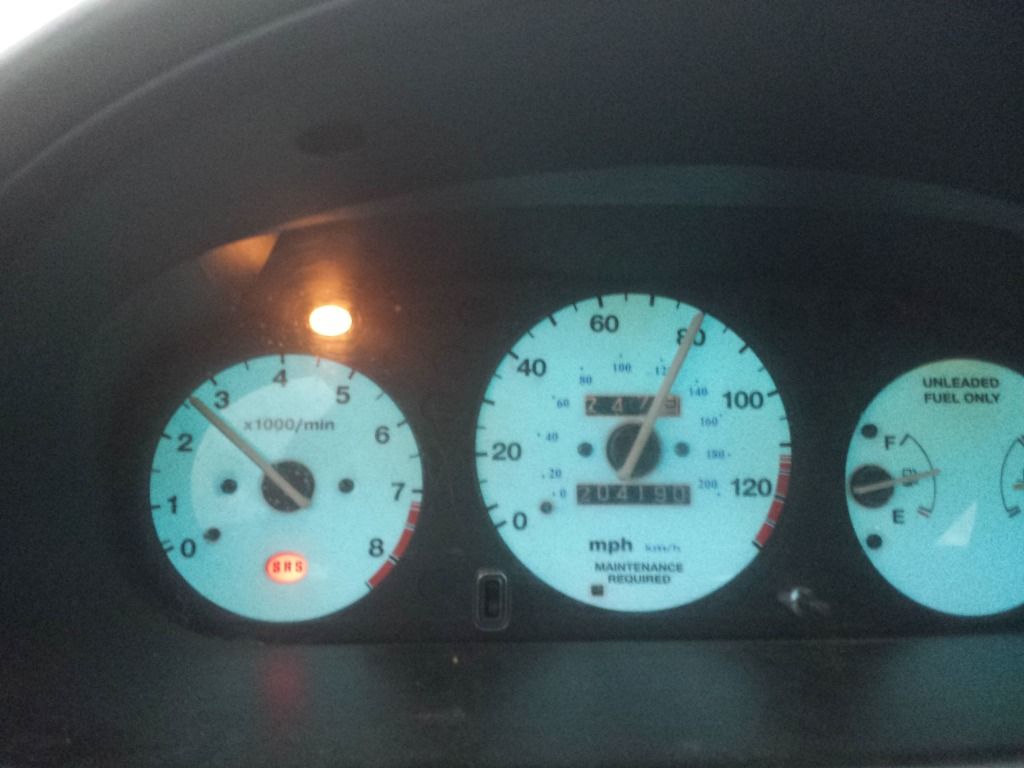
Night-time pic w/ the amber effect (whole dash will be this color soon)
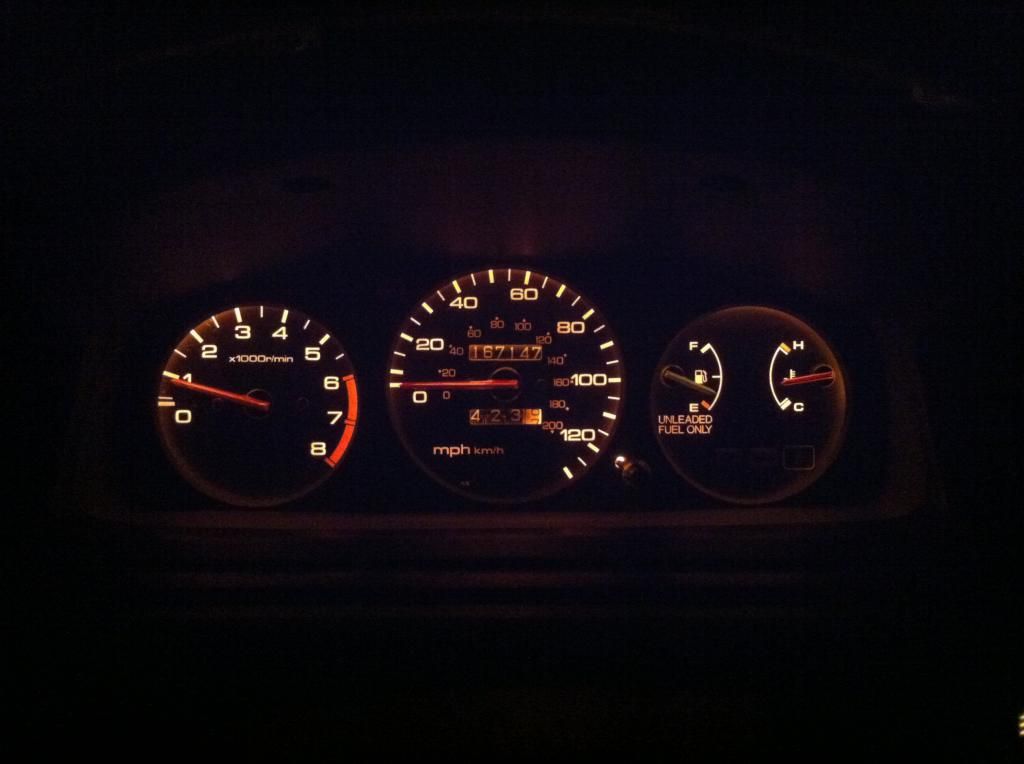
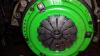
Later that evening, I had another idea/addition to add. Woke up the next day and added it. SO glad that I did. Feel like it really makes the cluster and ties everything together with the "green" mods for the dash. Added a "sweet spot" of green.
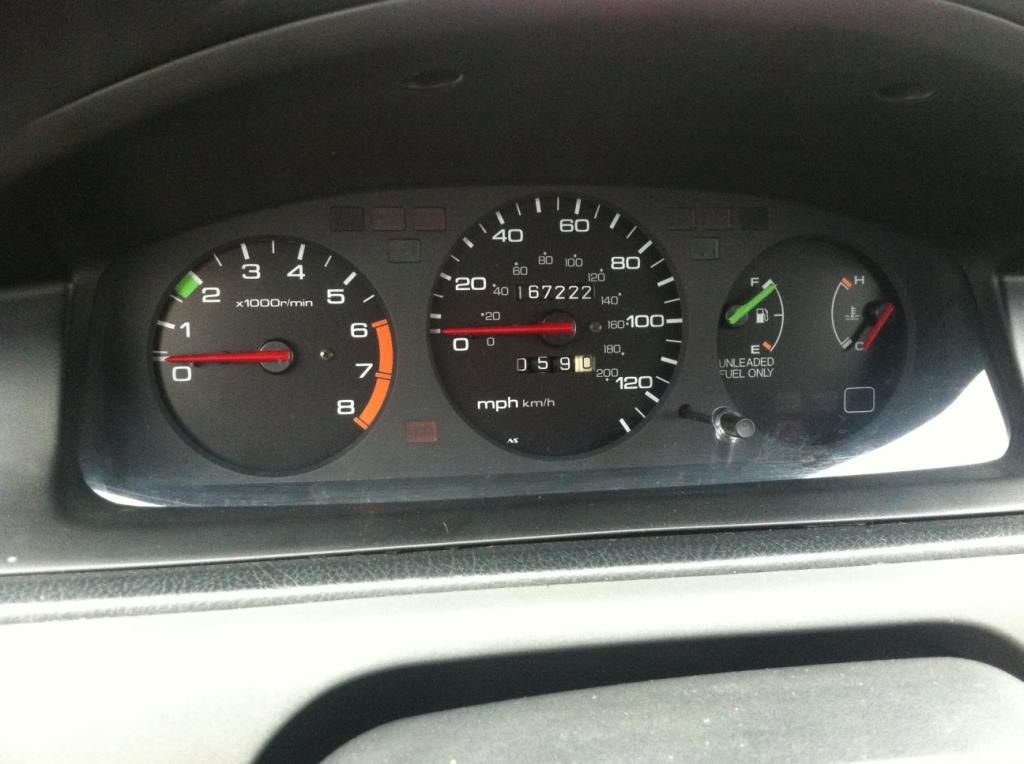
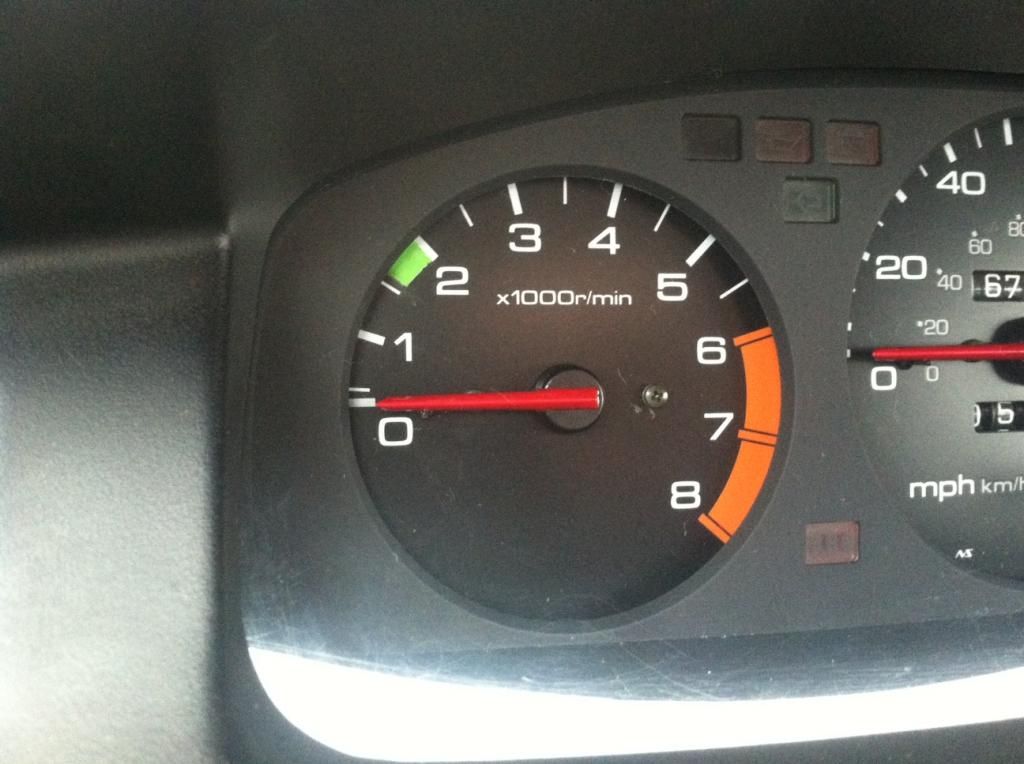
Here's the "sweet spot" in action, right near the area I shoot to lean burn within while highway cruising.
That's it for now. More to come.
Thanks for eco-tuning in!
|
|
|
|
|
The Following 7 Users Say Thank You to OG VX For This Useful Post:
|
|
|
08-14-2014, 10:23 PM
|
#33 (permalink)
|
|
ALL UP ON THE INTERWEB!!!
Join Date: Apr 2014
Location: quad cities illinois/iowa border
Posts: 520
Thanks: 185
Thanked 178 Times in 139 Posts
|
absolutely first class!!!
Too bad you guys don't have an actual "lean burn indicator" like mine, but I run a JDM ecu - 37820-p2j-j62 it's amazing to know for sure you're in lean burn for real. check my "happy light" lean burn indicator:
that way you know for sure, even when your foot feels a little heavy:
on the p2j's, the lean burn indicator comes from pin a30 (which most pinouts call unused), and it's a switched ground. I bring ignition switched 12v+ to the other side of the bulb.
one downside to this setup is NO OBD ANYTHING! I have to use the jumper under the passenger kick-panel and look up codes when necessary, but I do have my dual vtec motor and lean burn ( best of both worlds )! I can lean burn in 12v and 16v mode ( I'm pretty sure your d15z1 will as well with correct ecu and conditions), but I also have the "wild cam" mode, almost B-series type vtec action but it starts at about 5000 rpm to redline (I've had it to 7800 without fuel cutoff) Which would have most ecomodders shaking their heads!!
If you want to go for a quick ride, I can show you:
Lean burn - YouTube |
|
|
|
|
The Following 4 Users Say Thank You to vrmouseyd15b For This Useful Post:
|
|
|
08-14-2014, 10:26 PM
|
#34 (permalink)
|
|
Master EcoModder
Join Date: Feb 2013
Location: TN
Posts: 300
Thanks: 399
Thanked 564 Times in 189 Posts
|
OG, sorry, I forgot the 92 VX valve cover don't have the V-TEC E lettering. Not sure which years had it, but this cover is from our 94VX
|
|
|
|
|
The Following User Says Thank You to The donkey CRX For This Useful Post:
|
|
|
09-03-2014, 11:42 PM
|
#35 (permalink)
|
|
JDM hypeR mileR
Join Date: Aug 2014
Location: Mooresville, NC
Posts: 418
Thanks: 475
Thanked 418 Times in 198 Posts
|
Update: No-Start Issue + Complete Intake Manifold + Heater Hose Overhaul
I hope everyone’s well. I’ve been away for a bit, due to a crashed HD on our Mac. I went out to start my car this past Wed morning (the morning after the Mac crashed) and the car would not turn over. When the key was turned to position III, lights on the dash came on, but no sounds, no action, nothing, nada... I was def scratching my head at that point. After much troubleshooting (battery, fuses, connections, etc...) I finally made a call to just remove the starter and take it to get it tested. The starter was the original OEM unit, and tested "fail" at Autozone. Seemed simple enough to just replace the starter at that point.
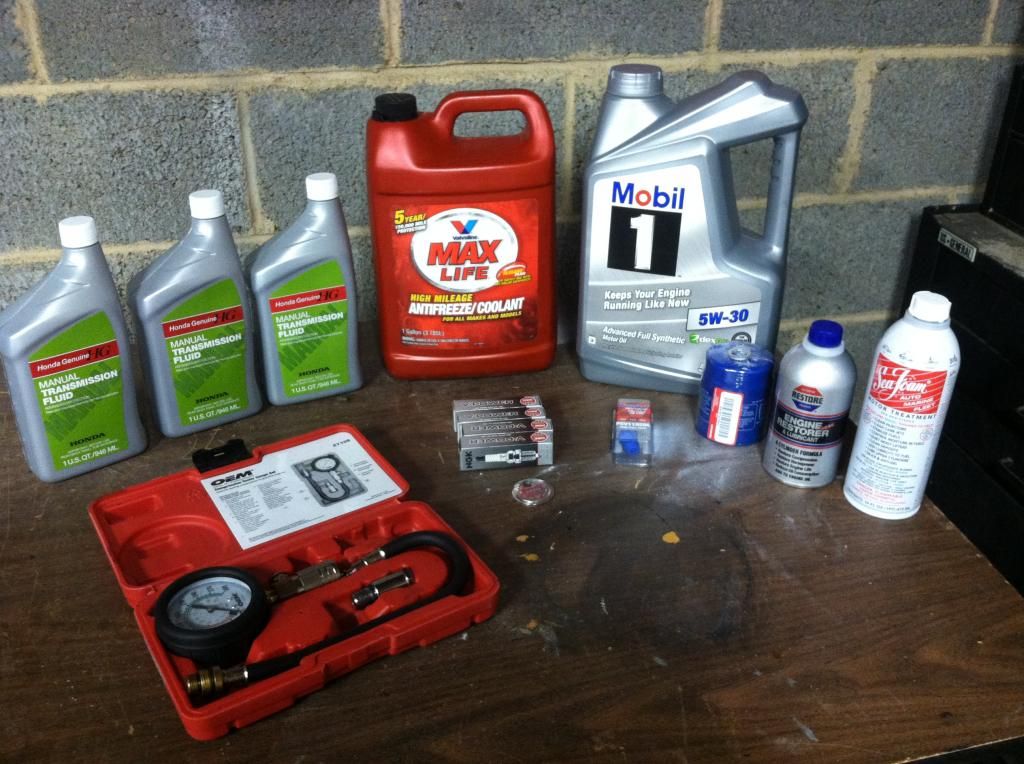
Since I missed work that day due to the issue, while I was removing the starter, I pretty much just decided to "go to town" on the car, moving forward with all the remaining mechanical/engine work I had planned to (eventually) do, but wasn't sure when I would have the time to get around to it. A list below outlines the work performed over the past week:
- Replaced gaskets for: Intake Manifold, EGR, Throttle Body, VTEC solenoid, Thermostat, IACV
- Replaced all heater hoses (around 9 total; including radiator and lines running to/from oil filter housing)
- Replaced thermostat
- Replaced starter (w/ lifetime warranty unit from Autozone)
- Coolant system drain and fill
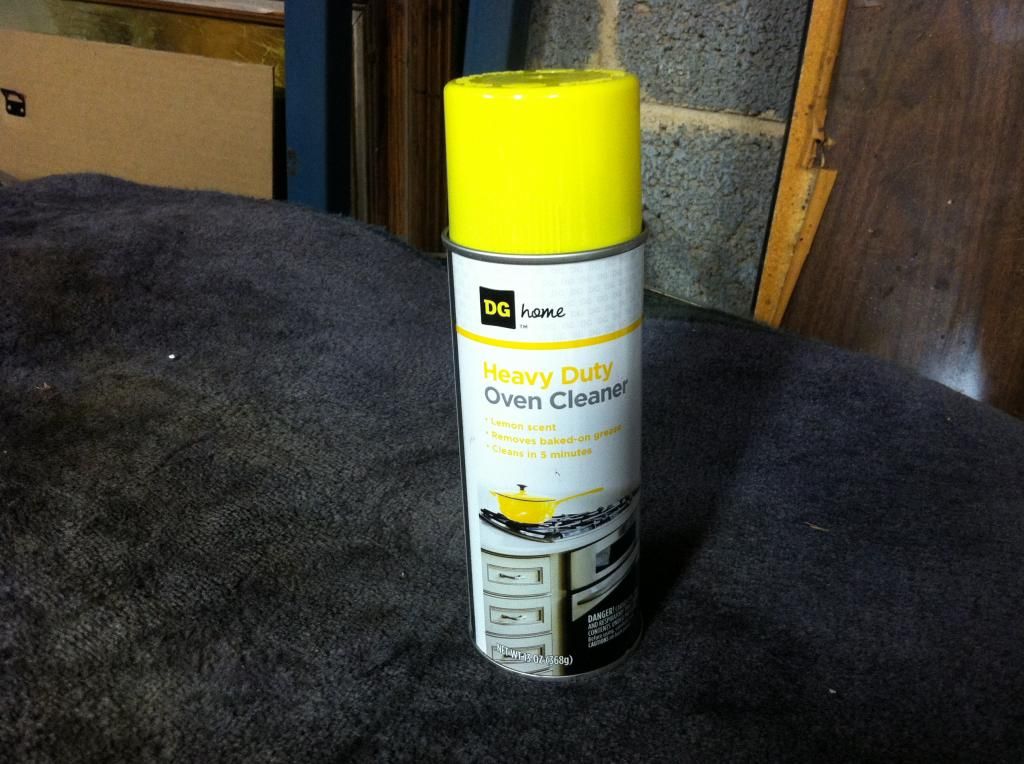
- Tooth-brush cleaned engine block and engine bay (Dollar General oven cleaner worked great for removing the stuck-on grease from the block!)
- Removed decals from battery to clean up look
- Painted exhaust manifold with VHT Flame Proof “Aluminum” Paint
- Painted exhaust mani. heat shield + bumper bracket w/ VHT Blk Brake Caliper Paint (hi-heat).
After all the gasket and fitted-hose chasing-down and installing was completed, I went to fire up the engine. No start... still. No sound upon turning key, nothing...
That was on Saturday evening. By now I was nearly out of ideas. So, I went back to my good old friend, the internet. I found out that there is a SECOND rubber stopper pad on the clutch pedal assembly that can and does go bad. I had previously checked the first (lower; in plain view) stopper pad location, which looked like it was replaced in recent times with the (revised) neoprone pad. Fans of older Honda’s know that these “stopper pads” on the brake and clutch pedals go bad over time, causing all sorts of annoying electrical havic. However, I’ve never had the top (hidden) pad go bad on me before. Apparently when this (fun to get to go) lil’ guy goes to stopper-pad-heaven, the car won’t start, as the pad is designed to sit on the end of a lever that touches and closes the switch circuit that allows power to the starter when the clutch pedal is pressed. No pad, no start. Of course, I came to this internet epiphany on a Saturday evening, and all my local Honda dealers were closed on both Sunday and Monday for the holiday. Thankfully, after several parts store calls, my local Advanced Auto was able to source a Dorman replacement part (#74015) from their Gastonia wearhouse, and I had the part to install on the VX yesterday afternoon. To install the pad, I ended up (lightly) duct taping it to the end of a long flat head screwdriver. I removed the driver’s seat for clearance/comfort, and used a large flood flash light to get some visibility up under the dash. I then halfway duct taped the little pad to a long flat head screwdriver, and use the screwdriver to get the pad in place and leverage it into the mounting hole. It was...fun.
After all that, car started up just fine. Acceleration feels good. I'm getting up tomorrow morning to complete the following:
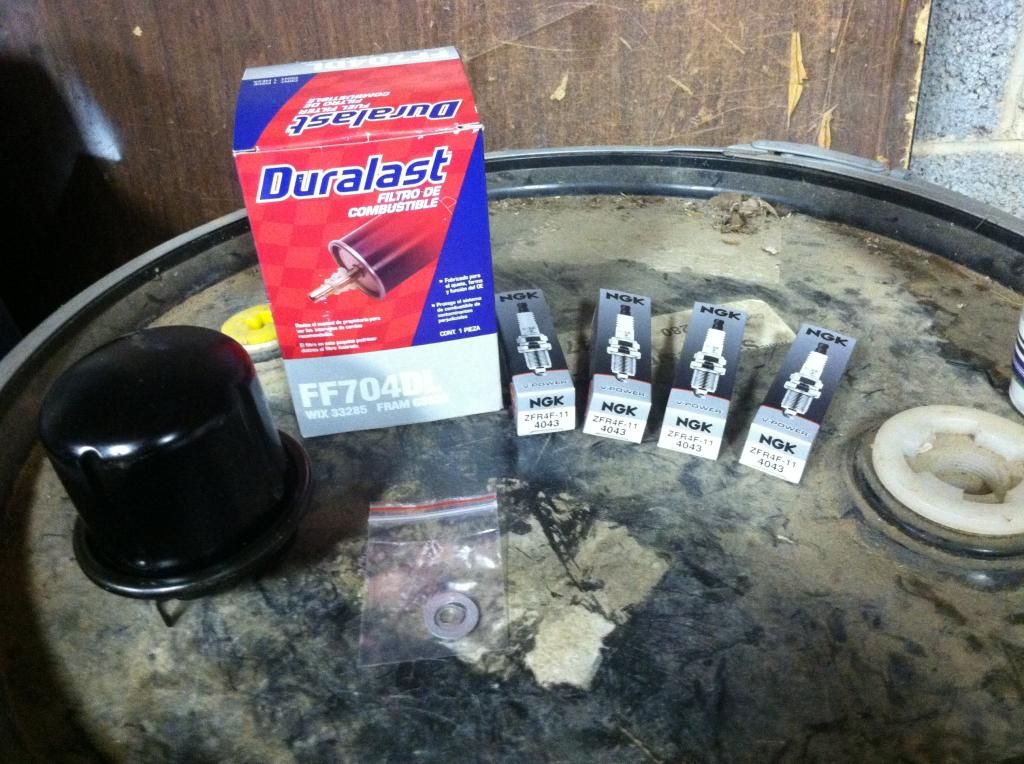
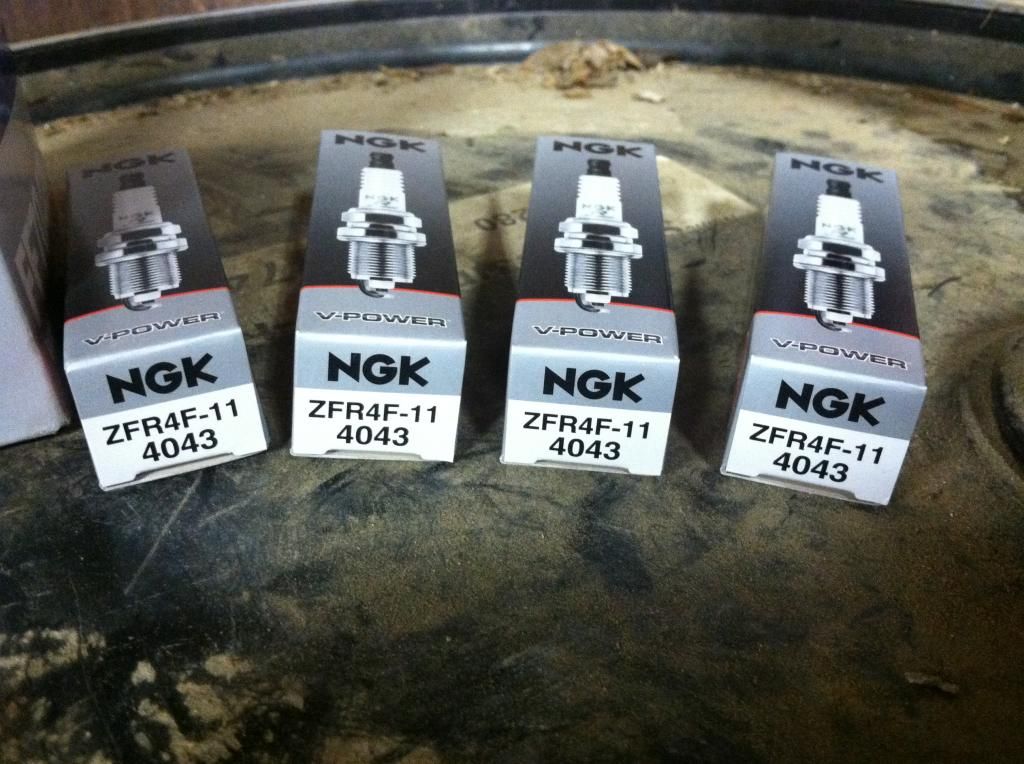
- Install proper (4 heat range plugs)
- Install new fuel filter
- Begin removing interior trim
I'll come back tomorrow with another post. Late and time for bed.
For now, here's some pics from the past week:
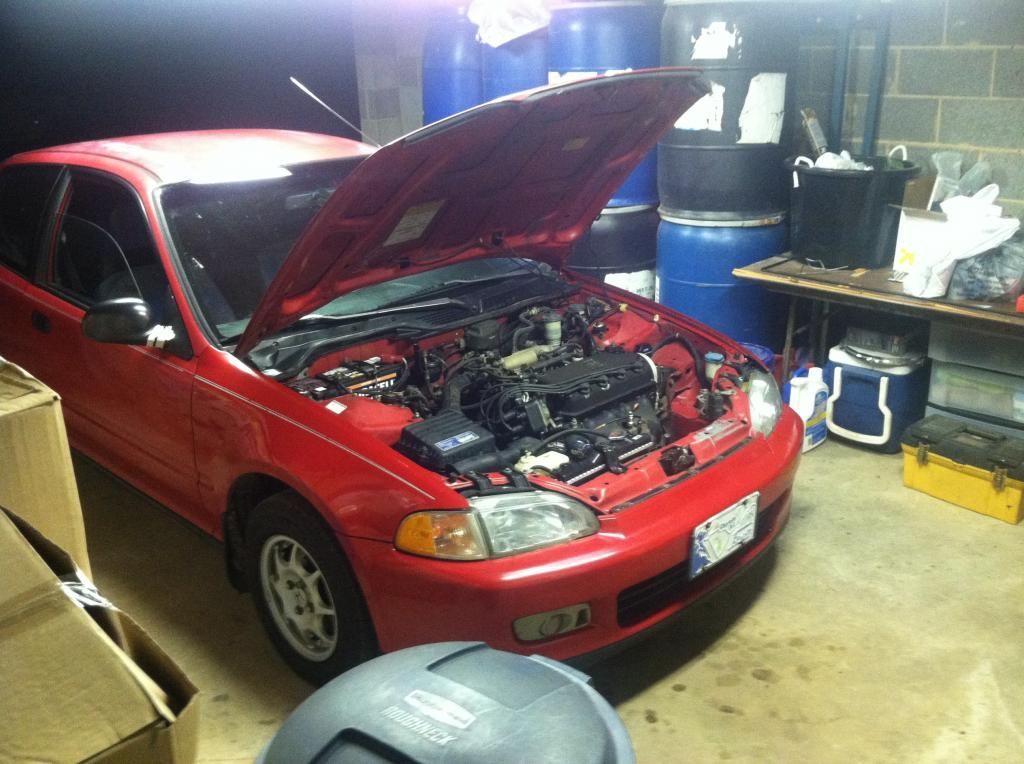
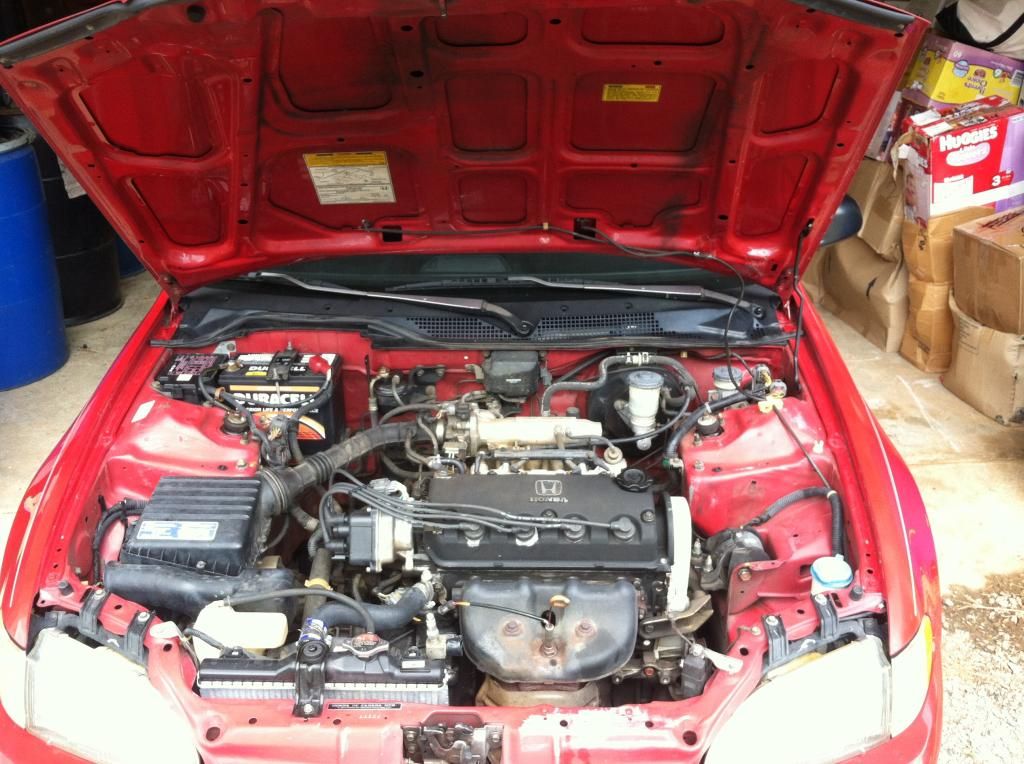
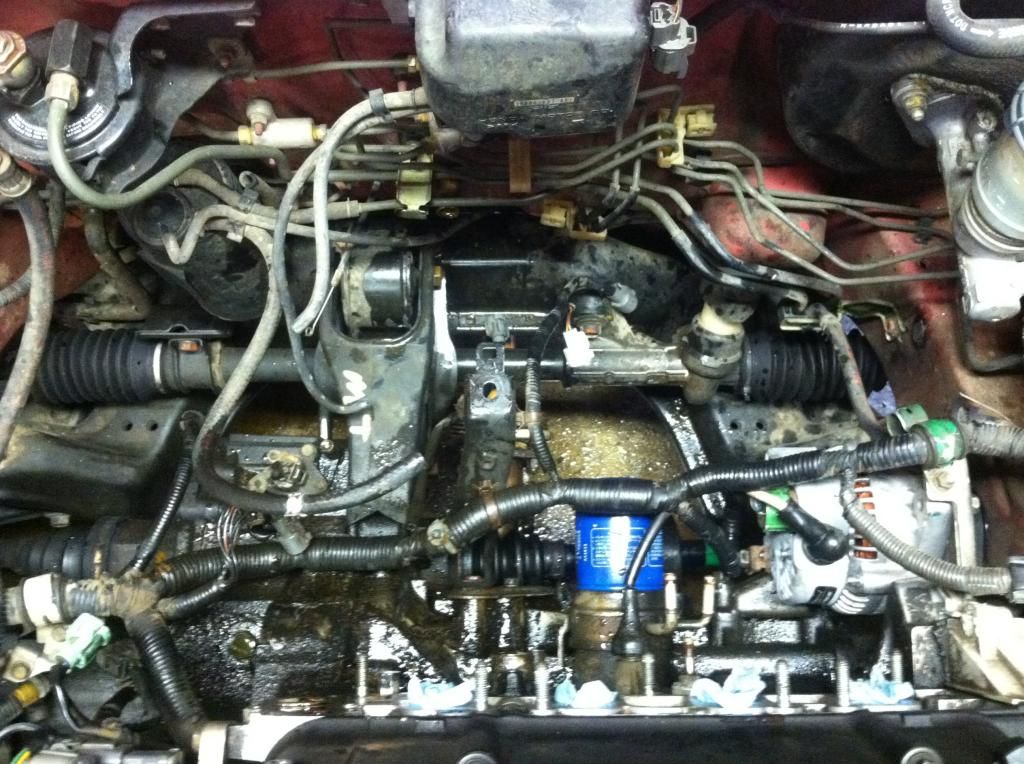
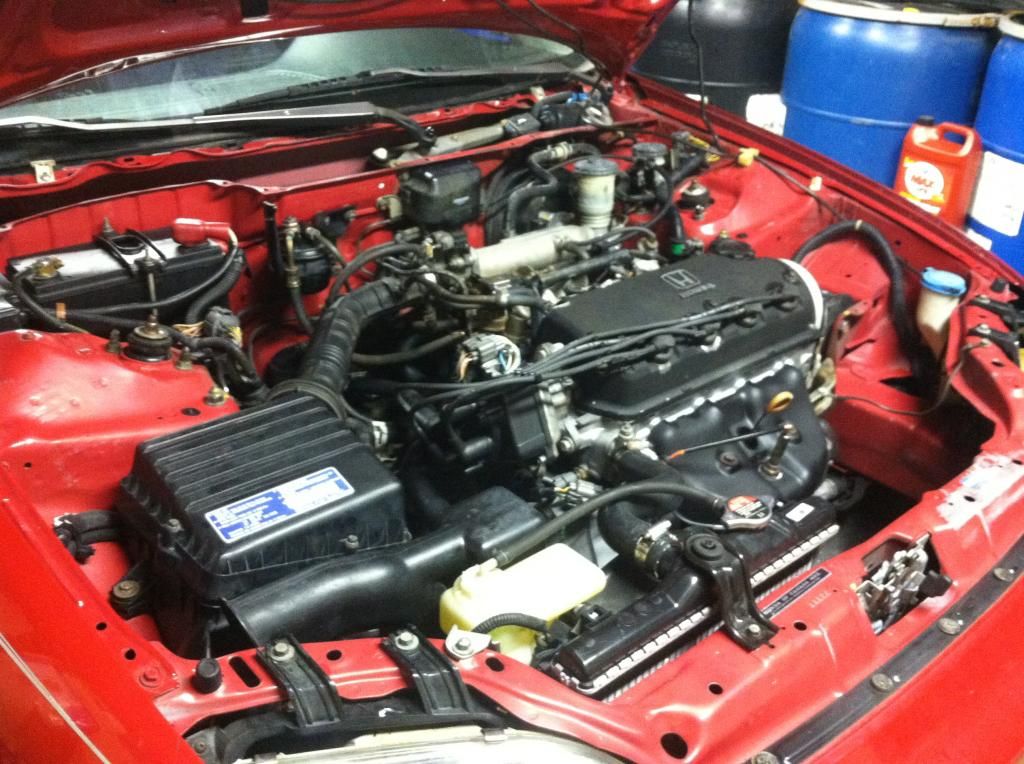
"Before" pic of the engine bay before cleaning:
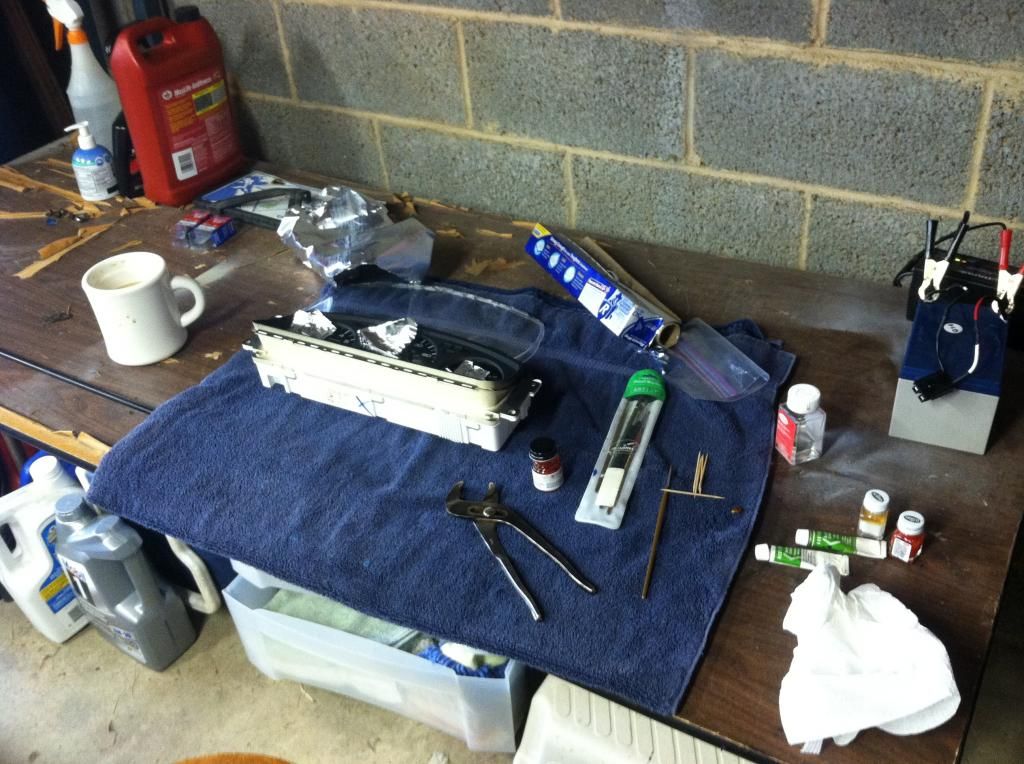
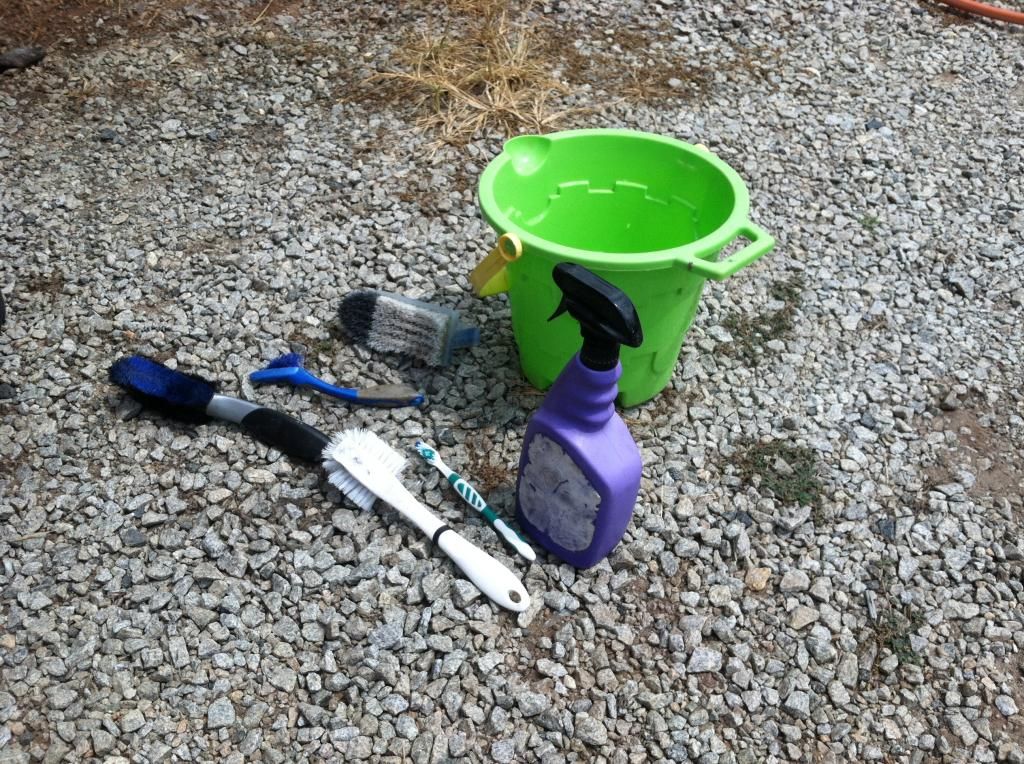
The tools for the job (Dollar General Oven Cleaner not pictured)
Check out that filthy block!
Beat up hoses:
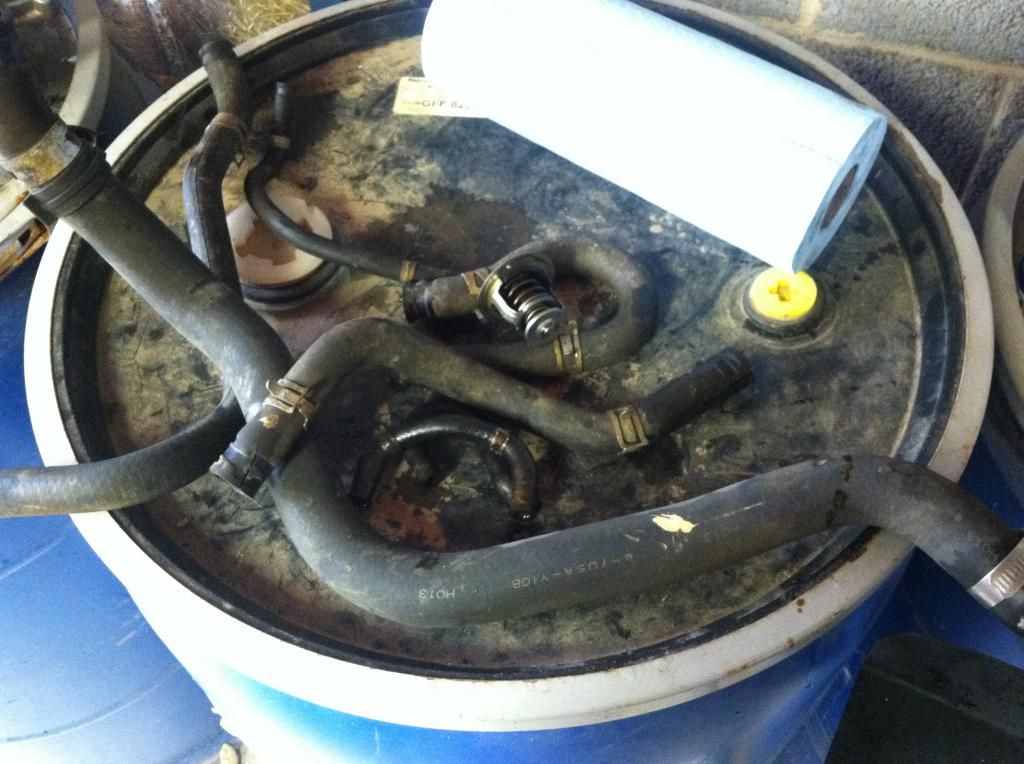
Dirty parts awaiting cleaning:
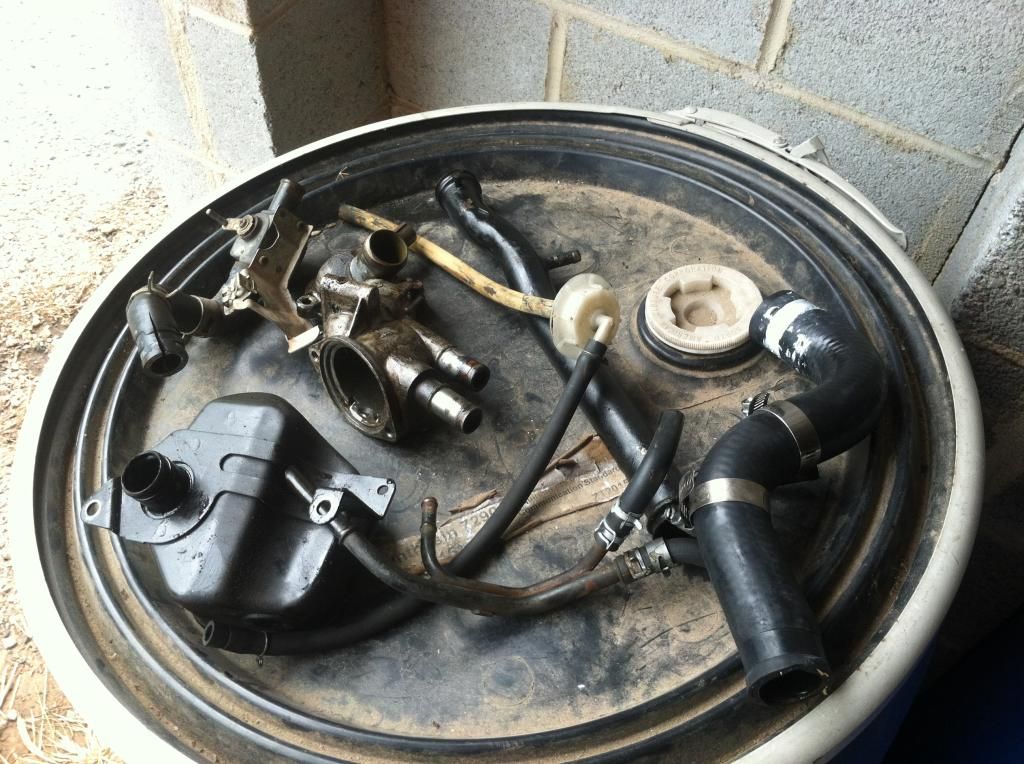
Parts that had been cleaned, awaiting install. Headlights were cleaned inside/out:
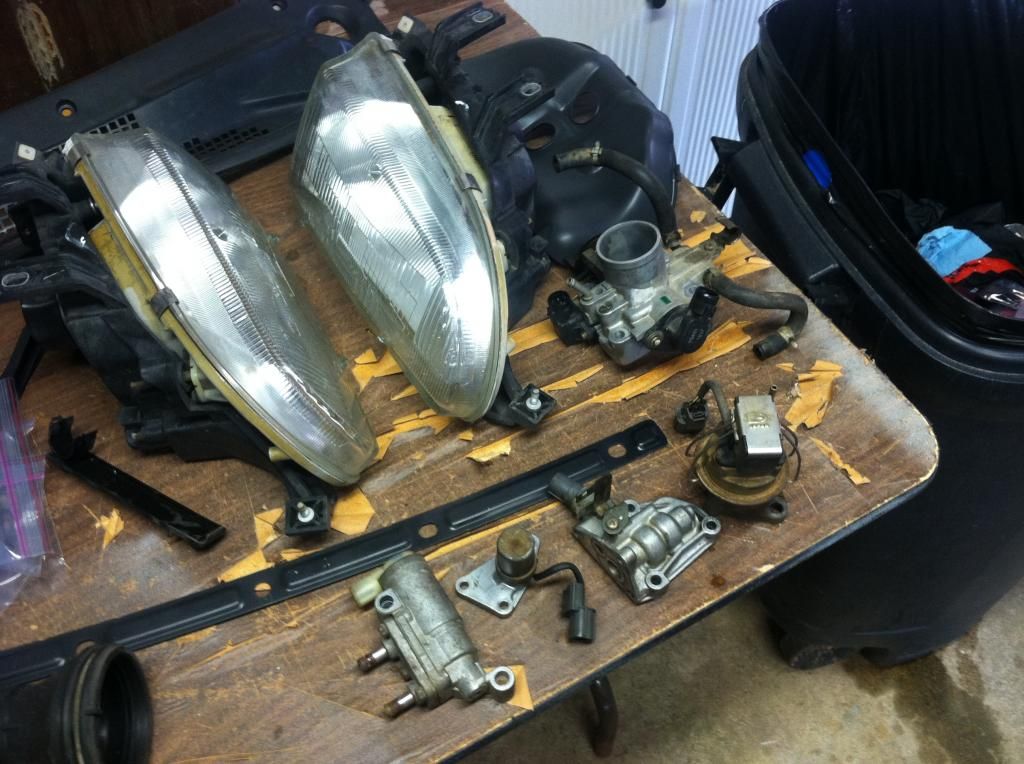
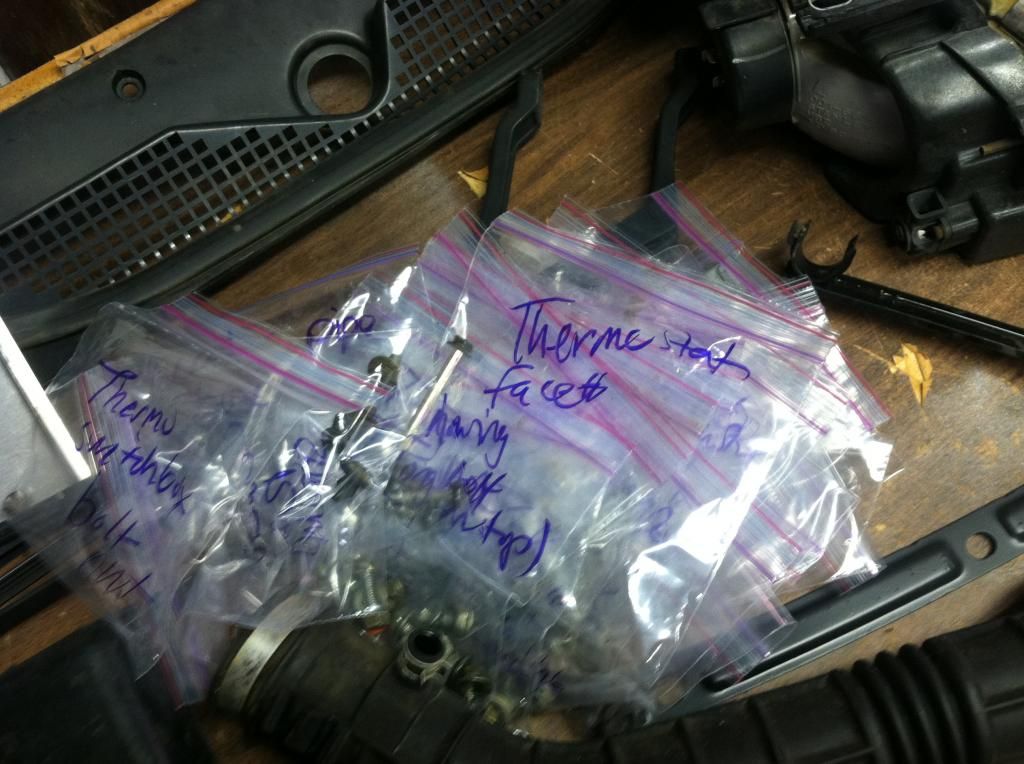
My method for staying organized during tear-down sessions:
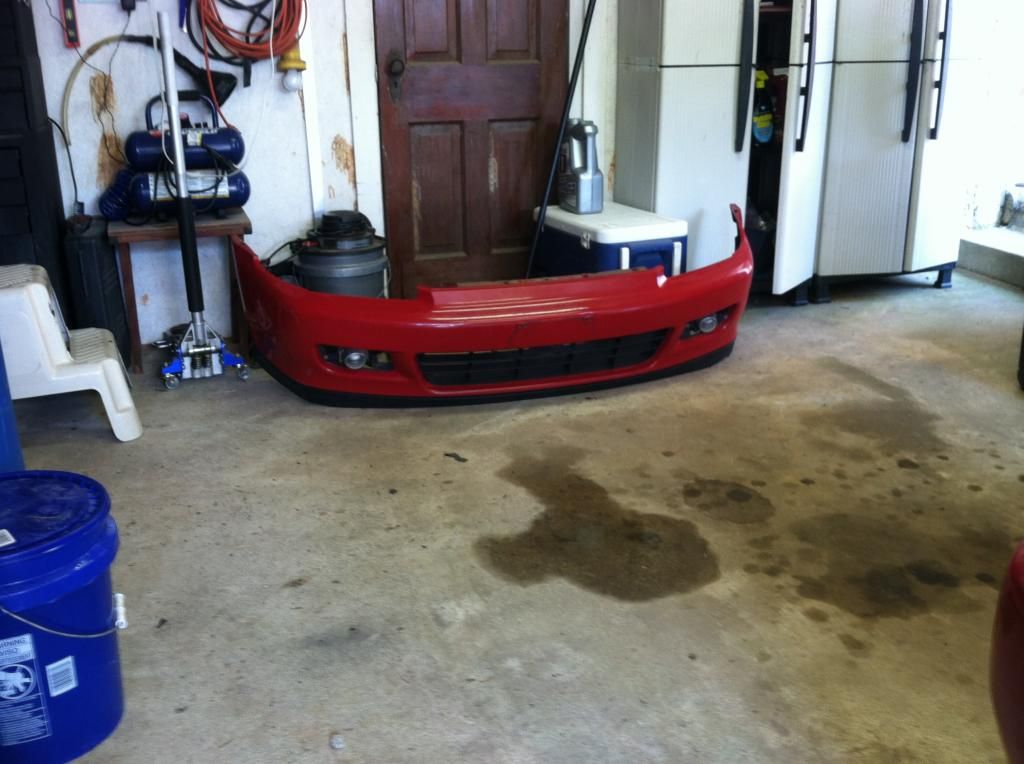
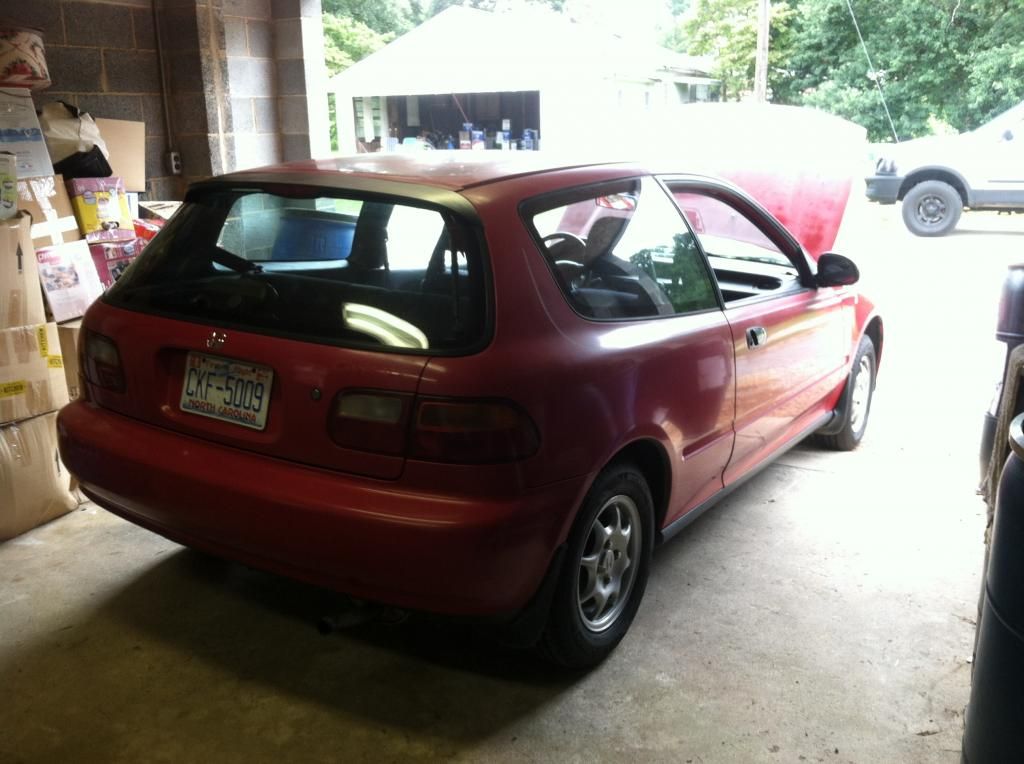
92-95 Civics have one of the best looking Honda bumpers ever, IMHO:
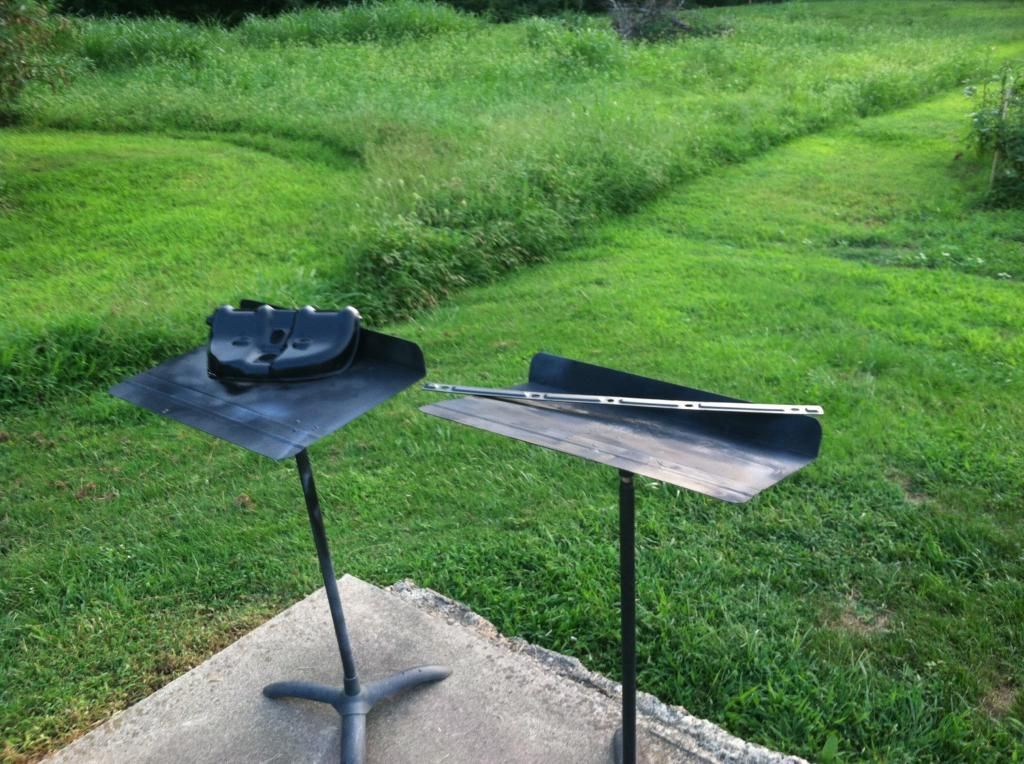
Some parts getting fresh paint:
My lil' buddy (pic not mine; from internets) :
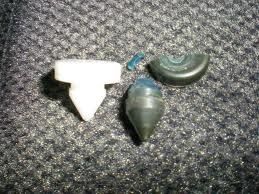 (continued next post)...
Last edited by OG VX; 09-06-2014 at 06:16 AM..
|
|
|
|
|
The Following User Says Thank You to OG VX For This Useful Post:
|
|
|
09-03-2014, 11:46 PM
|
#36 (permalink)
|
|
JDM hypeR mileR
Join Date: Aug 2014
Location: Mooresville, NC
Posts: 418
Thanks: 475
Thanked 418 Times in 198 Posts
|
To wrap up this post, here's some "after" pictures of the engine bay. Not show-ready yet, but working in that direction...
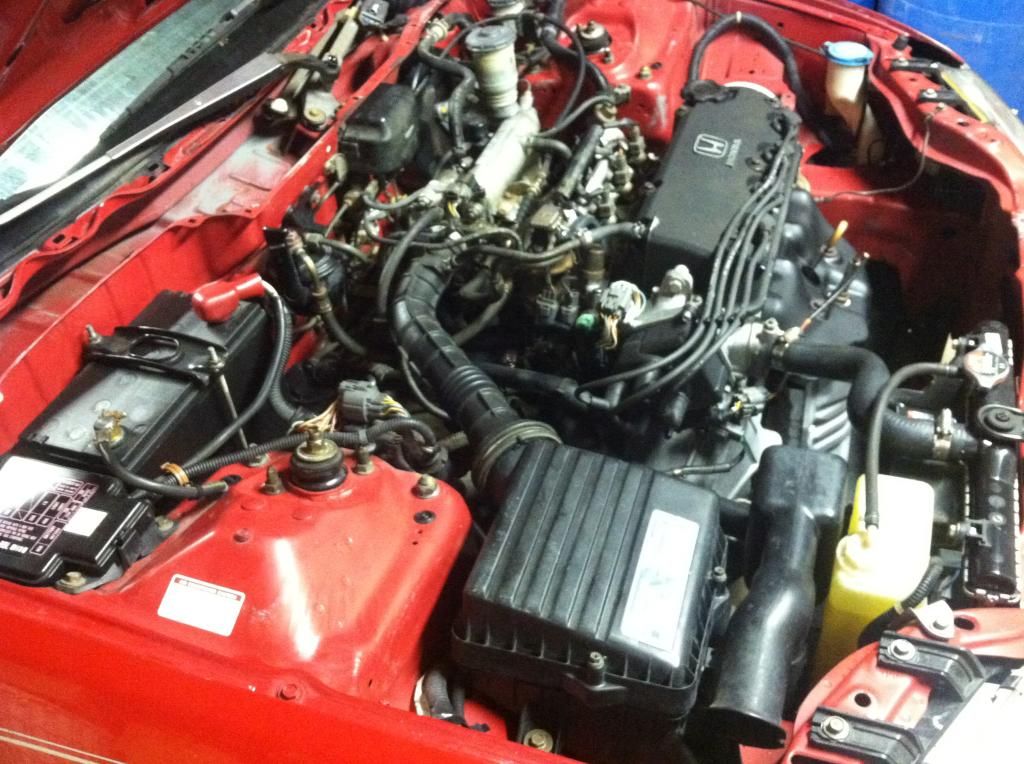
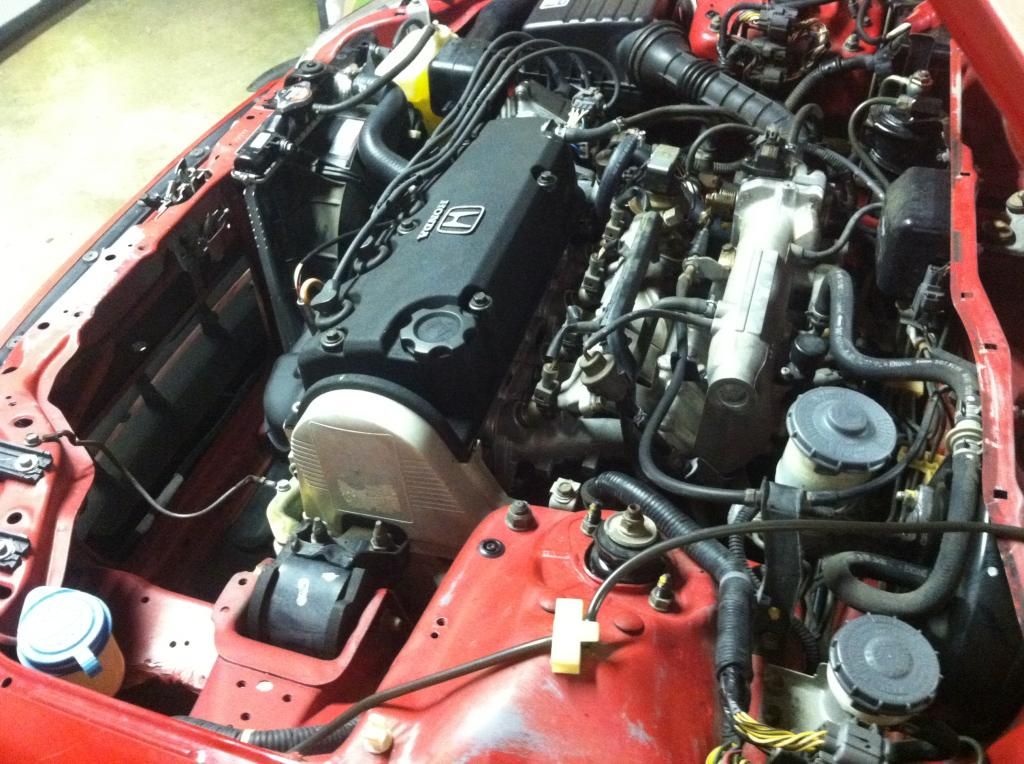

...and an artsy-fartsy final exterior shot before the overhaul on the exterior begins.
That's it for now. More to come.
Thanks for eco-tuning in!
Last edited by OG VX; 09-04-2014 at 06:44 PM..
|
|
|
|
|
The Following 5 Users Say Thank You to OG VX For This Useful Post:
|
|
|
09-04-2014, 12:30 AM
|
#37 (permalink)
|
|
Cyborg ECU
Join Date: Mar 2011
Location: Coastal Southern California
Posts: 6,299
Thanks: 2,373
Thanked 2,172 Times in 1,469 Posts
|
That's a very fine looking VX. And thanks for all the pics and deets.
__________________
See my car's mod & maintenance thread and my electric bicycle's thread for ongoing projects. I will rebuild Black and Green over decades as parts die, until it becomes a different car of roughly the same shape and color. My minimum fuel economy goal is 55 mpg while averaging posted speed limits. I generally top 60 mpg. See also my Honda manual transmission specs thread.


|
|
|
|
|
The Following User Says Thank You to California98Civic For This Useful Post:
|
|
|
09-05-2014, 01:19 PM
|
#38 (permalink)
|
|
JDM hypeR mileR
Join Date: Aug 2014
Location: Mooresville, NC
Posts: 418
Thanks: 475
Thanked 418 Times in 198 Posts
|
Thanks so much my friend. I’m trying to get her there...
I’ve spent, probably, 3 times as much time in parts acquirement as I have spent actually wrenching on this VX. Turns out that many of the VX gaskets/manifolds/etc... are all differently shaped than their CX/DX counterparts. Makes for fun hunting!
In another hunting effort, I went to PullaPart early this morning. When I was there three weeks ago, I saw a passenger-side mirror delete on a Civic. I wish I had grabbed the delete kit then, as the Civic was no longer there this morning when I arrived. So, looks like I’ll be modding both the right and left side mirror-deletes.
Here’s a list of recent parts ordered/obtained of late:
“Performance:”
- AutoMeter Vacuum Gauge (w/ eco-minded gauge face/readings)
- Dual pod A-pillar gauge mount
- Home-made MPGuino from Ecomodder user
Exterior:
- H4 CREE LED (30W) Hi/Low Headlight Conversion kit
- Nokya Hyper Yellow H3 fog light bulbs
- OEM Stanley EG sidemarkers
- SiR (replica) corner lights; w/ Amber 1156 bulbs
- OEM Honda radio antenna delete panel
- For a “special modification” for rear: (2) magnetic dealer plate tag holders; sheet metal; (2) Led sequential flashing amber arrows; (2) LED 6” light bars.
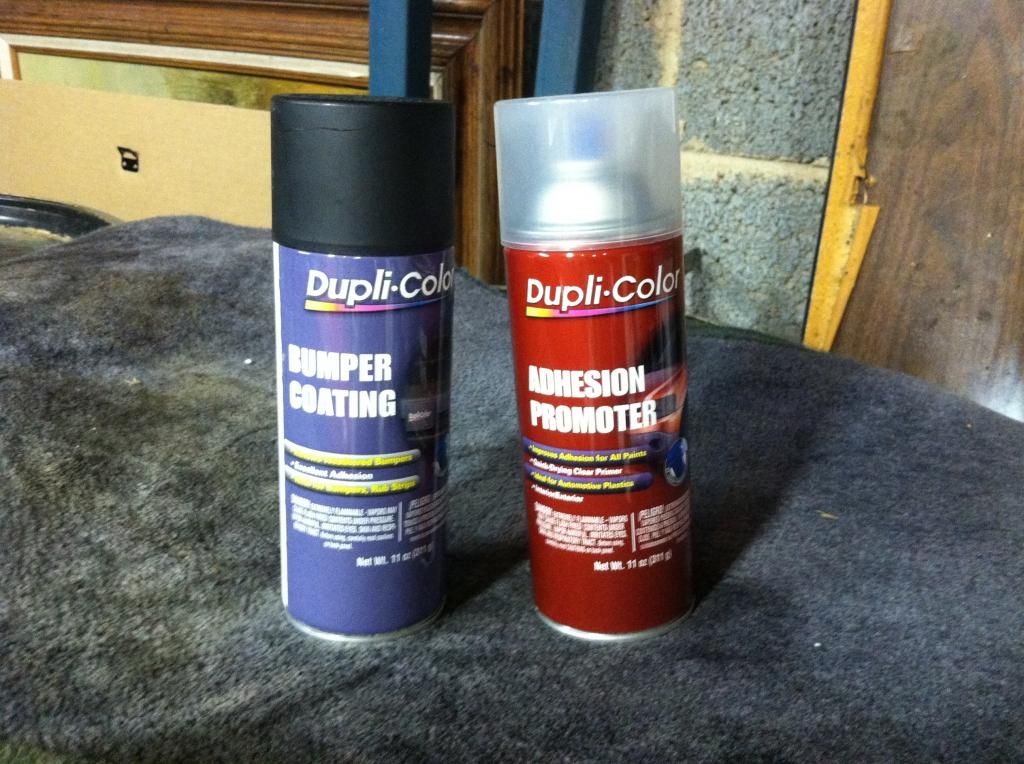
- (4) cans Duplicolor Bumper Paint; (2) cans Duplicolor Adhesion Promotor
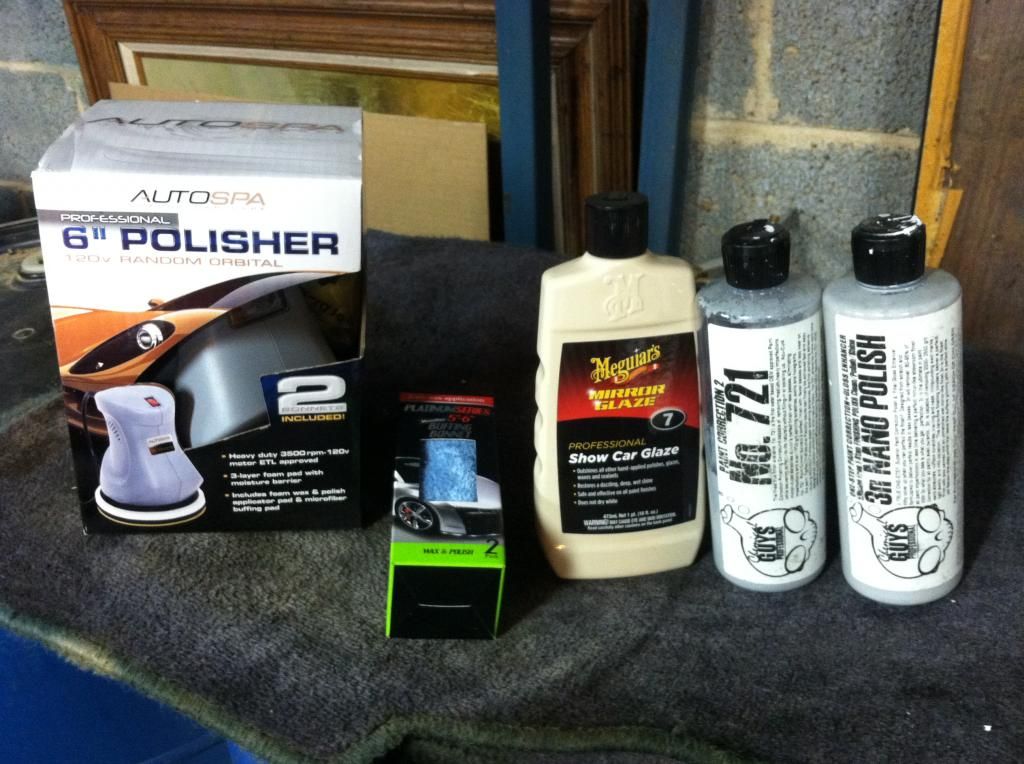
- 6” Orbital Buffer
- 2000 grit sand-paper
- Meguire’s Glaze
- Duralast “Flex Blade” wiper blades
Interior:
- Fan; oscillating, switch-operated w/ cigarette lighter plug
- Gooseneck Ipod mount; bolts to seat bolt of passenger seat.
- (2) “Ultimate Blind Spot Mirrors” from Autozone
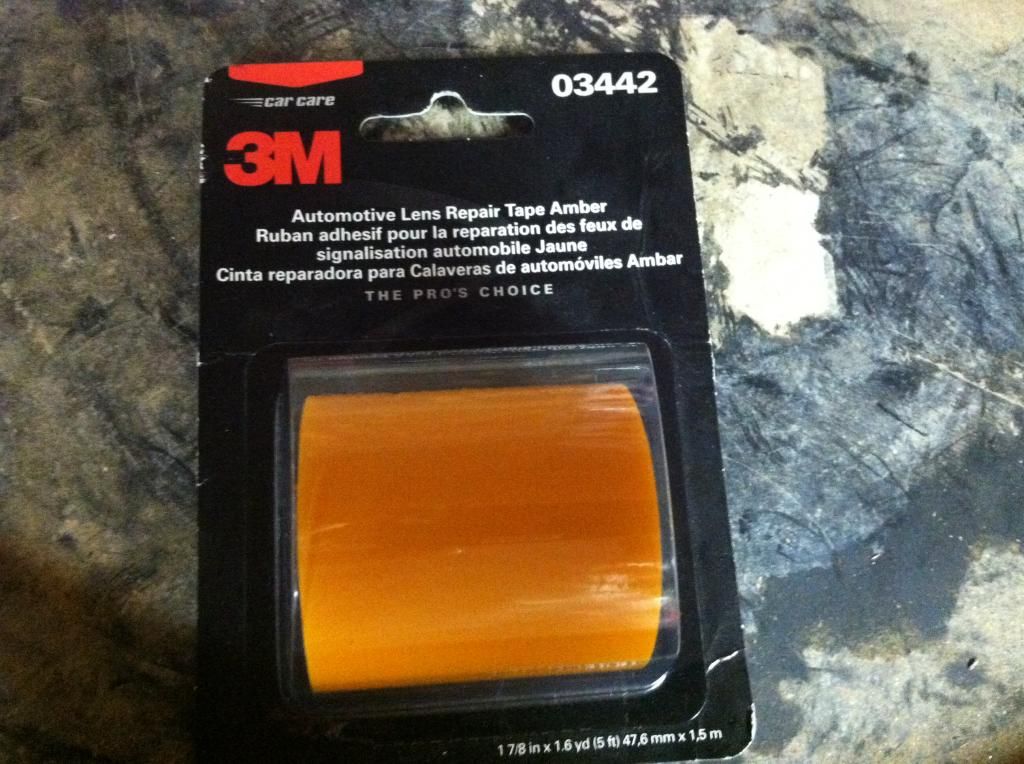
- 3M amber tail light repair tape (for amber dash lighting conversion)
-------------------
I’ll be busy for quite a while installing all of this stuff. I’ve got quite a few updates planned.
Next update will be exterior related.
Thanks for eco-tuning in!
|
|
|
|
|
The Following 2 Users Say Thank You to OG VX For This Useful Post:
|
|
|
09-05-2014, 07:10 PM
|
#39 (permalink)
|
|
ALL UP ON THE INTERWEB!!!
Join Date: Apr 2014
Location: quad cities illinois/iowa border
Posts: 520
Thanks: 185
Thanked 178 Times in 139 Posts
|
OG VX you're Killin it, man! Beautiful! I can't wait to see what's up with the magnets and metal, I'm ready for your update!
I really didn't want to do the a pillar Gauge on my minion, I was going to save that one for the turbo car (I'm just starting into the motor now, don't have the car yet), but the vacuum Gauge, with your eco markings AND the mpguino in there as well? HOLY CRAP YES!
That's my motivation to buy the mpguino now. Too cool, man. My next little pile of cash will be spent on copying your sweet idea - hope you don't mind
Thanks,
Victor |
|
|
|
|
The Following User Says Thank You to vrmouseyd15b For This Useful Post:
|
|
|
09-06-2014, 06:38 AM
|
#40 (permalink)
|
|
JDM hypeR mileR
Join Date: Aug 2014
Location: Mooresville, NC
Posts: 418
Thanks: 475
Thanked 418 Times in 198 Posts
|
^ Thanks much for the encouragement vrmouseyd15b. I appreciate you.
Yes, I'm anxious to get started on my "special project" as well. I'm sure you can guess what it may be. A hint: I wish I had completed it already, may have helped to avoid a near-death accident yesterday on my commute home...
Here's some pics of all of the parts that have come in over the last week. For the married men, my wife has been making a mental inventory of part arrivals each day. So, I'm glad that everything is finally in, sans the LED headlight kit. It should arrive "overnight from Japan" in about a week.
Here's some pics of everything, since everyone knows build threads suck without them...
Fuel Filter and proper heat-range plugs (#4 within part number, not #5)
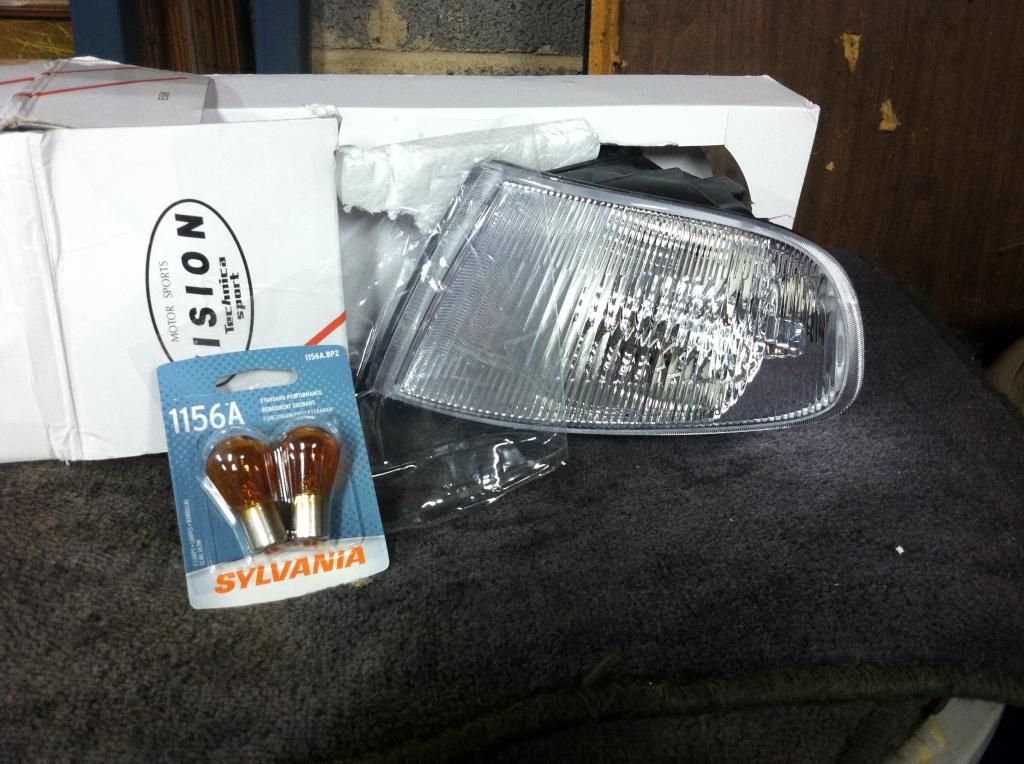
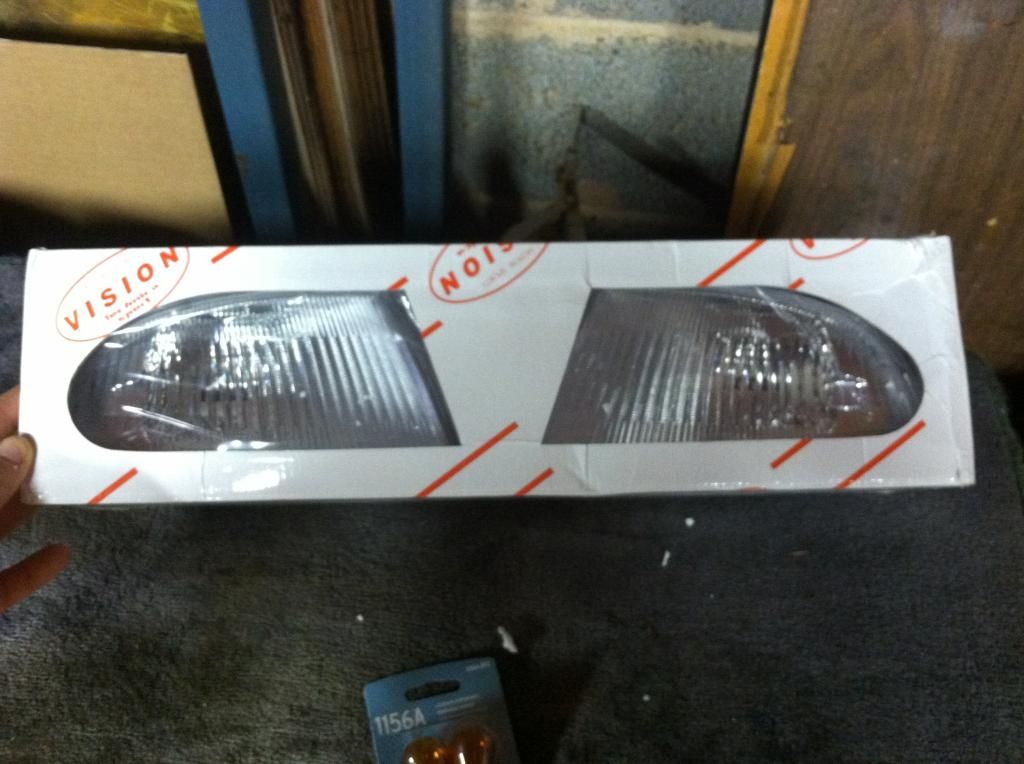
Vision Technica SiR-replica corners; 1156NA bulbs. Seem high quality!
3M Amber repair tape I found at Advanced Auto Parts (for dash lighting)
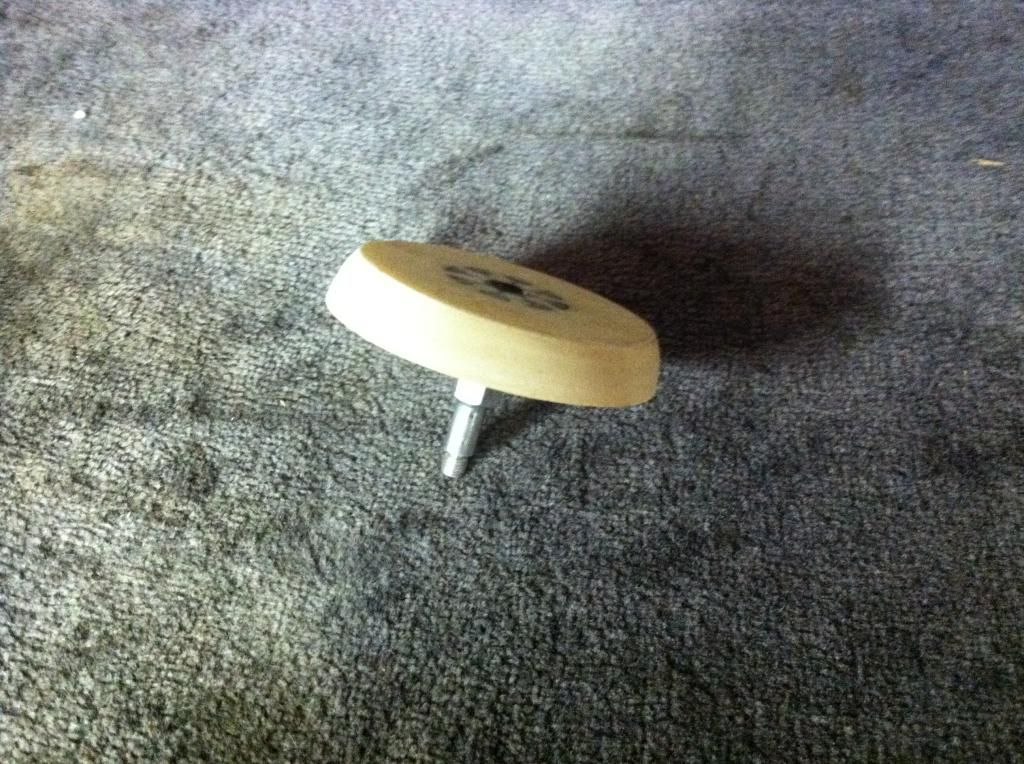
Here's the parts I'll use on the exterior & paint restoration. The first pic is a 3M pinstripe removal tool/wheel. Cost me $35 from my local NAPA 2 years back. Ouch! But: (1) I've used it on 4 cars now; (2) nothing is more hideous than a pinstripe. This little guy is worth it's weight in gold!! Great tool. Very safe on paint as well.
For trim pieces, this combo picture below has served me well for years. They go together like GC's and Koni's! Just degrease/dry your parts, one coat of the AP and 2-3 coats of the bumper paint. I should also note that Duplicolor makes and sells a product in a green can called "Trim Paint". However, from my own personal experience, I have found the "Bumper Paint" to serve a better purpose for all trim (bumper, plastic, and metal). It tends to lay down easier, is more archival, and (most importantly) is more "black". The trim paint starts black, but fades quickly in the sun to more of a dark charcoal. This combo ensures an "OEM like-new" look, while I've seen others use Krylon Fusion for trim pieces, which is just too glossy and ends up looking cheap, IMO. I always treat the trim pieces in my builds with this AP and BP combo, and I never touch a single ounce of Armour All, or "Back to Black" or similar greasy goo to my cars, ever. The trim pieces are always black, wash-to-wash. Now, if anything isn't easily removed for paint or is more of a rubber material (weatherstripping, etc...), I do use a product called "Forever Black". But this is a completely different product from the more common "band-aid" products available at parts stores. It's actually a black die that is permanent. Check it out on Google. Rustoleum has caught on to this product, and now offers this product, which is fairly similar, and it IS available locally. It's pretty good. I used it on my truck and the results were good. It's just a bit harder to work with than Forever Black (dries up too quick when applying, so doesn't go on as smooth; also is too runny, feels more like a water-based paint, where-is the Forever Black applies on more smooth-gliding, with the consistency of a silicone-based gel). It's a pain to have to order it and wait for it, but nothing beats Forever Black when it comes to trim gel. OK, I'll stop now. I just get so tired of seeing these band-aid fixes for trim, and I feel that trim is SO important to the aesthetics of a car, and is often not given the attention it deserves....
I didn't picture this product on a previous post, but did want to post it, as I found this stuff to be very valuable to me. GREAT for cleaning of stuck-on/stubborn grease from the engine block. Saved me much time. Cost about $2 per can at Dollar General. Just sprayed it on the block, waited about 5 minutes, tooth brushed the applied areas, and hosed off. Now, it will leave a bit of hazing to the finish of your block, but this can be wiped off later with WD40 and a rag.
 -- (continued next post) --
Last edited by OG VX; 09-06-2014 at 07:27 AM..
|
|
|
|
|
The Following 2 Users Say Thank You to OG VX For This Useful Post:
|
|
|