 09-29-2013, 12:09 AM
|
#31 (permalink)
|
|
Hydrogen > EV
Join Date: Apr 2012
Location: NW Ohio, United States
Posts: 2,025
Thanks: 994
Thanked 402 Times in 285 Posts
|
So I FINALLY checked the codes with my UG. P1456, and P1163.
P1456 on IC net.
Quote:
P1456 is indeed called the loose gas cap code.
More specifically its Evap leak, fuel tank area. In some unusual cases other more expensive items have (usually) been damaged.
|
I believe it is from running the tank so low. Will now be filling up at around a quarter tank left, at least shooting for that. I will make sure I fill up by 1-2 bars, at the very latest.
P1163 on IC net.
Quote:
|
But the fault and fix still lies with the EGR valve.
|
This suggests the EGR valve, so I may have an actual issue with the EGRv. I cleared them, and will see how it works out. I may be learning how to clean my EGRv soon!
Are those other images working?
Last edited by UltArc; 09-29-2013 at 12:10 AM..
Reason: 2nd link didn't work right.
|
|
|

|
 Today Today
|
|
|
|
 Other popular topics in this forum...
|
|
|
|
 09-29-2013, 03:08 AM
|
#32 (permalink)
|
|
Lots of Questions
Join Date: Jan 2013
Location: San Jose
Posts: 665
Thanks: 343
Thanked 101 Times in 79 Posts
|
That's interesting that low fuel would cause a CEL. I have had the gas cap loose code before though. Good luck with that valve! 
I still can't see the pics, not sure about anybody else. Can you add them as an attachment? Maybe the code isn't working for me for some reason. Or a link to the photo host site?
__________________
Don't forget to like our Facebook page!


Best EM Quotes:
Quote:
Originally Posted by aerohead

It has been said, that if you peel the duct tape back on Earth's equator, you'll find that the two hemispheres are held together with J B Weld.
|
Quote:
Originally Posted by Dan9

subscribed with a soda.
|
Quote:
Originally Posted by aerohead

If you're burning,and someone throws gasoline on you,there will be a localized cooling effect, but you're still on fire.
|
|
|
|

|
 09-29-2013, 11:14 AM
|
#33 (permalink)
|
|
Hydrogen > EV
Join Date: Apr 2012
Location: NW Ohio, United States
Posts: 2,025
Thanks: 994
Thanked 402 Times in 285 Posts
|
This is the reference I will be using.
http://ecomodder.com/forum/showthrea...tml#post159596
Quote:
1. Remove the rear wiper arm. There's a 10mm nut holding it in place, and with it gone, the arm can be worked loose by wiggling it back and forth a little.
2. Remove the wiper motor. Pull off the grey plastic interior hatch trim piece and discard it if you like. Unbolt the three 10mm bolts holding the motor in place, unplug its cord, and remove it from the car.
3. Plug the hole in the hatch glass. I used a plug from Lowe's misc. hardware drawer. Unfortunately, the size I needed (1+3/16" or 1+1/4" iirc) is only available in chrome, so I had to sand it until the chrome was rough so I could spray-paint it black. Install it with some silicone.
|
Getting started! |
|
|

|
 09-29-2013, 12:25 PM
|
#34 (permalink)
|
|
EcoModding Apprentice
Join Date: Dec 2012
Location: East Sacramento, California
Posts: 233
Thanks: 237
Thanked 60 Times in 41 Posts
|
Quote:
Originally Posted by UltArc

|
looks good. pulling the gray trim off requires some strategy at times, obviously make sure you pull it straight out toward the front of the car. also here is a link to the sink hole cover. its basically this but you can get it in white plastic and it comes with a gasket and sturdier mounting system, Shop Danco Metal Sink Hole Cover at Lowes.com
P.S. the plastic one also has too long of a mounting base so it has to be cut a little shorter for the trim plastic to go back on. but i really do recommend the plastic one. |
|
|

|
 09-29-2013, 02:54 PM
|
#35 (permalink)
|
|
Hydrogen > EV
Join Date: Apr 2012
Location: NW Ohio, United States
Posts: 2,025
Thanks: 994
Thanked 402 Times in 285 Posts
|
Deleted the rear antenna. I couldn't figure out how to safely remove the metal, so I Plasti dipped it.
Also, I started the final side mirror covers. Waiting for Rust - O - Leum to cure, then Plasti dip, then insulation and putting it all in place,
|
|
|

|
 09-29-2013, 08:45 PM
|
#36 (permalink)
|
|
.
Join Date: Dec 2011
Location: Salt Lake valley Utah
Posts: 923
Thanks: 114
Thanked 397 Times in 224 Posts
|
Did you delete the antennae base, or just the mast? The base appears to be oval, not sure what could be used as plug to that?
__________________
I try to be helpful. I'm not an expert.
|
|
|

|
 09-29-2013, 10:25 PM
|
#37 (permalink)
|
|
Hydrogen > EV
Join Date: Apr 2012
Location: NW Ohio, United States
Posts: 2,025
Thanks: 994
Thanked 402 Times in 285 Posts
|
Quote:
Originally Posted by sheepdog 44

Did you delete the antennae base, or just the mast? The base appears to be oval, not sure what could be used as plug to that?
|
Just the antenna. The metal base is still in, being a seal and just sticking up. I do think it is pretty close to a circle, just not totally flat.
Edit:
By antenna, I meant wiper.
Last edited by UltArc; 09-29-2013 at 10:25 PM..
Reason: Whoops!
|
|
|

|
 10-02-2013, 12:41 AM
|
#38 (permalink)
|
|
Hydrogen > EV
Join Date: Apr 2012
Location: NW Ohio, United States
Posts: 2,025
Thanks: 994
Thanked 402 Times in 285 Posts
|
Quote:
Originally Posted by UltArc

Current Plan: Complete driver mirror by end of the week. Within next two weeks, complete Honda dealership inspection, and after the inspection, the underbody will be completed. When I get to pulling the UG out of the Mustang, I may just check the codes myself, but I still want to make sure the underbody looks good.
After that, I will make a rear plate to come out of the rear, to keep the air above and below separate. I may put a plate on the rear, and eventually it will be a boattail, but one step at a time.
1. Driver interior mirror install.
2. Driver exterior mirror removal.
3. Honda inspection.
4. Underbody.
5. Rear flat plate.
|
1. Done, 2nd time the charm? We'll see in the morning.
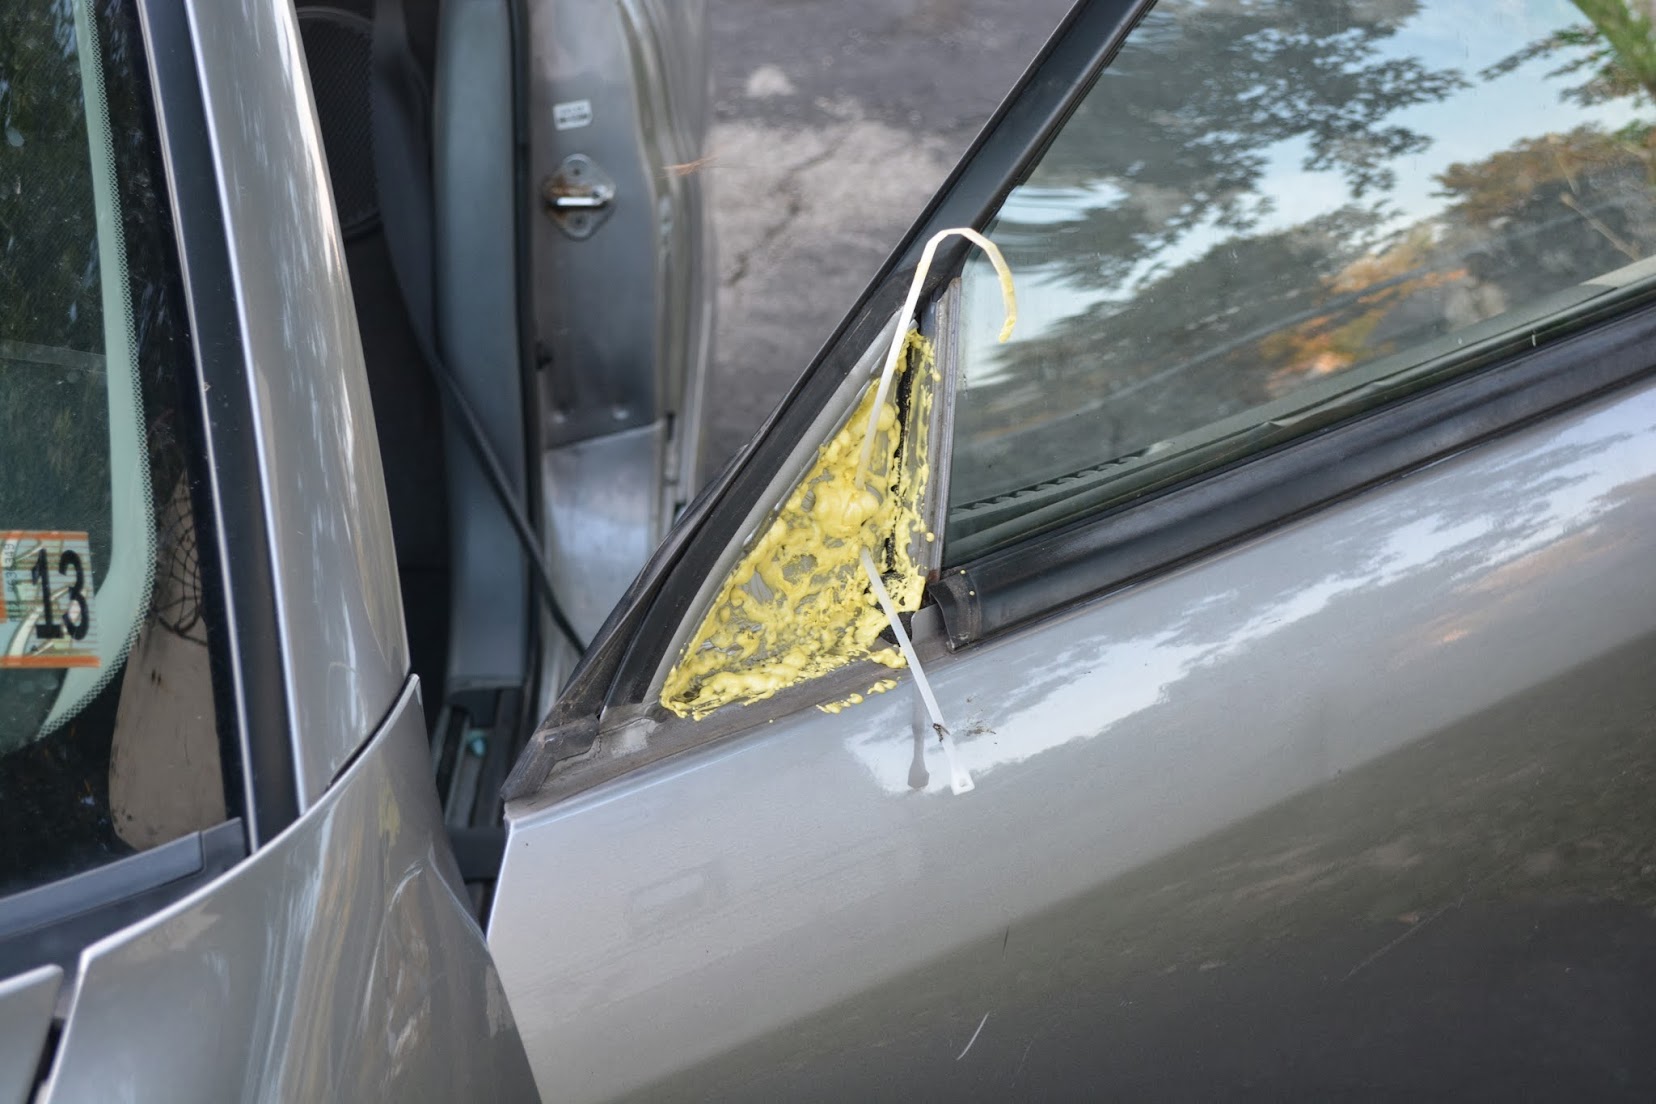
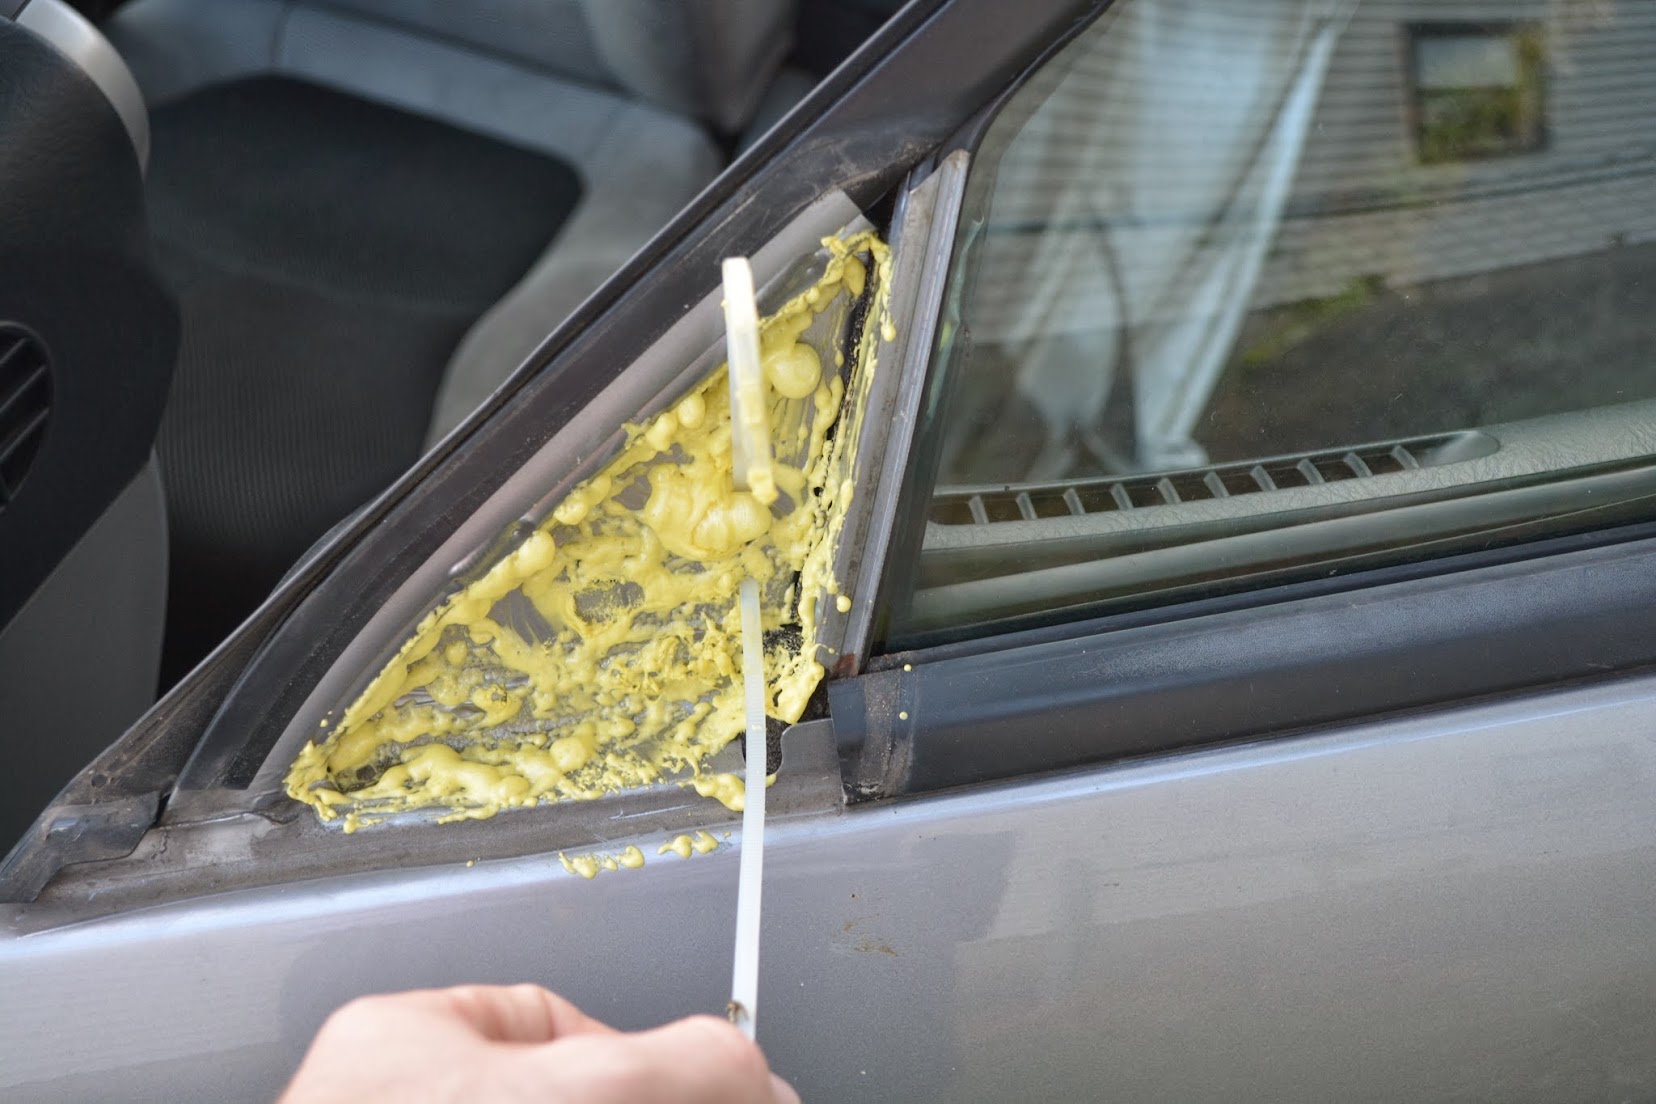
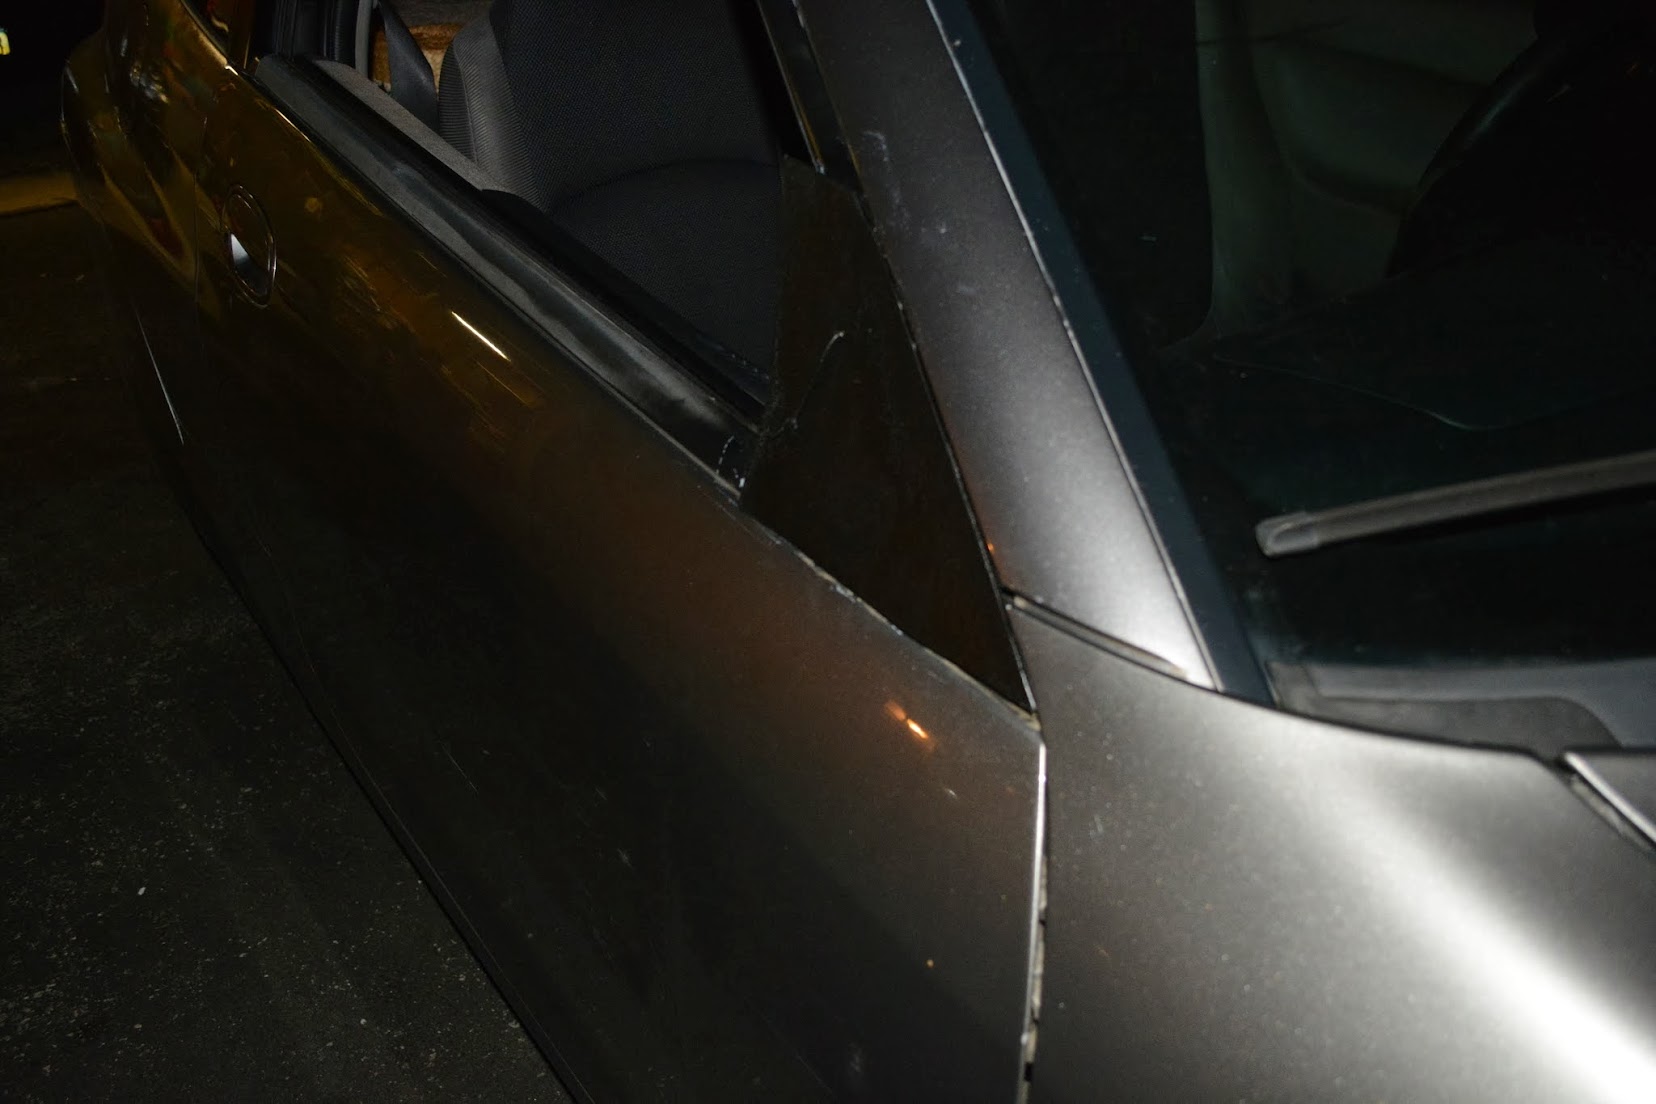
2. Been done, but now the inside filled with window Great Foam, and outside cavity w/ GF. This is covered w/ rubberized polycarbonate.
3. Saturday, 0800-1400.
4. After 3.
5. Started development! What was originally going to be used as a boattail/kammback for the Mustang is now going on the Insight as a flat rear panel(who am I kidding, this is the base for the boattail).
Basic checklist:
Upper grille block
Lower ""
Driver exterior mirror delete
Passenger ""
Rear wiper delete
New plan:
1. Rear flat panel
2. Honda Inspection
3. Underbody
4. Partial air dam
5. Side skirts
In the think tank: Grooving underbody to direct air straight back, Prius diffuser, decreasing hood/wind screen angle. Thinking of underbody as all aluminum, brain tsunami on directing air straight back & side skirt design.
Images to follow in the coming days. Just filled up the Mustang (about 50-100 miles early to get summer blend), saw just over 40.
Edit:
Tank was actually 39.55, updated.
Last edited by UltArc; 10-02-2013 at 01:29 AM..
Reason: Bad math :(
|
|
|

|
|
The Following User Says Thank You to UltArc For This Useful Post:
|
|
 10-02-2013, 01:06 AM
|
#39 (permalink)
|
|
Master EcoModder
Join Date: Sep 2011
Location: Laval, QC
Posts: 528
Thanks: 311
Thanked 93 Times in 69 Posts
|
Great job!
__________________
 Trollinsight Modding Thread Trollinsight Modding Thread
 2000 Honda Insight MT Silverstone Metallic
 #95 (CAN) 131K mi. 81.7 Lmpg
Best Tank : 100.06 MPG (US) | 120.2 MPG (Imp) | 2.35 L/100Km | 42.54 Km/L
Best commute : 130.8 MPG (US) | 157.1 MPG (Imp) | 1.8 L/100Km | 54.84 Km/L
Best Trip : 111.8 MPG (US) | 134.3 MPG (Imp) | 2.1 L/100Km | 47.53 Km/L
Last edited by HyperMileQC; 10-02-2013 at 01:15 AM..
|
|
|

|
 10-02-2013, 11:47 PM
|
#40 (permalink)
|
|
Hydrogen > EV
Join Date: Apr 2012
Location: NW Ohio, United States
Posts: 2,025
Thanks: 994
Thanked 402 Times in 285 Posts
|
Quote:
Originally Posted by UltArc

1. Done, 2nd time the charm? We'll see in the morning.
2. Been done, but now the inside filled with window Great Foam, and outside cavity w/ GF. This is covered w/ rubberized polycarbonate.
3. Saturday, 0800-1400.
4. After 3.
5. Started development! What was originally going to be used as a boattail/kammback for the Mustang is now going on the Insight as a flat rear panel(who am I kidding, this is the base for the boattail).
...
New plan:
1. Rear flat panel
2. Honda Inspection
3. Underbody
4. Partial air dam
5. Side skirts
...
|
1-1. 2nd times the charm!
1-2. Images will be uploaded in this post.
1-3. Saturday, 0800-1400
1-4. After 3.
1-5. Is in progress, and pretty effective.
2-1. Done!
For the side mirrors, I explained the process. Guts removed, interior taped off (to stop over filling/squishing out), then GS and the part being fully attached. The same with the outside.


But, how does one zip tie after the foam dries? Simple- foam it up with the zip tie properly in place, and every so often gently move it, so it does not become permanent. A little force after it dries keeps the foam good, but the tie moves.


After the outside piece is in place, zip ties ran through, one can fill it with foam, then tighten it up and get your final pieces in the right spot.

 Rear Panel
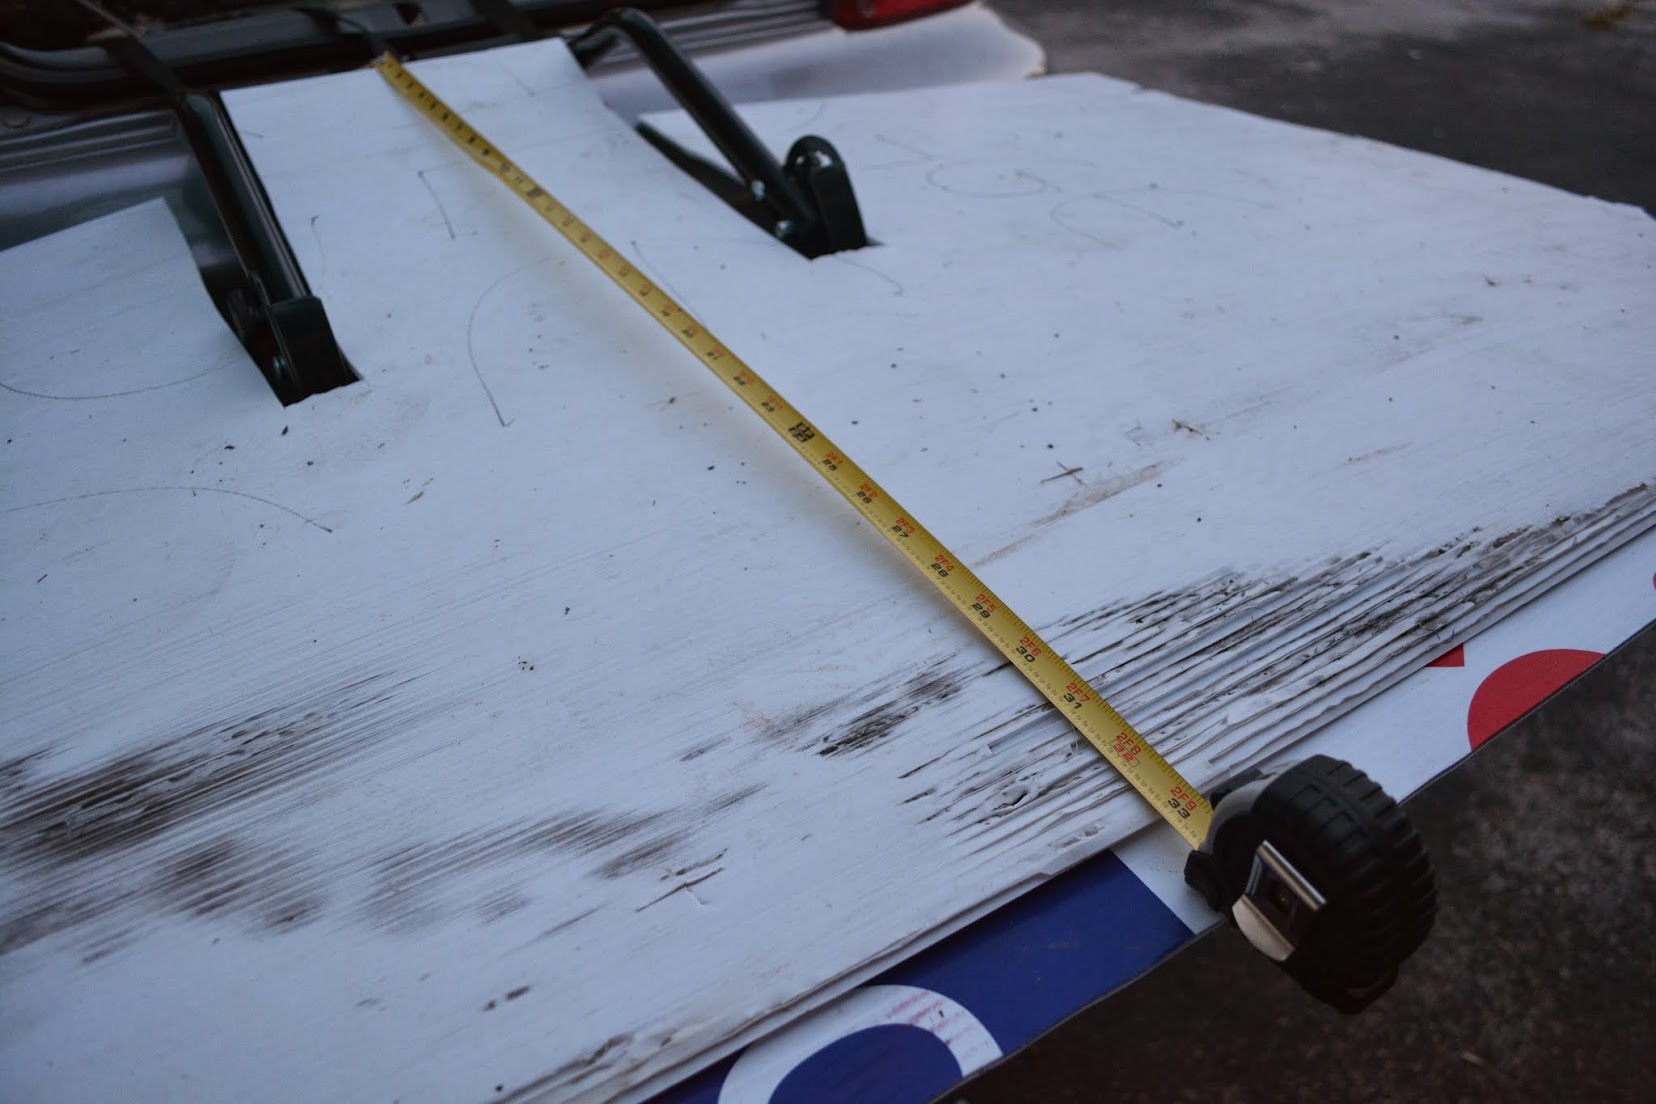
I used a bike rack to make the main platform. Set it to be as flat as possible. Then, a decent sized polycarbonate chunk was cut to fit perfect, and secured down.


Side view

The main rear portion before cutting

Attached (kind of)

It's the same length as Metro's Boat Tail, based off of this post (31 inches from edge of bumper): http://ecomodder.com/forum/showthrea...tml#post361057

Rear views


Side views


Current Sideview (Mirror)


Current Sideview (Quarter Panel back)


There is DEFINITELY a difference. Acceleration has not changed, but coasts seem to go on FOREVER. I also thought I was lean burning poorly, 65-70 via Iguage, but then I felt the LB shift...and was cruising w/ LB at 105-110.
It may be in my head, but it feels like the rear end is looser. As if a parachute is no longer catching the air. My roommate and I test drove it and as I was coasting she asked what was wrong with my engine, and I had to explain I wasn't even in gear... 
Before this modification, I traveled 749.0 miles on 9.20 gallons. Looking forward to seeing this performance over the tank!
|
|
|

|
|