07-30-2013, 06:23 PM
|
#481 (permalink)
|
|
Master EcoModder
Join Date: May 2008
Location: Maynard, MA Eaarth
Posts: 7,908
Thanks: 3,475
Thanked 2,953 Times in 1,846 Posts
|
Data collection has begun!
As originally intended, the jig was putting way too much stress on the samples - it is ~163.5lbs** and the strongest sample (the 10oz E-glass w/ rough surface) failed by compressing along the bearing rod. ** I made a further revision to the formula, and I'm pretty sure this is now correct.
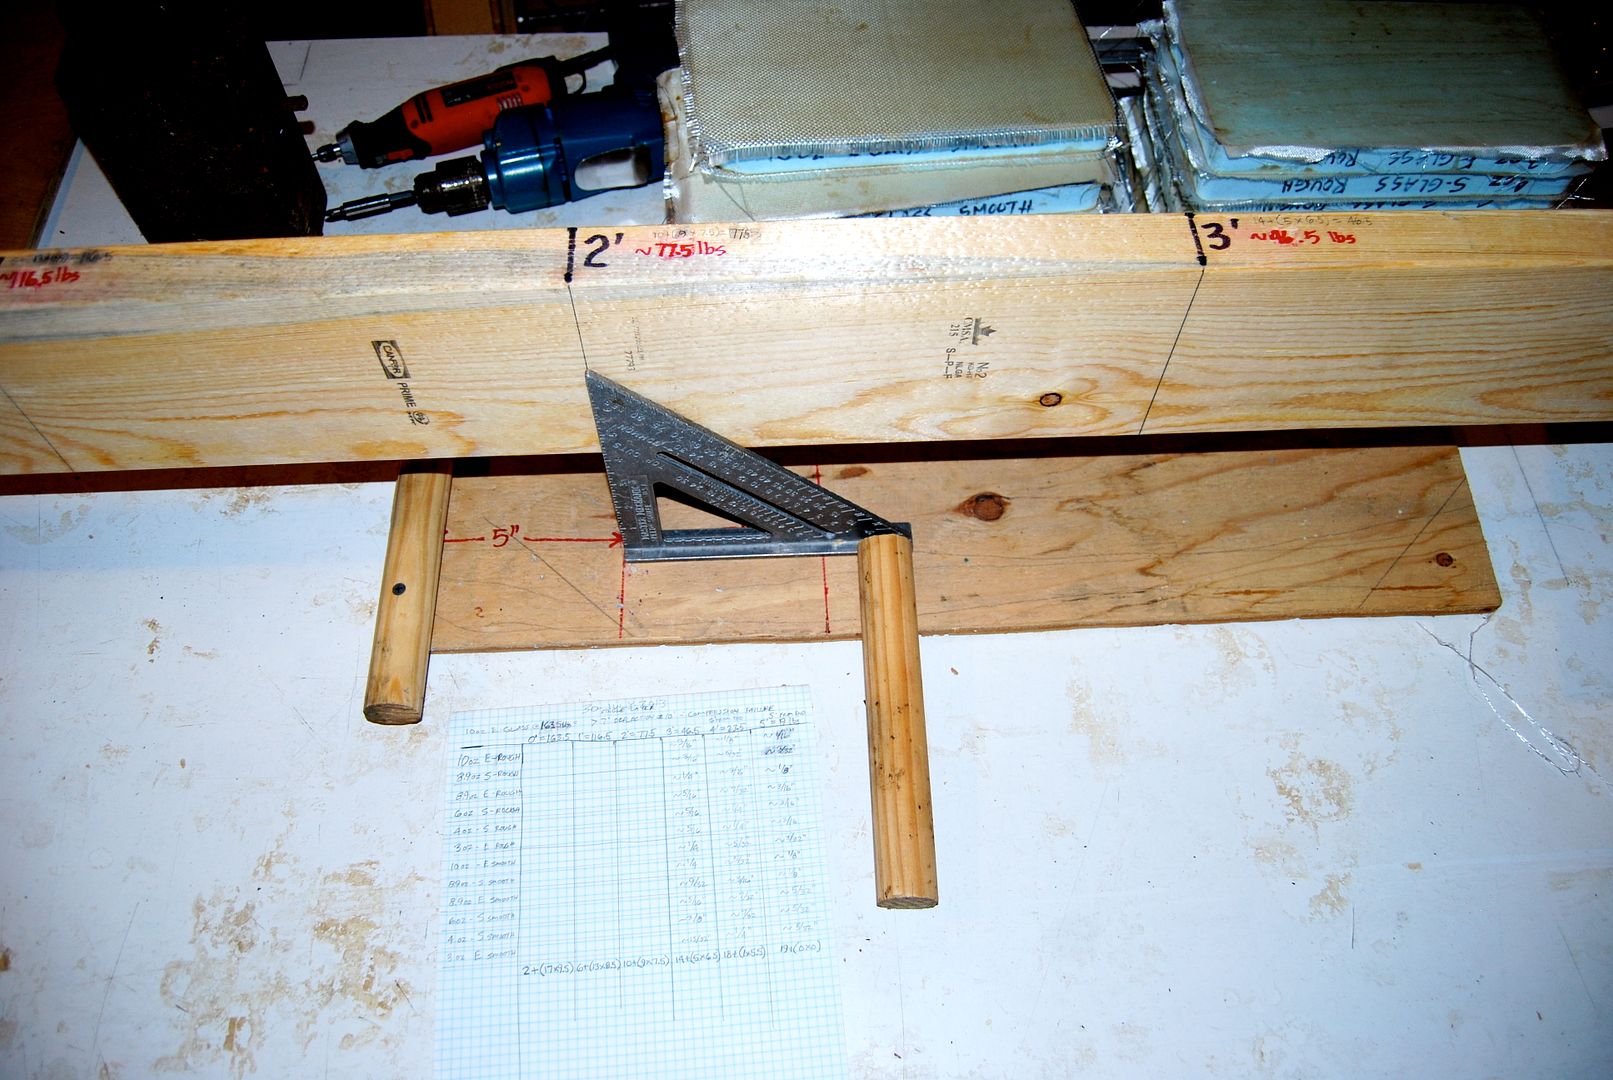
So, I calculated the pressure at the next 5 segments; each a foot farther away from the pivot point. These are the pressures with the 2x6 weight alone:
#0 = 163.5lbs = 2lbs + (17lbs x 9.5')
#1 = 116.5lbs = 6lbs + (13lbs x 8.5')
#2 = 77.5lbs = 10lbs + (9lbs x 7.5')
#3 = 46.5lbs = 14lbs + (5lbs x 6.5')
#4 = 23.5lbs = 18lbs + (1lbs x 5.5')
#5 = 19lbs = 19lbs + (0 x 0) - this is slightly beyond halfway and so #6 and up won't be different.
I'll post the raw data along with a dimensioned drawing soon - I've done 30 out of 72 measurements.
|
|
|

|
 Today Today
|
|
|
|
 Other popular topics in this forum...
|
|
|
|
|
07-30-2013, 07:36 PM
|
#482 (permalink)
|
|
EcoModding Lurker
Join Date: Sep 2010
Location: saint louis
Posts: 88
Thanks: 0
Thanked 4 Times in 3 Posts
|
why don't you also buy a small amount of epoxy and repeat the tests with epoxy for a comparison?
Last edited by 2007 ion2; 07-30-2013 at 11:17 PM..
|
|
|
|
|
07-30-2013, 10:50 PM
|
#483 (permalink)
|
|
Master EcoModder
Join Date: May 2008
Location: Maynard, MA Eaarth
Posts: 7,908
Thanks: 3,475
Thanked 2,953 Times in 1,846 Posts
|
Some pictures of the testing:
 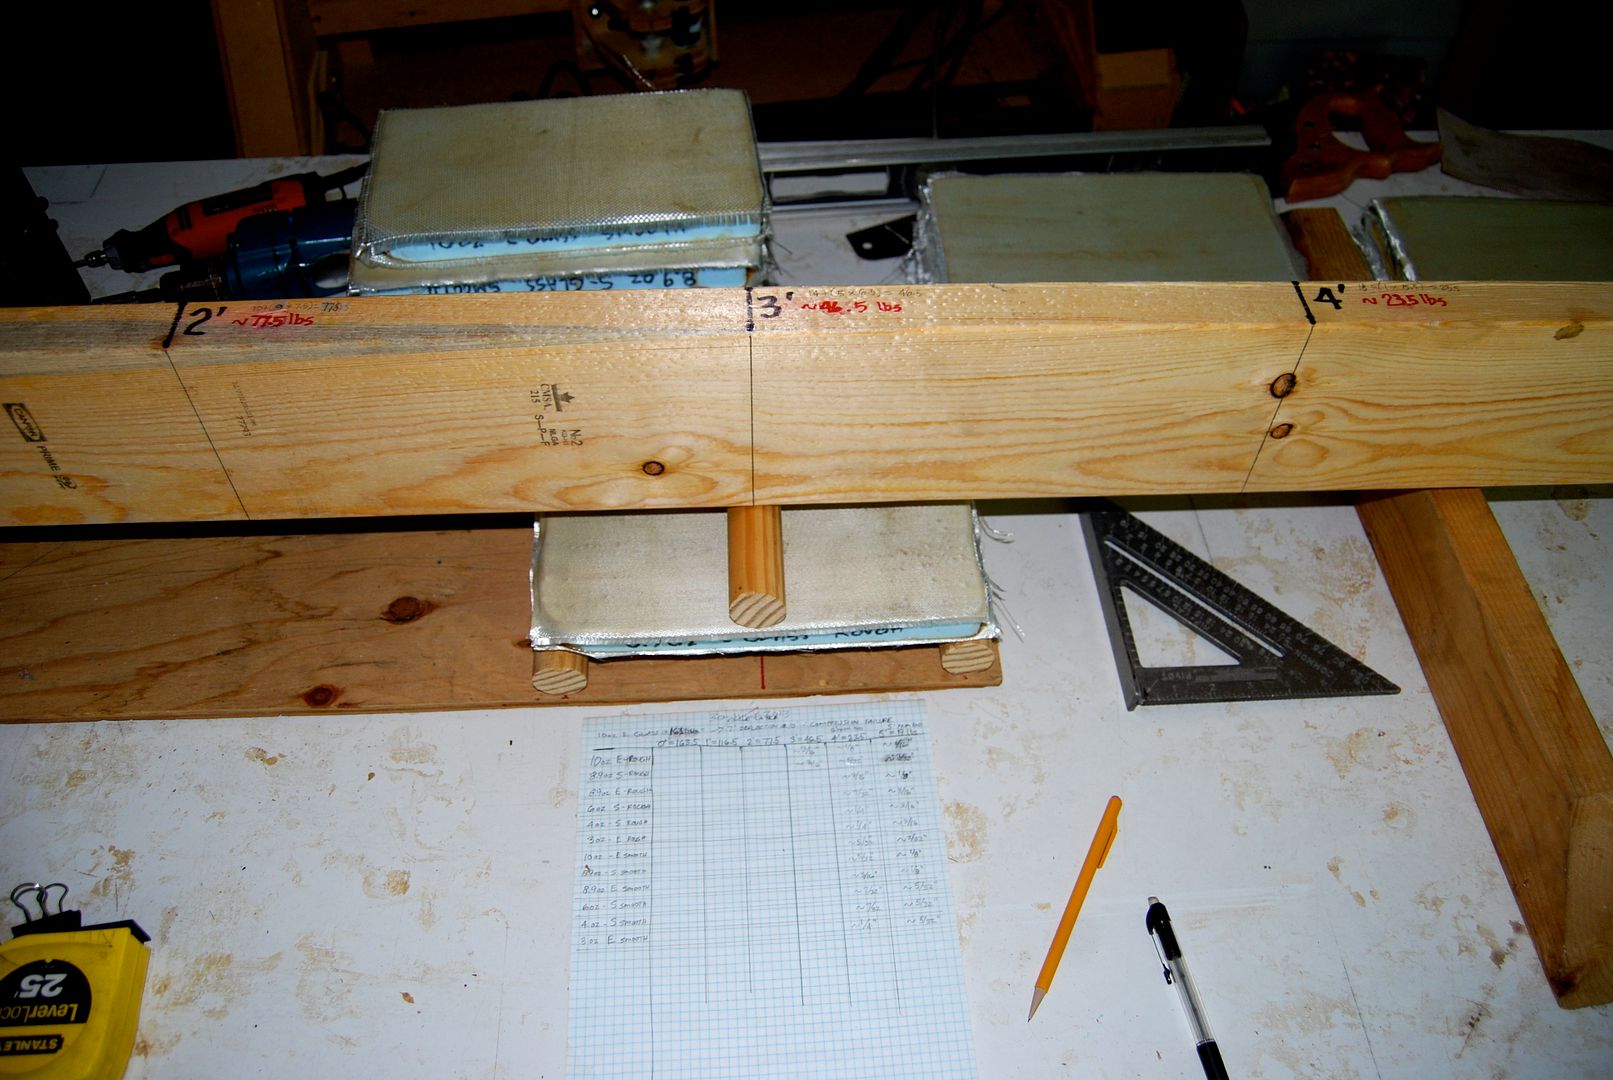 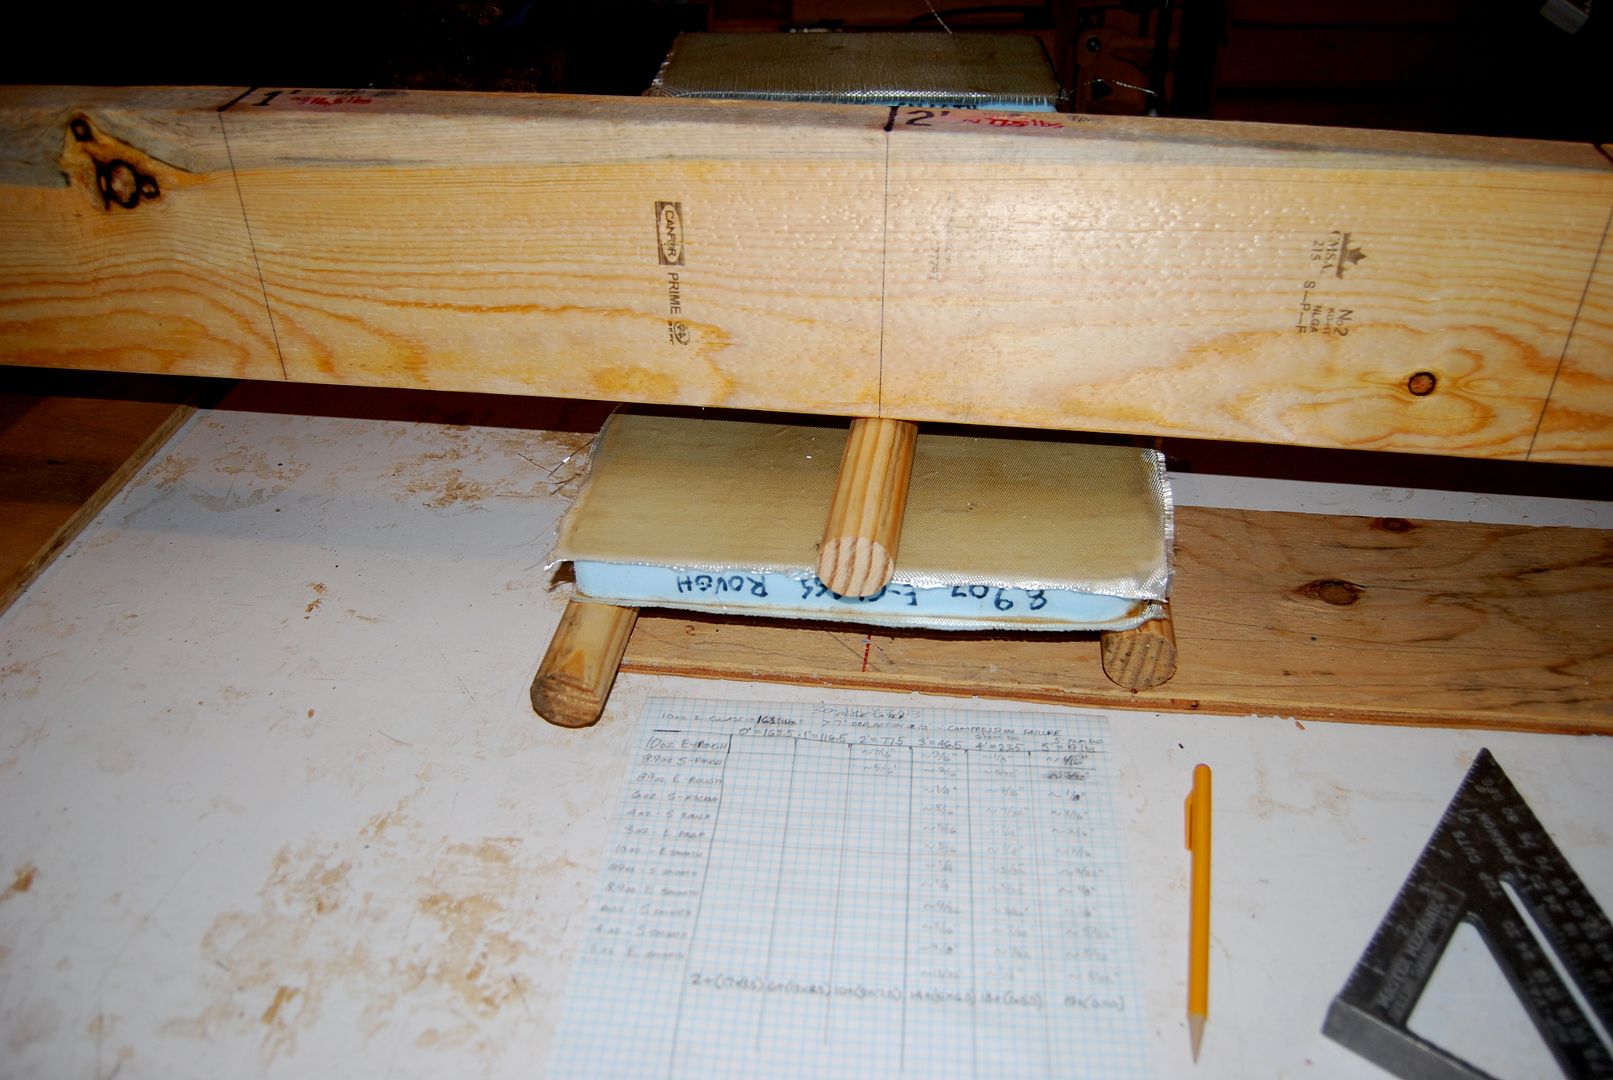
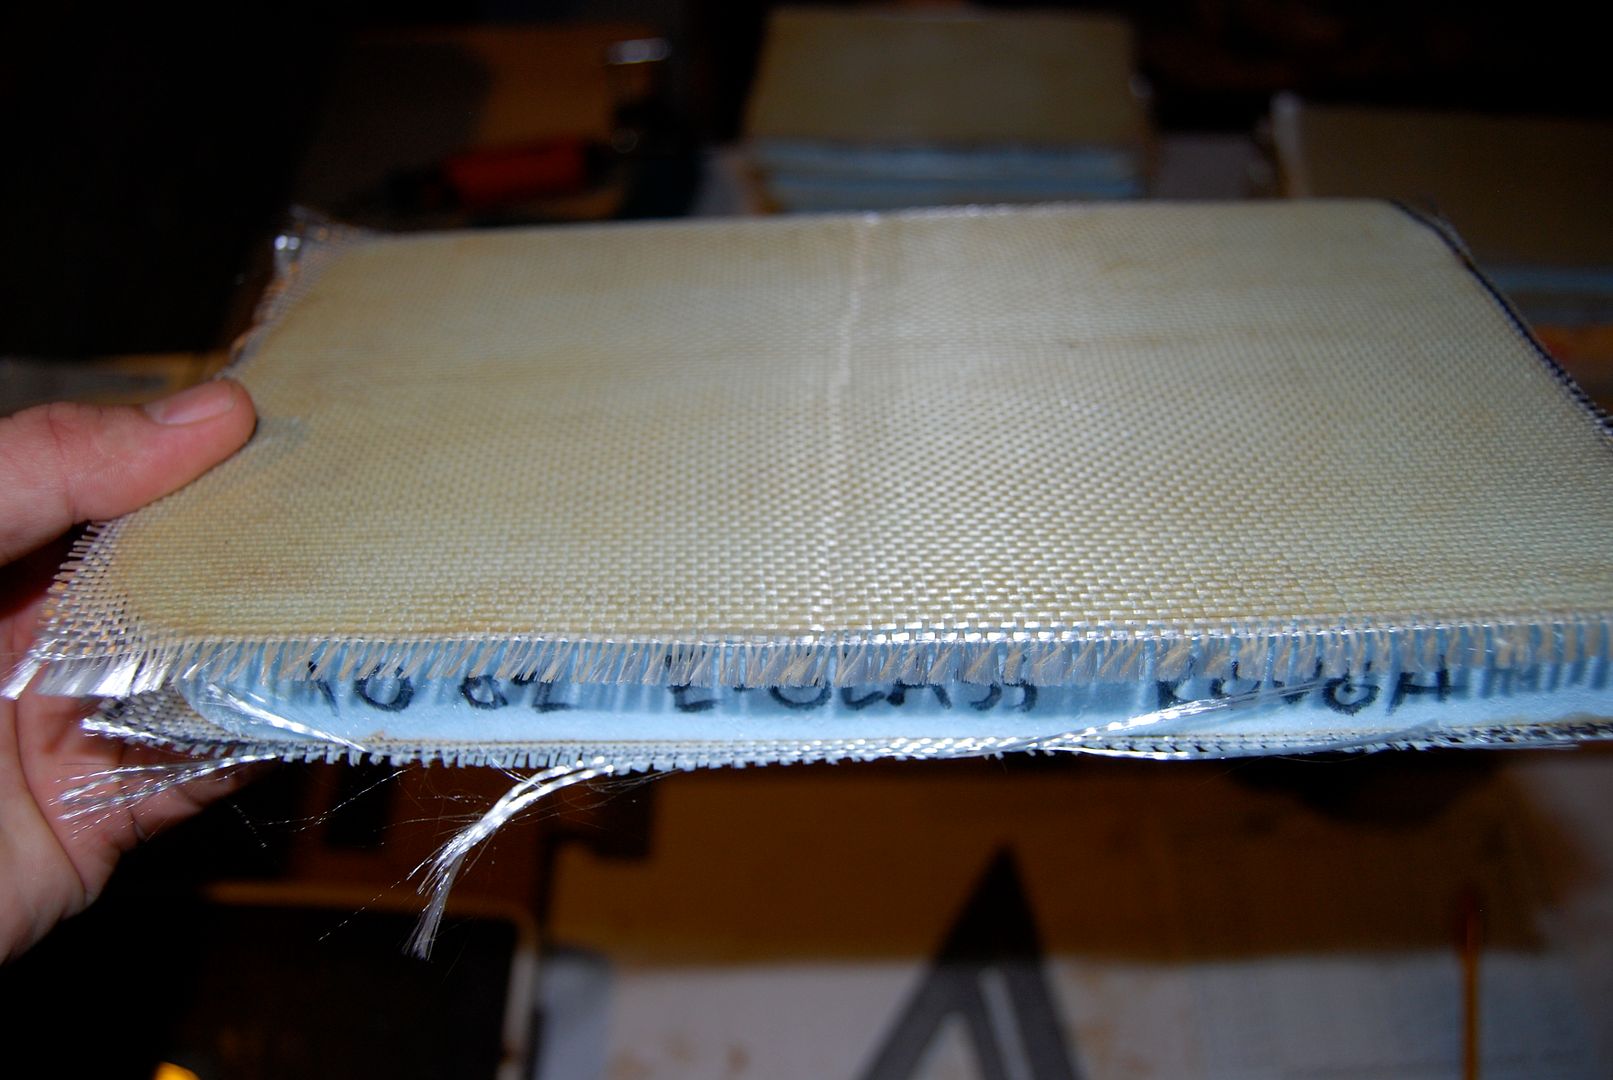
This was the worst compression failure, that occurred at ~163.5 pounds pressure. This piece was tested with this damage on the underside for the rest of the testing, and it seemed to have minimal affect on the deflection, if any.
The lighter fabrics started to show some compression damaged at position #3 with ~46.5 pounds of pressure, and most showed a compression dent in position #2 with 77.5 pounds pressure. All samples had a compression dent after testing in position #1 with 116.5 pounds pressure. When possible, the (largest) dent was on the underside on tests after a sample was damaged. This may have exacerbated the deflection in those later tests, but it seemed to be minimal and not change the general pattern of the data. |
|
|
|
|
The Following 2 Users Say Thank You to NeilBlanchard For This Useful Post:
|
|
|
07-31-2013, 11:20 AM
|
#484 (permalink)
|
|
Master EcoModder
Join Date: May 2008
Location: Maynard, MA Eaarth
Posts: 7,908
Thanks: 3,475
Thanked 2,953 Times in 1,846 Posts
|
I need some help with the geometry of my jig, so I can determine the actual deflection of each sample from the measurement I got at the end of the bending arm. The two things I know are the radius of the bending arm, and the length of the arc at the free end of the bending arm. I also know the radius at each of the testing positions.
How do I get the included angle of the measurement I took, and then find the arc length i.e. the deflection at the sample?

I need to solve for n and then find the L for the smaller radius at each testing position. |
|
|
|
|
07-31-2013, 01:55 PM
|
#485 (permalink)
|
|
Master EcoModder
Join Date: Dec 2008
Location: Southern WI
Posts: 829
Thanks: 101
Thanked 563 Times in 191 Posts
|
Neil,
I don't understand why you did not place the pivot hinge as shown below??
Lowering the pivot point would then in turn keep it on the same plane as your applied loads.
As it is now, your putting "rolling" forces on your entire load setup, which in effect, causes shear forces across your composites that are under test.
Yes, I understand that the pin can roll, but the load "center" shifts in position with higher load forces.
If your trying to accommodate thicker samples, then you could use differing thickness shims to accomplish what is needed.

Jim. |
|
|
|
|
The Following User Says Thank You to 3-Wheeler For This Useful Post:
|
|
|
07-31-2013, 04:25 PM
|
#486 (permalink)
|
|
Master EcoModder
Join Date: May 2008
Location: Maynard, MA Eaarth
Posts: 7,908
Thanks: 3,475
Thanked 2,953 Times in 1,846 Posts
|
You're right of course Jim, though the one saving grace is that I unscrewed two of the rods so that they rolled freely - which is the proper way to do it if I understand correctly? The only other reason is that the way I did it, the screws in the long leaf of the hinge are not under stress. If it was on the bottom edge, then they would be put under tension.
The hinge is located to let the 2x6 be (very close to) level so the motion is close to straight down.
After thinking about my above question, I think it is really simple: I just have to divide the shorter radius by the longer one (which results in a ratio less than 1:1) and then multiply that by the arc length I measured. This should result in the actual deflection of the sample?
The rest of the formula cancels out, I think.
Here's the drawing of the testing jig:

I used Position #5 first, then #4, #3, #2, and #1 last. Position #0 resulted in over 7" (measured at the end of the arm!) deflection, effectively bottoming out the jig.
Last edited by NeilBlanchard; 07-31-2013 at 04:40 PM..
|
|
|
|
|
07-31-2013, 06:06 PM
|
#487 (permalink)
|
|
Master EcoModder
Join Date: May 2008
Location: Maynard, MA Eaarth
Posts: 7,908
Thanks: 3,475
Thanked 2,953 Times in 1,846 Posts
|
I got all the data into a spreadsheet - and I figured out how to make a useful chart! 
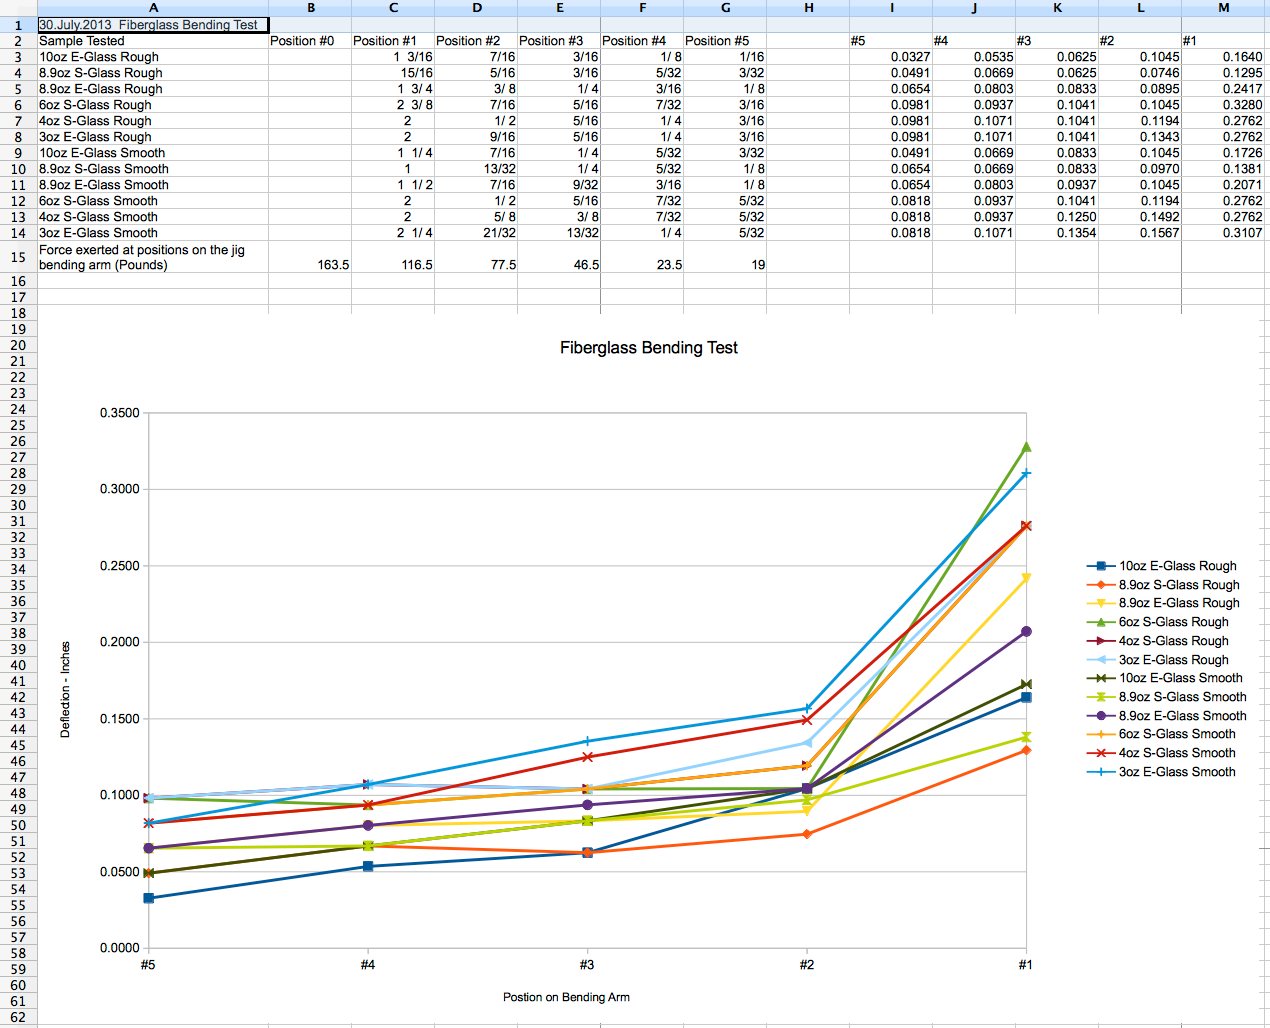
My 6oz S-Glass Rough sample was not up to snuff, I think. The rough surface definitely helped! I am much happier seeing the actual deflection... |
|
|
|
|
08-03-2013, 04:59 PM
|
#488 (permalink)
|
|
Master EcoModder
Join Date: Jan 2008
Location: Sanger,Texas,U.S.A.
Posts: 16,534
Thanks: 24,520
Thanked 7,436 Times in 4,817 Posts
|
n and L
Quote:
Originally Posted by NeilBlanchard

I need some help with the geometry of my jig, so I can determine the actual deflection of each sample from the measurement I got at the end of the bending arm. The two things I know are the radius of the bending arm, and the length of the arc at the free end of the bending arm. I also know the radius at each of the testing positions.
How do I get the included angle of the measurement I took, and then find the arc length i.e. the deflection at the sample?
I need to solve for n and then find the L for the smaller radius at each testing position. |
*The circumference is pi X diameter and represents 360-degrees.
*L/C would be the percentage of 360-degrees and spit n out.
* The 'new' circumference at the different station would be pi X D,which would constitute 360-degrees.
*If you measure n there,then L= [[ n/360 X[ ( 2 X radius) X pi]]
__________________
Photobucket album: http://s1271.photobucket.com/albums/jj622/aerohead2/
|
|
|
|
|
08-10-2013, 02:00 PM
|
#489 (permalink)
|
|
EcoModding Lurker
Join Date: Apr 2011
Location: Texas
Posts: 1
Thanks: 0
Thanked 0 Times in 0 Posts
|
I don't think anyone has brought it up yet, but even if the PVA glue or whatever you're using is strong enough by the tests, that doesn't mean that it is suitable. Aside from creep, compressive strength, etc., you also have to be concerned with fatigue of a material. Fatigue is caused by cyclic loading. An example of the cyclic loading on a car is the bumps you go over. Over time, this will weaken the material and it may eventually fail.
There are ways to estimate the fatigue limit of a material. I personally do not know how, but it may be a good idea to consider fatigue before settling on PVA glue over epoxy. It may be worth waiting for the extra cash or just go ahead and buy the epoxy.
Basic information on fatigue can be found on wikipedia under "Fatigue limit" and "Fatigue (material)". I cannot post links because I do not have 5 posts yet.
|
|
|
|
|
08-10-2013, 04:03 PM
|
#490 (permalink)
|
|
Moderate your Moderation.
Join Date: Nov 2008
Location: Troy, Pa.
Posts: 8,919
Pasta - '96 Volkswagen Passat TDi 90 day: 45.22 mpg (US)
Thanks: 1,369
Thanked 430 Times in 353 Posts
|
This one's a prototype, right?
Prototype vehicles are NEVER built with top-end materials. If it's a test bed, build it how you need to build it to get it done, show it off, campaign and get funding to do it better for the /real thing/ later.
I see no reason to not use something that will work in the short term and save money on a prototyped design. If the design fails during testing, you upgrade it and move on. The general idea is that it will be a completed vehicle, able to be seen, felt, shown, tested, admired, photographed, and invested in for some sort of production, and/or the design sold [probably not, I guess] to a company who can produce them en masse for sale.
__________________
"¿ʞɐǝɹɟ ɐ ǝɹ,noʎ uǝɥʍ 'ʇı ʇ,usı 'ʎlǝuol s,ʇı"

|
|
|
|
|