 09-13-2013, 11:38 PM
|
#71 (permalink)
|
|
EcoModding Lurker
Join Date: Apr 2013
Location: Nj
Posts: 48
wrx - '02 subaru impreza wrx wagon 90 day: 33.81 mpg (US) Leg - '05 Subaru Legacy 2.5i
Thanks: 2
Thanked 2 Times in 2 Posts
|
That sucks the mold flexed a bit, f/g needs to be done in a controlled environment. Try heat lamps and let it cure for at least 24hrs. I'm not saying access port, a tactrix cable is a third the price, but a subaru specialist could do it and you won't have to worry about finding a good open source tune. A specialist has a better source to tune then you doing it yourself. Basically find a local mechanic that works specifically on Subaru's, a performance tuner will be more expensive because they work on various models.
Just to be clear; a subaru dealer is a good place to start but they can't do it, a subaru speciality shop is a rally shop, a performance tuner knows vetecs better but can do it for a little more.
|
|
|

|
 Today Today
|
|
|
|
 Other popular topics in this forum...
|
|
|
|
 09-23-2013, 04:52 PM
|
#72 (permalink)
|
|
Master EcoModder
Join Date: Mar 2009
Location: Tustin, CA
Posts: 929
Thanks: 368
Thanked 380 Times in 238 Posts
|
Side Mirror Delete, Uppger grill block v. 3.1
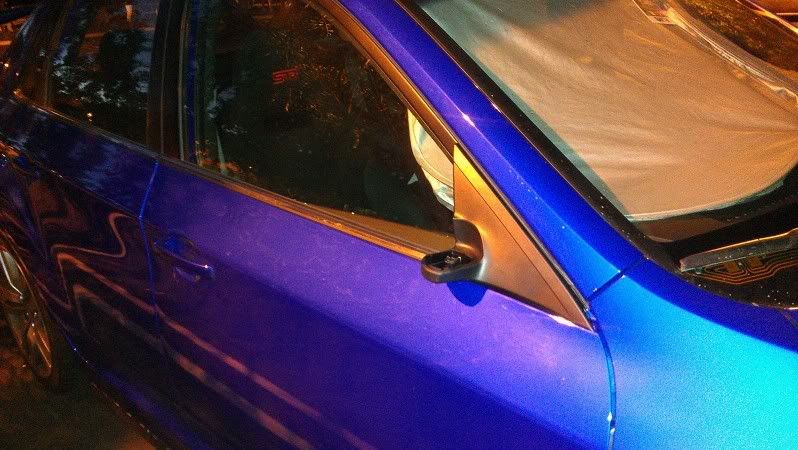
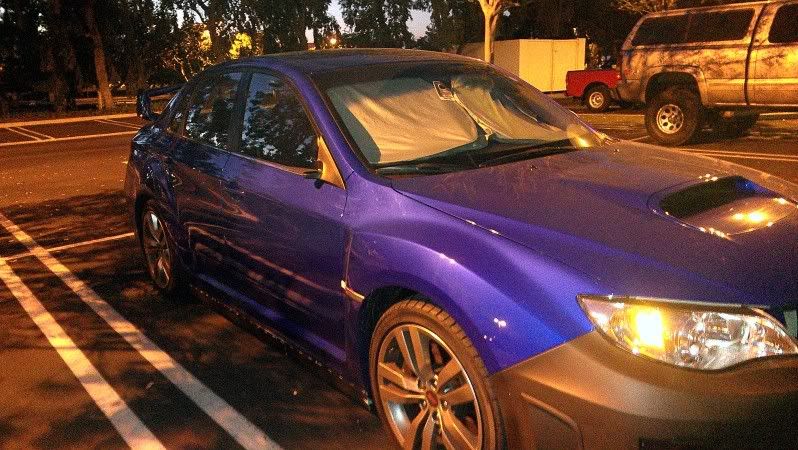
Had a busy weekend working on the Sti. I removed the passenger side mirror. I want to keep the stock mounting hardware to keep it looking OEM (and to avoid spending hours making a block off plate).
How to - remove outside mirror
1) Mine came installed with a factory tweeter. Pull the tweeter towards the back of the car.
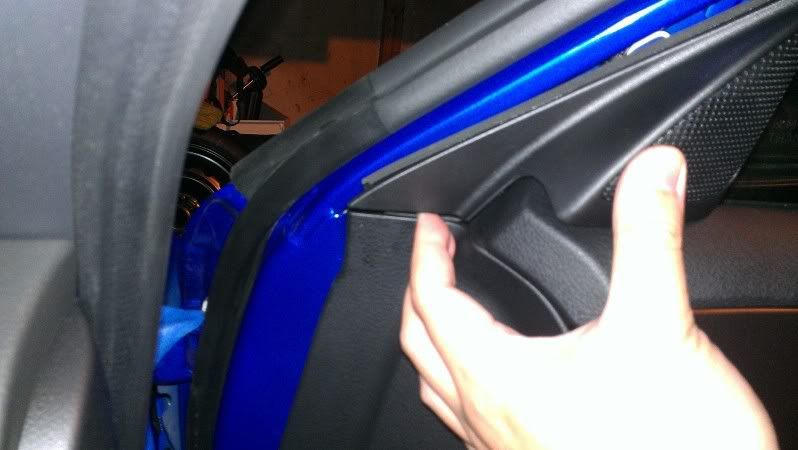
2) The tweeter housing (the side closer to the front of the car) will slightly pry open by itself, Then get your fingers behind the tweeter housing and gently pry the entire tweeter housing off.
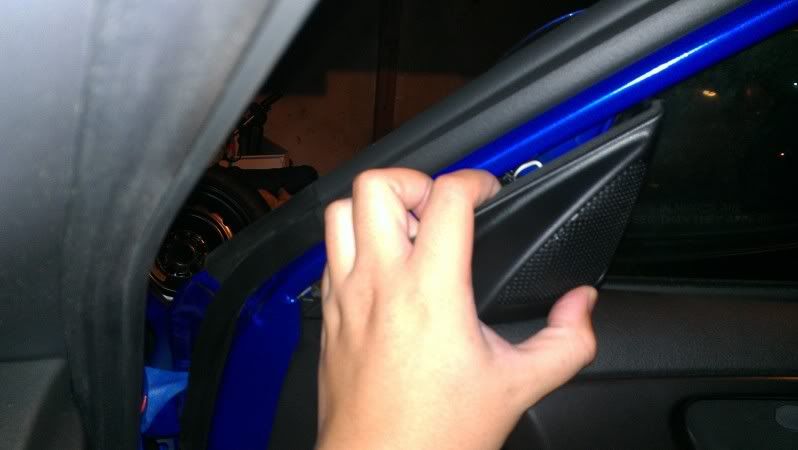
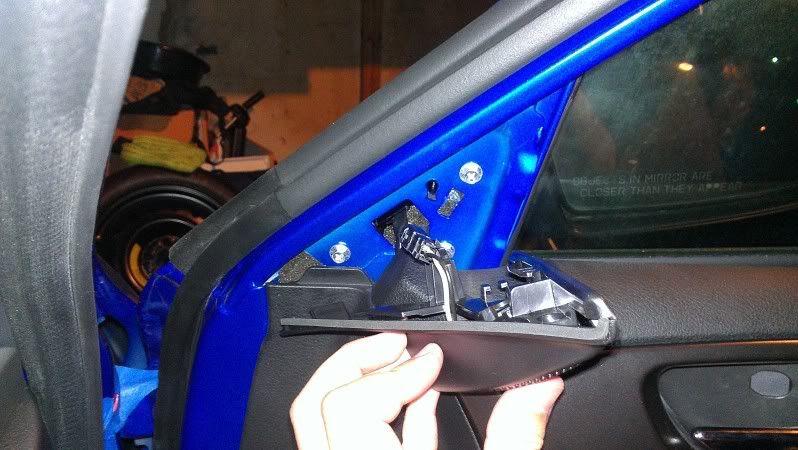
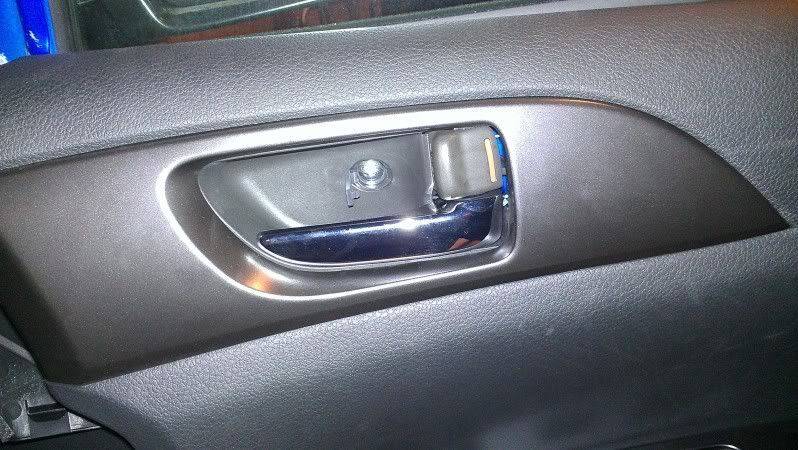
3) there are 3 bolts to unscrew the mirror housing. The very topmost bolt is easy to access. However, the bottom 2 bolts require you to remove the door panel.
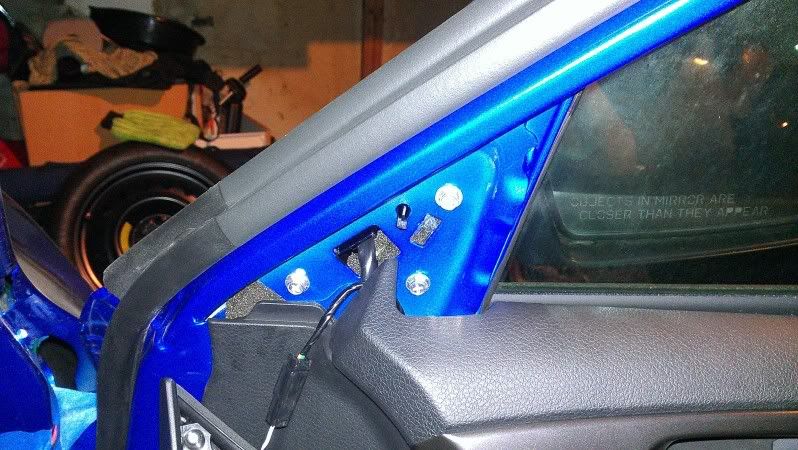
4) first remove the screw located in the door handle
5) then remove the screw in the armrest
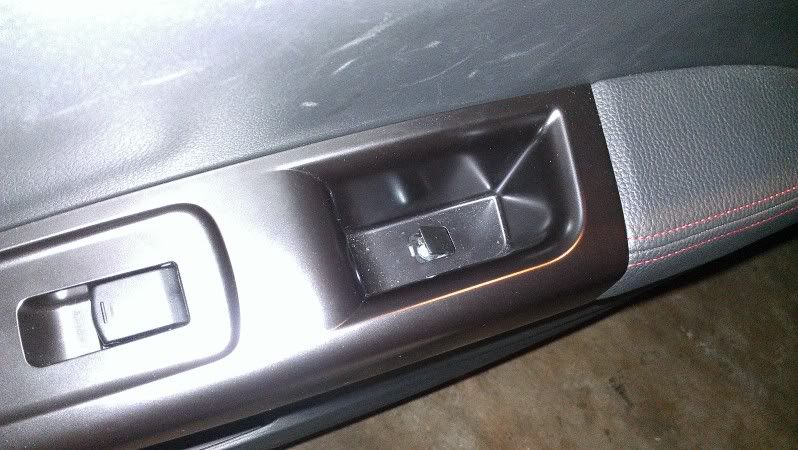
6) Pry up the arm rest cover, they're held in by pressure clips so you just need a firm tug.
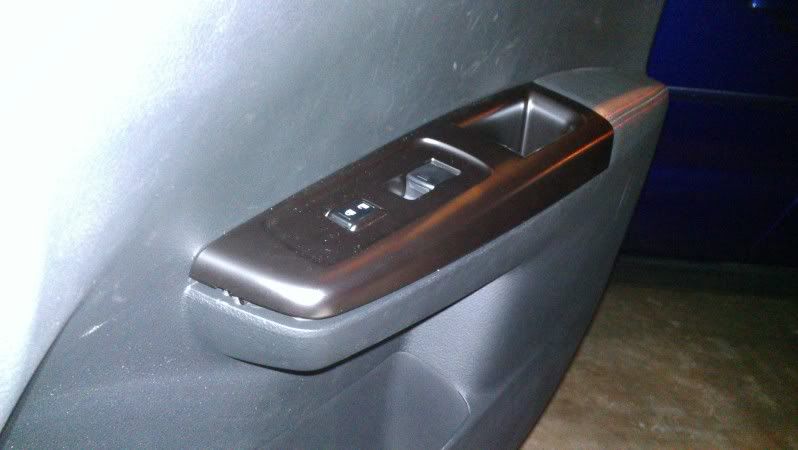
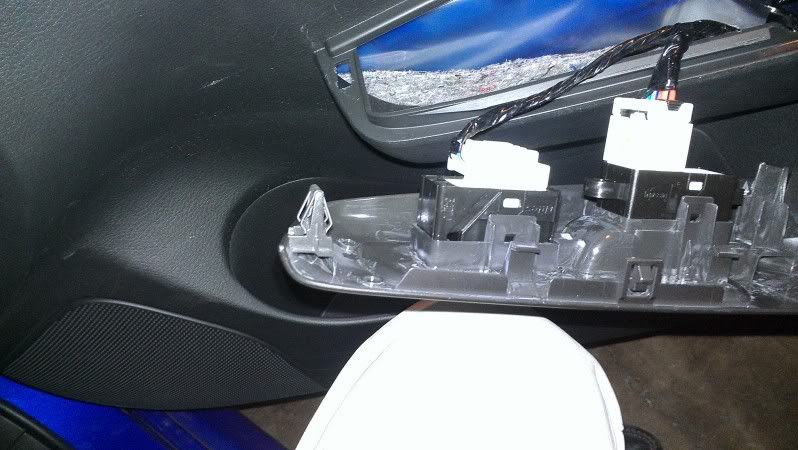
7) remove the remaining 2 screws that hold on the door panel
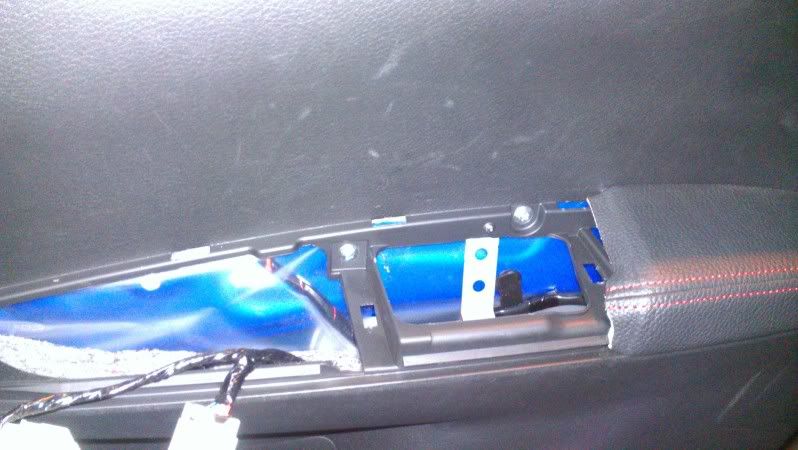
8) now you can go around the door panel and pop it off....then unscrew the remaining bottom bolts.
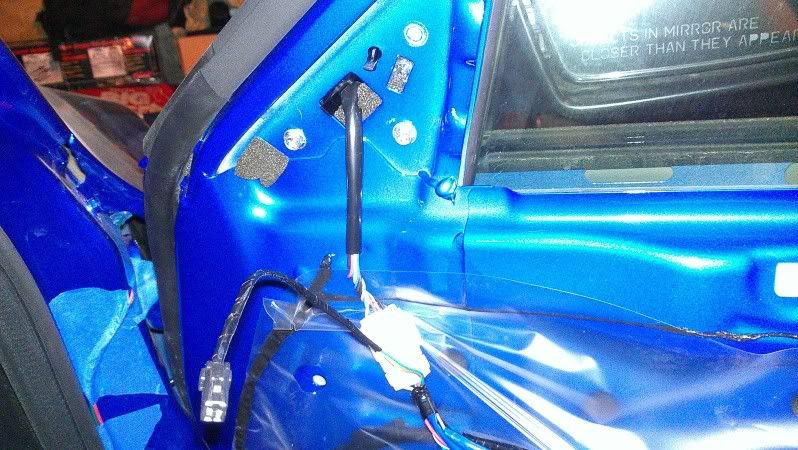
9) remove the mirror, there are 3 bols underneath (2 are covered by a foam sticky piece).
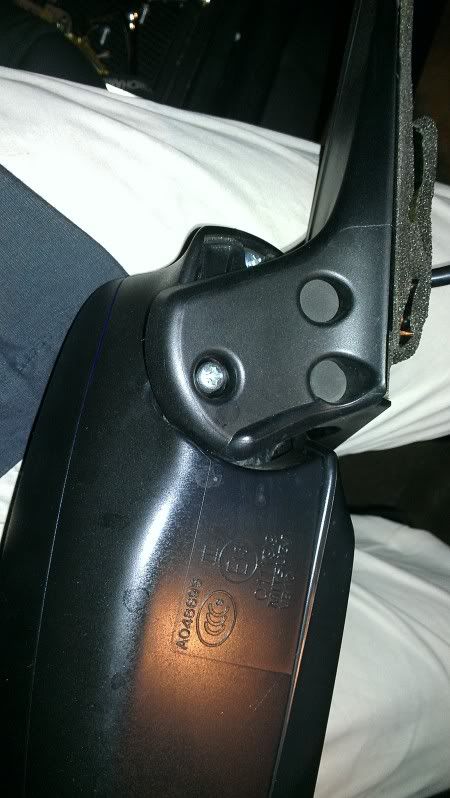
10) it turns out the plug does not fit into the hole to completely seperate the mirror housing with the mounting plate. Therefore, i decided to de-pin the connector (only 8 pins so its not bad). Use a tiny flathead and pry open the "pin lock" on both sides of the plug
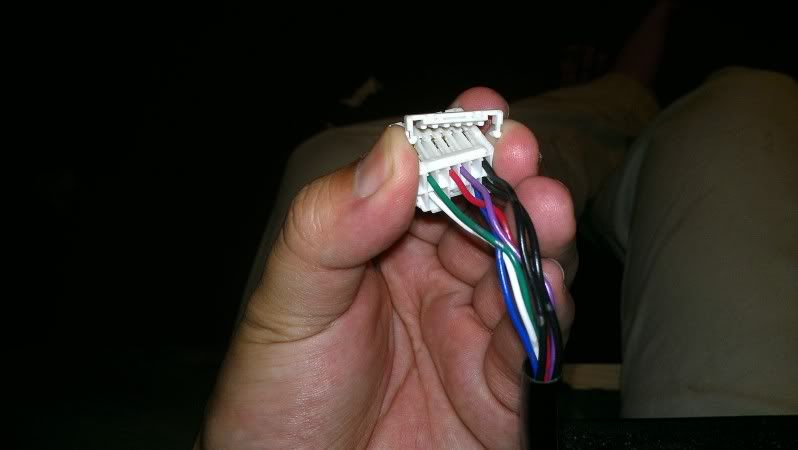
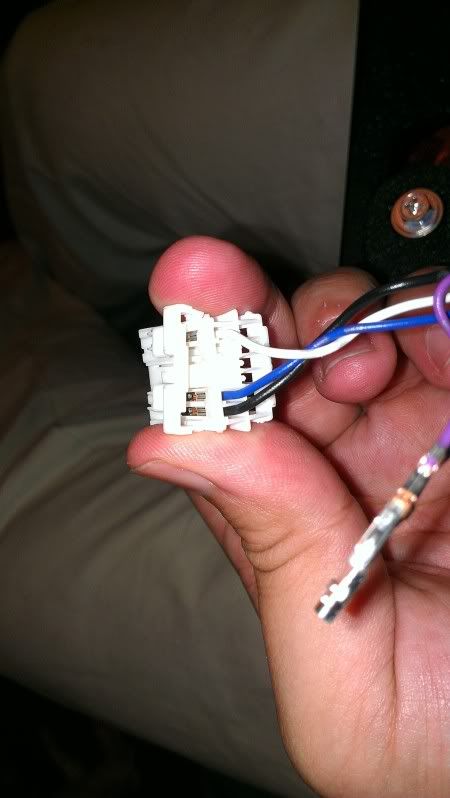
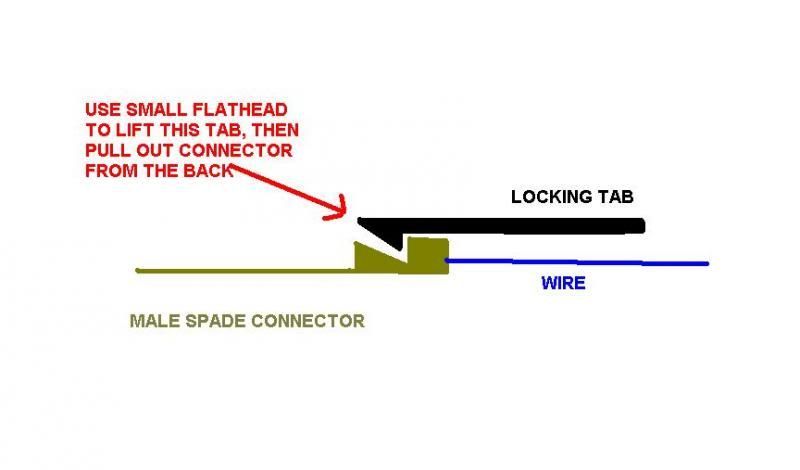
11) use the same method i used for my kill switch to "de pin" the plug.
since these pins are a lot smaller, i used a safety pin to unlatch the pins.
12) now you can remove the mirror housing from the mounting plate. I am going to attach a small bubble mirror on the "lip" of the mounting plate eventually
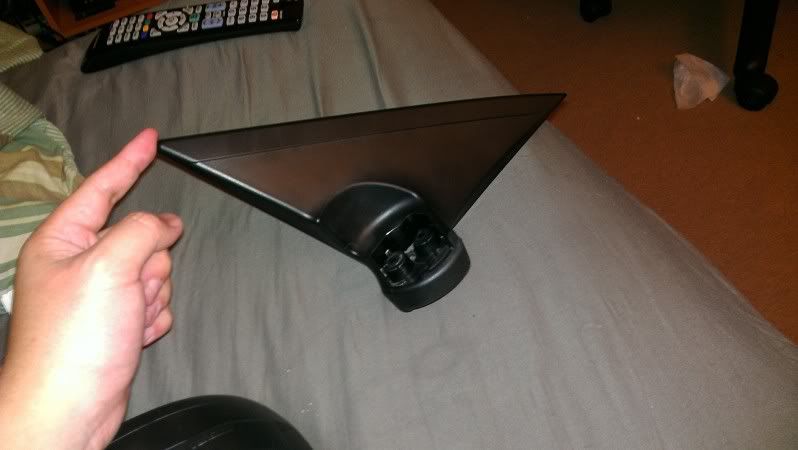
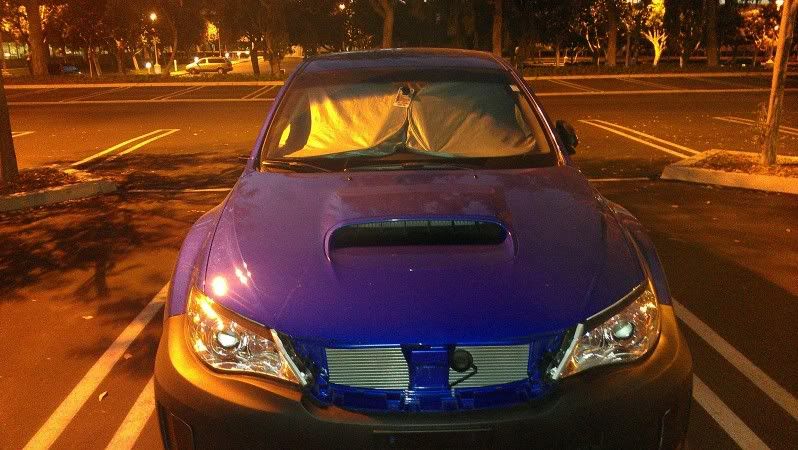
Pictures!

Last edited by jedi_sol; 09-25-2013 at 03:40 PM..
|
|
|

|
 09-23-2013, 05:11 PM
|
#73 (permalink)
|
|
Master EcoModder
Join Date: Mar 2009
Location: Tustin, CA
Posts: 929
Thanks: 368
Thanked 380 Times in 238 Posts
|
upper grill block v. 3.1
I was not completely satisfied with Upper grill block v 3.0 fitment and alignment
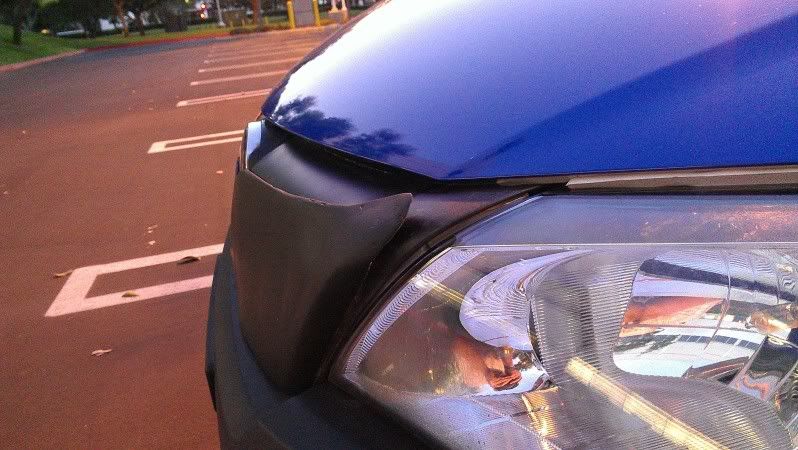
AWD180 suggested i heat it up and remold it...but the fiberglass/resin was too thick and would not re-mold. I decided to start on upper grill block v 3.1
I always see suggestions to "make a basic "frame" by doing a thin layer of fiberglass, then fill the void with greatstuff foam", however, i still have not seen anybody implement this yet. I like this method because now i can essentially make the grill block line up exactly with contours of the grill without risking sanding down the grill block itself.
The main problem i had with my grill block v 3.0 was that the "release agent" (plastic wrap / aluminum) became seperated from the grill because there ws nothing holding the actual release agent onto the grill. While the resin was drying, this causing the huge gap in the picture you see above.
Therefore, i found double sided tape duct tape from home depot and lined my grill so that the release agent perfectly conforms to the shape of the grill
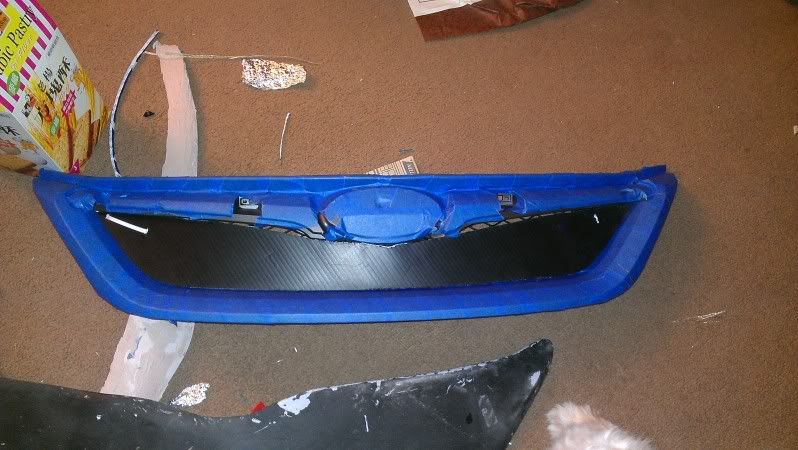
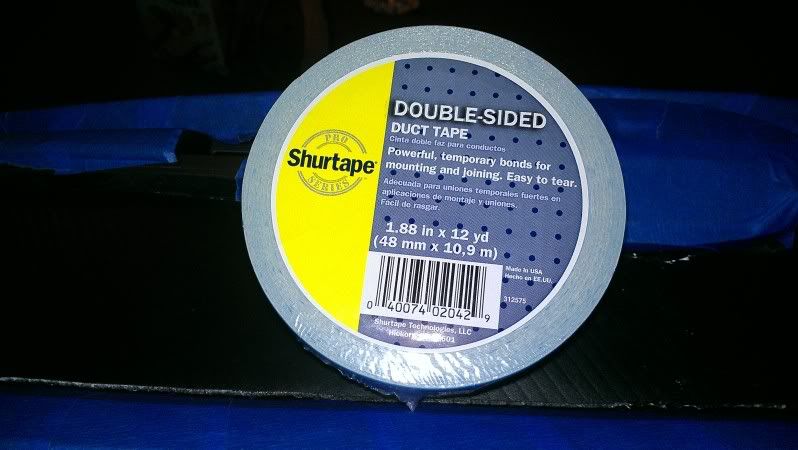
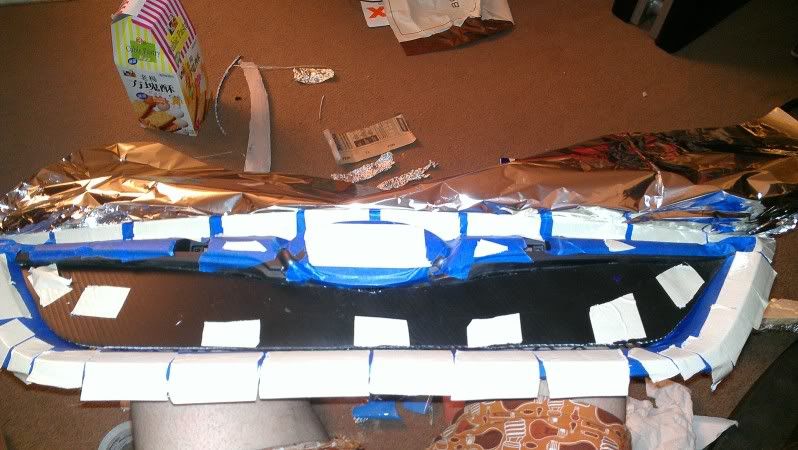
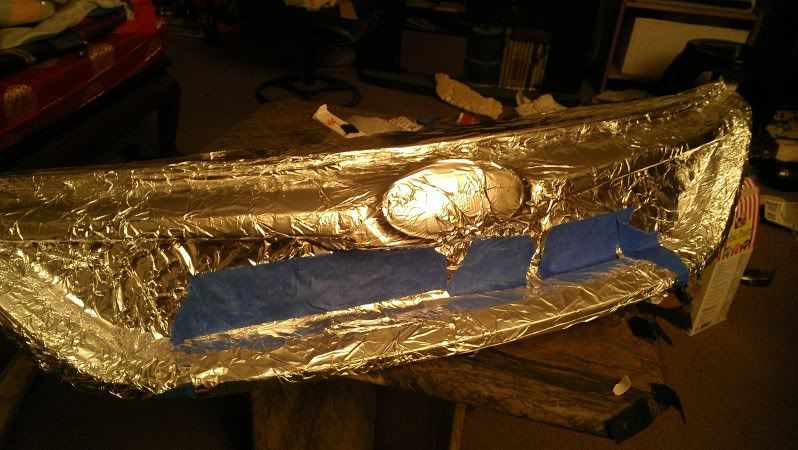
Next up, applying fiberglass to make a basic "mold" of the grill," then fill the voids with greatstuff foam, then sanding and bondo. |
|
|

|
 09-23-2013, 05:18 PM
|
#74 (permalink)
|
|
Master EcoModder
Join Date: Mar 2009
Location: Tustin, CA
Posts: 929
Thanks: 368
Thanked 380 Times in 238 Posts
|
I also filled up last night...got my best tank ever at 27.56mpg.
Not bad considering that i was running with NO UPPER GRILL for the past 2 weeks, so there was big gaping hole in the front of the car.
Now that the side mirror is off and once i finish upper grill block v 3.1, hopefully i can break 28mpg
|
|
|

|
 09-23-2013, 05:52 PM
|
#75 (permalink)
|
|
Hydrogen > EV
Join Date: Apr 2012
Location: NW Ohio, United States
Posts: 2,025
Thanks: 994
Thanked 402 Times in 285 Posts
|
Looking good, sir!
Any images of the exterior of that window? I'd like to see how she looks without the mirror.
|
|
|

|
 09-23-2013, 09:19 PM
|
#76 (permalink)
|
|
Not Doug
Join Date: Jun 2012
Location: Show Low, AZ
Posts: 12,284
Thanks: 7,281
Thanked 2,238 Times in 1,728 Posts
|
Jedi Sol, I have been on this site since last June, and have only removed the crossmembers on my roof rack. I have tried a few other things. I had wanted to cover my fog lights, but I could not think of how to do it properly. I finally used duct tape, hoping that in desperation, my mind would come up with something better.
Not before the duct tape peeled off. It did not last long.
I really liked your simple technique of using painter's tape and then plasti-dipped coroplast secured with double-sided tape.
I actually think that I will do that. I grabbed a full-sized campaign sign last year and ordered two 2'x4' sheets of ABS, but never felt that I had a good use for them.
I keep watching for Civic HXes, because an idiot could get better mileage in one of those than an Ecomodder can get in Bacon, and also, I really need to spend more of my time on school, but I think that your work looks great, and I wish you the best of luck with your ecomodding and other endeavors.
Do you mind if I ask why you chose plastic wrap and foil instead of wax? Everybody says to apply it several times and buff it thoroughy, but one guy on YouTube seemed to have good success just applying a thick layer and moving on.
I remember a Yaris owner that made a grill block with Great Stuff and he made it look awesome, but it seems like everyone else has it shrink. I have thought of projects that would involve endless cutting and sanding of foam block, but that should be done easily with Great Stuff, if it just did not shrink.
Jasen, does the marine foam shrink?
|
|
|

|
 09-23-2013, 09:59 PM
|
#77 (permalink)
|
|
Master EcoModder
Join Date: Mar 2009
Location: Tustin, CA
Posts: 929
Thanks: 368
Thanked 380 Times in 238 Posts
|
Quote:
Originally Posted by Xist

Do you mind if I ask why you chose plastic wrap and foil instead of wax? Everybody says to apply it several times and buff it thoroughy, but one guy on YouTube seemed to have good success just applying a thick layer and moving on.
I remember a Yaris owner that made a grill block with Great Stuff and he made it look awesome, but it seems like everyone else has it shrink. I have thought of projects that would involve endless cutting and sanding of foam block, but that should be done easily with Great Stuff, if it just did not shrink.
Jasen, does the marine foam shrink?
|
I chose plastic wrap because that is all that i had laying around at the time  . But that ended up being a bad choice of material because as you can see with grill block v 3.0, the plastic wrap ended up sagging.
Im weary of using wax as a release agent because i dont want to risk not doing it right, then i have globs of resin stuck on my brand new paint. If grill block v 3.1 doesnt turn out right, then i might resort to covering my grill in wax as a release agent.
The yaris with the nicer grill block was CigaR007..which is my inspiration
http://ecomodder.com/forum/showthrea...cho-15673.html
Like Jasen mentioned, CigaR007 used marine foam for his grill block, the upside to this is that it does not shrink. However, the foam is 2 parts (requires 2 buckets) and you can only purchase the full buckets (a bit overkill for such a small project).
I got futher inspiration to revisit great foam because of Daox's "pretty grill block" thread. I think the key with greatfoam is that after you cut/sand it, you have to resin/fiber glass it right away...otherwise you get the shrinking problem. However, it looks like Daox never got around to finishing his grill block, but it looked good enough for me to revisit great foam
http://ecomodder.com/forum/showthrea...k-19294-9.html |
|
|

|
 09-23-2013, 10:03 PM
|
#78 (permalink)
|
|
Master EcoModder
Join Date: Mar 2009
Location: Tustin, CA
Posts: 929
Thanks: 368
Thanked 380 Times in 238 Posts
|
Quote:
Originally Posted by Xist

Jedi Sol, I have been on this site since last June, and have only removed the crossmembers on my roof rack. I have tried a few other things. I had wanted to cover my fog lights, but I could not think of how to do it properly. I finally used duct tape, hoping that in desperation, my mind would come up with something better.
|
To fill "voids" (fog lights), yes great foam works great...but i think the key is to resin your "plug" right after you sand it down. Therefore, your "plug" will retain its shape.
then use bondo to smooth out and perfect the edges (unfortunately, this will require hours of sanding).
then you gotta figure something out to mount the "plug" from behind. Its a lot of extra work, but it'll look a lot nicer than "coroplast cut to shape"
I got lucky with my fog lights, the "void" was not that big so i can get away with using "coroplast cut to shap" 
I googled the 1999 Forester, it looks like the fog lights almost sit flush with the bumper, so the "coroplast cut to shape and double sided tape" method might work for you 
Last edited by jedi_sol; 09-23-2013 at 11:44 PM..
|
|
|

|
 09-23-2013, 11:42 PM
|
#79 (permalink)
|
|
Master EcoModder
Join Date: Mar 2009
Location: Tustin, CA
Posts: 929
Thanks: 368
Thanked 380 Times in 238 Posts
|
i uploaded pics of the side mirror delete on post 72
|
|
|

|
 09-23-2013, 11:42 PM
|
#80 (permalink)
|
|
Not Doug
Join Date: Jun 2012
Location: Show Low, AZ
Posts: 12,284
Thanks: 7,281
Thanked 2,238 Times in 1,728 Posts
|
Quote:
Originally Posted by jedi_sol

To fill "voids" (fog lights), yes great foam works great...but i think the key is to resin your "plug" right after you sand it down. Therefore, your "plug" will retain its shape.
then use bondo to smooth out and perfect the edges (unfortunately, this will require hours of sanding).
then you gotta figure something out to mount the "plug" from behind. Its a lot of extra work, but it'll look a lot nicer than "coroplast cut to shape"
I got lucky with my fog lights, the "void" was not that big so i can get away with using "coroplast cut to shap"  |
Somehow I always visualized the mess of just spraying Great Stuff into my fog lights and smoothing it down. It might hold until the insulation shears.
How about I do plasti-dipped coroplast and then replace it with fiberglass, also held by double-sided tape? 
Somewhere I saw foam sheeting linked. It was awfully thin and basically came on giant pages, with perforations to break off each one. One of those would probably work as a good core, putting fiberglass on the outside, but I would use such a small fraction of it for this job!
Plus, I do not have any idea where to order it!
|
|
|

|
|